
Today I'm sharing a tutorial for the Folio Journal I made for Eileen Hull's blog hop last month where her Design Teams shared projects using her newly released dies.

First, here are the basics of the die cuts and putting them together, beginning with cutting out the pieces of the die from matboard twice.

Put adhesive (I used ScorTape) along the binding on one of the cover pieces.
I am going to have the three scored pieces overlap the three scored pieces so I put the tape on all three 'strips' - you can just overlap 1 or two to make the binding different widths - you decide!

I took the paper off the tape and pressed one binding over the other to adhere them together, being sure the holes were aligned.

Next I folded on the score lines on each side of the smaller pieces that will be used to create sides on one of the cover folds. I used the edge of my work table to help me make a good fold on the score.

Here are the smaller pieces scored and with ScorTape applied. I also folded the cover on the side score lines.


So here is the pocket created by closing in the top and bottom. You could also close in the inside and the bottom leaving the top open - depending on what you want to use the pocket for.

At this point I measured and cut all the designer papers into panels to adhere to all the sides of my journal (as shown two photos down)
but I wanted to show you how I wrapped a piece of bakers twine around the binding in the gullies outside the holes in the binding to hold the notebook I added later. I forgot to photo the added twine on my completed folio journal!
(So imagine the papers are already behind the twine!)
I knotted the twine on the inside but could have the knot on the outside as well. When I added the notebook, I opened it to the center and slipped it under the twine.

Here's how the twine looks from the outside (minus the patterned paper!).
I put the twine in the gullies rather than through the holes due to the size of my notebook - if it was 1/2" or so shorter, I would have put the twine through the holes to hold the notebook in.

I cut pieces of Forest papers from Stamperia to fit each panel, adhered each piece to Stick It Adhesive Sheets and adhered all the pieces to all the journal sides.
I like to cut out each panel rather than cutting one piece for the whole cover as I find that my paper often splits at the bends if I use one long piece. You also have better control over orientation if there is an up and a down to your design.
I did use the die to cut the binding piece out of the paper so the holes were in it (strip on left). The strip on the right, without the holes was, cut in two lengthwise to fit over the ends on the opening side.

I had some long notebooks from Michaels and I cut it down to measure 5" tall. The width is 4 1/4" which worked perfectly inside the journal.

I had some glassine envelopes and small brown paper bags in my stash, and I labelled them with "Sticks and Stones", |"Pressed Flowers", and "Leaves and Ferns" using my Brother Label Maker. My journal theme is Nature and I thought these are things I might pick up on nature walk and store in my folio! They will fit right into the 'pocket' of the journal

I also cut some cards out of kraft cardstock and die cut panels from the Forest Papers using Eileen's Credit Card Sleeve and Tags dies. I added some Clippings Stickers from Tim Holtz/Idea-ology to the cards.
I could write notes about my walks on these cards.

So here is my Folio Journal opened up with the journal held in with the twine and the cards and bags tucked inside the pocket on the right. I also put twine on the tabs on the cards so they'd be easy to pull out of the pocket.


I added some images from the Forest papers and die cut letters to the notebook cover.

More images on the back of the notebook

Here it is with the left cover folded in.

Both sides folded in with the notebook behind the left panel.

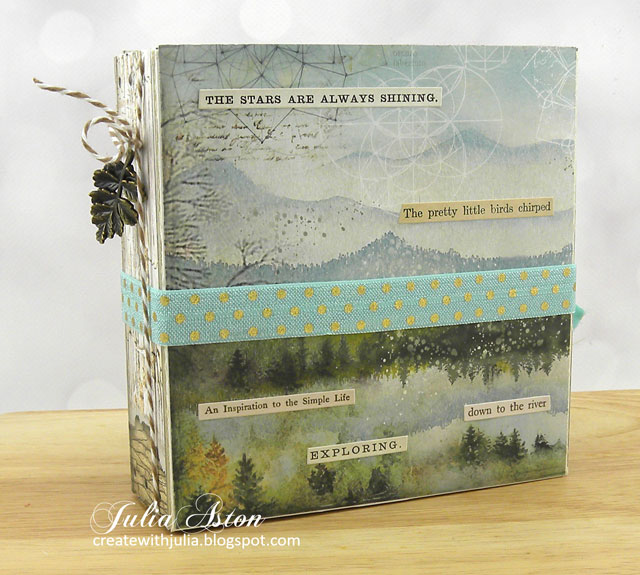
Here are all the finished outside views - the front.
I held the journal closed with a piece of stretchy ribbon that I glued to the binding edge and just tied the ends in a knot on the opening side. The binding can just be slipped off at the opening edge but stays attached to the folio journal at the binding, so when I'm 'in the field' I won't lose it!.
I also added more of the Clipping Stickers to the front and back covers.
The opening side.

View of the back.

View of the binding with a leaf charm added to the twine.

So there you go - pretty straightforward! Sorry I kept you so long but hope you have enjoyed seeing my Folio Journal!
Eileen's Design Teams will be showcasing her new dies every Wednesday in March over at Eileen's blog so please check it out!

Accessories: Folio Journal Bigz Die, Credit Card Sleeve and Tags Thinlit Dies - Eileen Hull/Sizzix, Alphanumeric Tiny Type Upper Dies - Tim Holtz/Sizzix, Stick It Adhesive Sheets, ScorTape, Clippings Stickers - Tim Holtz/Idea-ology, elastic cord - Cousin, Brother Label Maker, leaf charm, bakers twine, glassine envelopes, brown paper bags - from stash, Notebook - Michaels.
10 comments:
Wow ...Julia this Folio journal is amazing. I always enjoy reading how you make your creative projects and I extra loved reading today's x. What a stunner of a project and I love it x.
Wow, that's really impressive, it would make an amazing present for someone special. Thanks for all the clear instructions xx
This is awesome, Julia, and when it's full of your nature notes it will be priceless!
Great tutorial Julia, I really want to make a journal so pinned for later :)
Your folio is amazing, I love that paper line from Stamperia.
This is brilliant Julia... some much lovely work for your folio, just wonderful and great to see the process in photos.. hugs Robyn
Wow!!!! What an elaborate work and all these lovable details!
Julia, I adore the look of your journal and the addition of collection bags! Great idea. =)
WOW! AMAZING work on this journal Julia! I LOVE the papers you've used and the special touches with the labeled backs and pockets. This truly a work of love. I can tell that you enjoyed every minute of making this journal. And I've enjoyed every minute of reading your blog post and seeing the process with your photos. xx
Love this project Julia it is just fabulous- you showcased the paper beautifully
Post a Comment