Sunday, October 30, 2016

Terminal 4 - Inspiration Post for A Vintage Journey

I have a post over on A Vintage Journey today -  Terminal 4 Inspiration Post.
Every Monday - one of the AVJ Creative Guides is at a train terminal -  and we have to use the contents of our Travel Bag for our project.  The contents of the bag change each month.
Here's what we had to use for October
#1 - Product -  Crackle Paste
#2 Technique - Layering colors through stencils
#3 Color - Greens and Golds
#4 Substrate - some kind of box
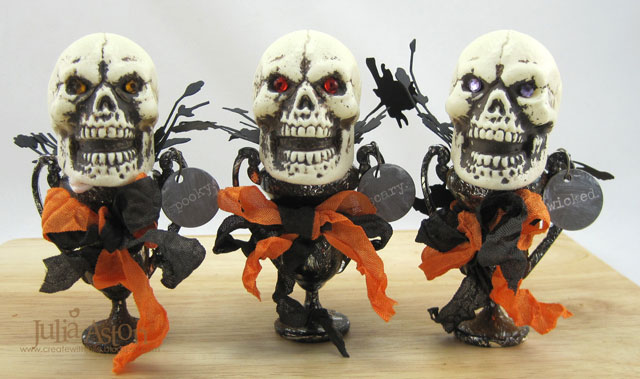
I used the contents today to create a coffin for Halloween! And the coffin just happened to have an inhabitant - who was only too happy to come forth and celebrate All Hallow's Eve!!

Straddling the line between fall and winter, plenty and paucity, life and death, Halloween is a time of celebration and superstition. It is thought to have originated with the ancient Celtic festival of Samhain, when people would light bonfires and wear costumes to ward off roaming ghosts. In the eighth century, Pope Gregory III designated November 1 as a time to honor all saints and martyrs; the holiday, All Saints’ Day, incorporated some of the traditions of Samhain. The evening before was known as All Hallows’ Eve and later Halloween. Over time, Halloween evolved into a secular, community-based event characterized by child-friendly activities such as trick-or-treating. In a number of countries around the world, as the days grow shorter and the nights get colder, people continue to usher in the winter season with gatherings, costumes and sweet treats.

You'll find more photos and details about my coffin project over at A Vintage Journey -  I'd greatly appreciate your stopping by there to check out my post!

Paper:  black Coredinations, white cardstock - PTI
Ink:  Ranger Distress Peeled Paint, Mustard Seed, Antique Linen and Hickory Smoke
Accessories:  Bat Background and Leaf stencils - Tim Holtz, orange rhinestones - Kaiser Craft, Idea-ology - Ornaments Wicket, Adornments, jump rings, Small Talk/Occasions,  Black Stabilo Pencil, skeleton - Joann, DecoArt one step crackle, Thinlits Wild Flower dies - Tim Holtz, wooden coffin - Michaels, Liquitex Light Modeling Paste, acrylic paints - Burnt Umber, Burnt Sienna, Paynes Gray.

Tuesday, October 25, 2016

Happy Birthday Old Bean

This is my second card created to show how you can use Eileen Hull's dies on a card design - you don't always have to make a 3D item!  (see last week's post if you missed my first card!)
This week I used Eileen's Mug and Spoon die as well as her Basket Weave Embossing Folder along with some pretty fall patterned papers!
I placed the patterned paper on the die so the pattern would be along the side and bottom - aren't the florals pretty!?  I also cut the mug out of kraft card and glued the patterned paper over it to give the mug some sturdiness.  I embossed a piece of Tropical Teal card stock with the basket weave folder and then sponged over it with Ranger Distress Ground Espresso ink and adhered it to the bottom third of the panel.
I adhered another piece of patterned paper on the top half - then adhered the mug over the panel using thick foam dots down the center of the mug and thinner foam dots on the side and handle so the mug is a little curved off the panel.  You can see how I sponged the ink thicker over the top to create a rim on the mug.  I added 3 rhinestones onto the mug.
I stamped the sentiment right on the mug.  I think this design makes a great fall birthday card for a coffee lover!  
 Please check out Eileen's blog to see other examples of using her fun dies to create cards!

I'm also linking my card to:
Anything but Cute - An Autumn Day

Stamps:  Coffee - Gina K Designs.
Paper:  Rustic Cream, Tropical Teal, Kraft - PTI, Bo Bunny Forever Fall Collection.
Ink:  Ranger Distress Ground Espresso, True Black - PTI
Accessories:  Mug and Spoon Die - Eileen Hull/Sizzix, Basket Weave Embossing Folder - Eileen Hull Sizzix, rhinestones - Kaiser Craft, thick foam dots, thin foam dots.

Saturday, October 22, 2016

Ghosting Feathers - and a Church Fair

I have another card to share that I made for the CAS Mix Up Card Challenge
Stamping, Ghosting and sequins
I stamped the feathers using Versamark Ink - hit it with my heat tool to dry it - then sponged over it with Distress Wilted Violet Ink and the 'ghost' feathers showed up!
There's two more days to get your Ghosting card linked up at CAS Mix Up Card Challenge!.

Friday Night and Saturday - I was at my church fair - selling cards and crafts at one of the tables.  Unfortunately, it was rainy off and on both days - but luckily people still came by in dribs and make around $6,000.00 and hopefully this year will be the same -  here are a few photos of our wonderful home town church fair!
A shot of our Card table -  we made $150.00 at our table - not bad considering we sell the cards for $3.00 each!
We also have a jewelry table - where they sell jewelry donated by parishioners.  We have people run to that table as soon as the doors open - hoping someone unknowingly donated a solid gold ring or diamond earrings!
Many people make homemade fudge, caramel popcorn, and chocolate/caramel 'turtles' for the Candy Table.
And in the main hall -  we sell bakery bread, home made baked goods, knit goods, we raffle themed gift baskets, have a silent auction for 'nice' donated items and local restaurants donate gift certificates where the highest bidder wins at the end of the fair.
We have a pie social on Friday night and lunch on Saturday downstairs - and have two rooms full of Attic Treasures!
 And I had surprise visitors come to keep me company for an hour - my sweet grandnephew Landon and niece Mila!  They had fun eating popcorn, and looking through all the interesting junk in the Attic Treasures - they each got to pick out something - Landon got a Halloween Pirate costume and Mila got a little carrier for her doll!
All in all, a lovely day of fellowship and shopping! 
Stamps:  Fine Feathers - Waltzingmouse (retired)
Paper:  White, True Black - PTI
Ink:  Versamark, Ranger Distress Wilted Violet, True Black - PTI
Accessories:  sequins (gifted from Loll!)


Tuesday, October 18, 2016

My Heart Sings of the Beauty of Autumn

For the next two weeks of October - the members of Eileen Hull's Sizzix Design Team are making cards using her dies and embossing folders to show that  Eileen's dies are not just for making 3D items! 
Today I have a card that I made using Eileen's Spring Leaves Die and  her Honeycomb Embossing Folder.
First I embossed a white panel with the Honeycomb folder, then I used a stitched edge rectangle die to cut out the center .  I adhered the inner piece to the card base.  Then I die cut the Spring Leaves out of a piece of Brushed Copper metal sheet.  I colored the leaves with Adirondack Alcohol Inks - using Butterscotch, Cranberry and Lettuce.
I layered the leaves onto the center piece on foam dots.  Then I adhered the outer frame on thick foam dots so it sits higher than the center piece.
 
I stamped a sentiment on white, punched it with an oval punch and layered it over the frame with foam dots.  I added 3 rhinestones for a little extra bling!
Please be sure to check out Eileen's blog to see how you can use her dies to make cards - I think you'll be inspired!

I'm linking my card to:  
Anything But Cute - An Autumn Day
Happy Little Stampers - Mixed Media


Stamps:  Autumn Bounty - Sweet and Sassy
Paper:  white - PTI
Ink:  True Black - PTI
Accessories: Spring Leaves Die - Eileen Hull/Sizzix, Honeycomb Embossing Folder -Eileen Hull/Sizzix,  Adirondack Alcohol Inks Butterscotch, Cranberry, Lettuce, oval punch - SU, Rhinestones - Kaiser Craft, Brushed Copper Metal Sheet - Add a Little Dazzle, Stitched Edge Rectangle Die - Lil'Inker Designs,

Saturday, October 15, 2016

Four Grimacing Little Pumpkins

I have 4 grimacing little pumpkin/gourds to share today!  I saw these in Martha Stewart Magazine several years ago - and every year I just have to make a few!
They are SO easy to make and really just crack me up!  
First you draw a rectangle by holding up a pair of Dracula teeth (readily available during the Halloween season at places like CVS or Rite Aid - or the Halloween shops that show up for the season), close the teeth and trace around the edges.  Usually I buy white teeth but I found clear/glow in the dark ones this year.  The eyes are Map Tacks.  I just happened to have two boxes from my father - red and black.  Once the mouth space is cut out - scrape out the seeds with a spoon.
When you cut the rectangle, it's better to have it a little smaller than you need - then you can try the teeth in the space and cut it bigger if you need to.  I found I needed to shave the back of the opening at an angle so the pumpkin didn't 'spit' his teeth right out (!)  You can see that happening with the spook on the left below - and sometimes you just need to push them in a little further.  
 If they pop right into the pumpkin - they are easily retrieved as they are very flexible!
If you turn the teeth one way they have an under bite - like mine with red eyes - turning the teeth the other way give an over bite - like mine with the black eyes.  The under bite makes them look a little meaner don't you think??!
My little guys wanted to play with the big pumpkins I have on my steps - so I let them - but then they had to come inside!
They do eventually rot just like a regular cut out pumpkin -  they can last a week to two weeks or more, depending on the temperature around them.  You can make them out of little orange pumpkin gourds but I think they are spookier in the white!  
Using the Map Tacks for the eyes - you need to keep them away from little hands!

We had a beautiful sunny day today here in MA - I was out doing errands without a coat - but the nights are cooling down to the 30's - 40's lovely fall weather.  
I got some cleaning up done in the garden - getting ready for the winter! 

Now that it's dark - I have to go see if my pumpkin's teeth do glow in the dark!!

I'm linking my grimacing pumpkins to the A Vintage Journey challenge - Make it Spooky!


Wednesday, October 12, 2016

Autumn Blessings

Today was a beautiful fall day here in New England and some of the trees are starting to turn to beautiful reds and yellows.  I was inspired to create two cards using the same supplies with slightly different designs.
I made the background by first sponging Ranger Distress inks over the panel - in Carved Pumpkin, Brushed Corduroy and Barn Door.  Then I placed Tim's small leaf stencil over the panel and spritzed over the stencil with a water mister.  I removed the stencil immediately and dried the panel with my heat tool revealing the washed out leaf design of the stencil.
 I die cut the leaves out of a Brushed Copper Metal sheet from Add a Little Dazzle using Stitched Leaves dies from Lawn Fawn and layered them over the panels with foam dots.  Then I stamped the sentiments.
I'm linking my first card to:


I'm linking my second card to:

I was inspired by the foliage in the top middle photo


Anything But Cute -  Autumn Day


First Card
Stamps:  Season of Change - Sweet N Sassy Stamps
Paper:  White, Dark Chocolate - PTI
Ink:  Ranger Distress Carved Pumpkin, Barn Door, Brushes Corduroy, True Black - PTI
Accessories:  Blending Tool - Ranger, Leaf Stencil - Tim Holtz, Stitched Leaves Dies - Lawn Fawn, Water Mister - Ranger, Brushed Copper Metal Sheet - Add a Little Dazzle, foam dots

Second Card
Stamps:  Autumn Abundance - PTI
Paper:  Rustic Cream, White, Dark Chocolate - PTI
Ink:  Ranger Distress Carved Pumpkin, Barn Door, Brushes Corduroy, True Black - PTI
Accessories:  Blending Tool - Ranger, Leaf Stencil - Tim Holtz, Stitched Leaves Dies - Lawn Fawn, Water Mister - Ranger, Brushed Copper Metal Sheet - Add a Little Dazzle, foam dots

Sunday, October 9, 2016

Skull Trophies

Getting down to the wire for my church fair which is on Oct 21st and 22nd - two friends and I sell things on our Stamped Cards and Crafts Table and I'm working on Halloween projects!  And I'm SO excited about how my little Skull Trophies came out!
 I bought these little 1 3/4 wide x 2" (head to jaw) skulls at Joann.  They came in a bag of 12 and were tied with a string with smaller skulls strung on the string - How could I leave them in the store even though I didn't know what I'd do with them??
I loved the little bottle brush trees Tim did last year in his Idea-ology Trophy Cups and wondered if the skulls would fit on them?  And, YES,  they did!  Looking a little top heavy but they fit!
So here's what I gathered for supplies.  I glued purple, red and gold rhinestones into the eye sockets.  I rusted the silver trophy cups by painting them with black acrylic paint and then sprinkling cinnamon over the paint and letting them dry.
I die cut Thinlit Wildflowers out of black card stock, cut small pieces off and taped them inside the back half of the trophies.  The skulls hit the rim of the trophy at two spots on the jaw and on the back of the base of the skull - so I attached them to the rim on those spots with glue.
My idea was that the wildflowers  would look sort of like the upturned collar on Dracula's cape but in a more airy dead-looking way. (!)
I rubbed Picket Fence Distress paint over Typed Tokens Halloween making sure the paint got into the letters and then wiped over the token to remove some of the paint.  I dropped some Mushroom alcohol ink over the Spiders but didn't end up using them.  
Here are two of the Trophy Cups all rusted up.
So here are Trick or Treat, Beware and Fright (named for their Typed Tokens!)
followed by Spooky, Scary and Wicked.  
I know it's hard to tell in the photos, but they each have slightly different facial feature shadows so their mother is able to tell them apart.  Other than that, they do look frighteningly alike!!
I tied two 12" pieces of wrinkled seam tape in orange and black around the trophies - the seam tape make such a great bow!  And I added the Typed Tokens Halloween with a Loop Pin through the trophy handle.
A great little spooky decoration for Halloween don't you think??!

I'm linking my project to:

I was inspired by the colors, the spooky house and the skull family!

Paper:  True Black - PTI
Accessories:  plastic skulls - Joann, Wild Flower Thinlit dies - Tim Holtz, Picket Fence Distress Paint, Idea-ology Trophy Cups, Typed Tokens Halloween, Loop Pins, Black Acrylic Paint, Cinnamon, rhinestones - Kaiser Craft, wrinkled seam tape - Prairie Bird Boutique Etsy Shop.

Saturday, October 8, 2016

Wicked!

Another Halloween creation!   I wanted to make a Halloween card that I could send to my grand nephews and nieces in pieces - so they could create their own Halloween card/decoration. They are 2,4,5 and 6 years old so I'm sure they will make some fun scenes!

So here are the most of the pieces I will send to the grands in an envelope - each die cut will have foam dots on the back so they can place them on the Cameo Frame background in any design they wish.  I'll also include the sentiment and ribbons. 
Here is how I put my card together.
I stenciled Tim Holtz Batgrounder stencil on the Cameo Frame using Ranger Distress Hickoey Smoke Ink.
The tree die is an old Sizzix die, the cat is from Tim's Raven and Scaredy Cat Die.  The fence was punched with a Martha Stewart punch.  I sponged the edges with more Distress Hickory Smoke Ink.  I glued just the end edges of the fence so it curves out over the cat and tree.
I was inspired by this image from Annes Paper Creations -  From the SCS Inspiration challenge
and also The Mixed Media Monthly Challenge Inspiration Board
Kent and I are off to buy some apples and delicious hot apple cider donuts at a nearby farm!  Yum!
Stamps: Wicked - Amuse
Paper: Orange Zest, True Black - PTI, DP Authentique/Enchanted, Paper Stash Materialize/Tim Holtz
Paper Size: 4 1/4" x 5 1/2"
Ink: Archival Jet Black, Ranger Distress Hickory Smoke
Accessories: Dies: Cameo Frame, Raven and Scaredy Cat- Tim Holtz/Alterations, Bare Tree - Sizzix, oval punch - SU, Fence Punch - Martha Stewart, foam dots, Batground Stencil - Tim Holtz, clear rhinestones - Michaels