Showing posts with label Creatalicious Challenge. Show all posts

Thursday, May 5, 2022

Gift Boxes for Mother's Day

 A friend commissioned me to create some Mother's Day gift boxes to put small gifts in for her mother-in-law, and daughters-in-law.  

I have lots of Eileen Hull/Sizzix container dies (having just retired from her wonderful Design Team after 6 years) and so made up a few undecorated containers so she could choose size and shape.  My friend wanted a flower/bee theme on all of them as she was giving at least one of the receivers some honey!  

She said it was ok to use the same general design on all of them - which made it easier for me!

I made a sunflower for each of the projects below using a beautiful die from Honey Bee Stamps called Lovely Layers Sunflower.  I die cut them out of yellow textured paper and then sponged over them with Wild Honey Distress Ink to add depth to the petals.  I cut the leaves out of a textured green cardstock and sponged the center of them with Peeled Paint Distress Ink to highlight the veins.

I made bees for all of the projects using the Fireflies die from the Greetery - cutting them from white cardstock and coloring the bodies with Copics to make them look like bees.

I die cut bows for all of the projects with Put a Bow On It die and stamped the sentiment from Put a Bow On It stamp set - both from the Greetery.

I die cut all of the boxes out of Little Sizzles Matboard from Sizzix.  I added DP to all of the boxes, some of the pieces I cut with the die and some I just cut panels to fit. (I don't like to wrap DP around corners as sometimes it creates a gap - so I cut pieces for each square or rectangle side instead.)

Here are the gift boxes I created.

First up is this sweet little box made using Eileen Hulls Sizzix Bag Caddy Die (retired).  I cut it out of Sizzix Matboard and covered it with a Teal Bumble Bees DP from Michaels.  I added the stamped die cut bow to the top and the sunflower on the front.  I didn't add any leaves to this sunflower since the area was so small and it was fun to see this pretty paper!

I decorated the back of each container the same way with Sentiments Squared Stamps and dies from The Greetery.  The sentiment strip was cut with Simple Strips Die from Taylored Expression.

I used Eileen Hull's Sizzix 3D Teacup Bigz die for my second project.  The die also cuts the tea bag and spoon.  I added twine to the teabag and sponged it with Vintage Photo Distress Ink.  I pressed the spoon onto a Versamark Ink pad and embossed it with Platinum Ultra Thick Embossing Powder.  

My friend ordered 4 boxes cut from Eileen Hull's Sizzix Gift Box Scalloped Edge Die.   I didn't fold the back piece of the box on the scoreline so it stood up as a tall back and I cut off the tab on the top edge.  I added the two scallop pieces from the die to the top edge (the small scallop adhered over the larger scallop at the score edge).  I made these boxes all the same but used different papers.

This one was made with a yellow background with white dots DP - I sponged randomly over it with Wild Honey Distress Ink to tone down the white dots a bit.

I covered this box with a Hexagon DP from American Crafts.

I made the last two boxes with this fun bee paper from American Crafts.  The paper had a white background with the black bees, and I thought the bees looked a little scary against the white (!) -  so I sponged randomly over the paper with Wild Honey Distress Ink to make the bees look more friendly!?


Design Tip - I wanted to share how I reinforced the bottom side edges of this Scalloped Edge Gift box.  
The Design of the die cut only secures the front and back edges of the bottom of the box when you assemble it and there can be a little gap on the bottom sides depending on how sturdy the  matboard you use is. 
The Little Sizzles I use is very sturdy, but I wasn't sure how heavy the items might be that she was going to put in the boxes, so I die cut 2 more of the larger scallop edge on the die, folded them on the score line and adhered them inside the box on both sides using ScorTape, so the flat edge is adhered to the bottom of the box and the scalloped edge is adhered to the side, holding the sides to the bottom of the box.
(I hope this makes sense to you......)

My friend was very happy with these Mother's Day gift boxes!
 
I'm linking my Tea Cup Box to:


Creatalicious Challenges - Anything Goes - Optional: Mother's Day


Path of Positivity Challenge - Anything Goes - or Something special about a friend.


Stamps:  Put a Bow On It, Sentiments Squared - The Greetery

Ink:  Versafine,  Canyon Clay - PTI, Ranger Distress Wild Honey, Peeled Paint, Vintage Photo

Paper:  White Little Sizzles Matboard - Sizzix, Precision Yellow and Brown Textured Card Stock- Parklane/JoAnn, Green Textured Card Stock - Lawn Fawn, DP:  Core-dinations Yellow Hexagon and Bumble Bee - American Crafts/JoAnn, Teal Bumblebees, Yellow Pin dots - Recollections/Michaels.

Accessories:  Bag Caddy Die, 3D Tea Cup Die, Gift Box Scalloped Edge Die - Eileen Hull/Sizzix, Put a Bow On It Die, Sentiments Squared Die, Firefly Dies - The Greetery, Simple Strips Dies - Taylored Expressions, Lovely Layers Sunflower Die - Honey Bee, Ultra Thick Platinum Embossing Powder - UTEE, brown POSCA Pen (for centers of sunflowers), foam dots, orange gem - from stash, Copics - Y38, 100 (to color bees)

Thursday, March 3, 2022

Sunflowers In Solidarity

 In support of the Ukraine and it's people - I made this card in the colors of their flag and with sunflowers, one of their major exports.

I used the lovely Botanicuts Sunflower die from The Greetery for my blooms.  I took a large panel of watercolor paper and smooshed it onto my craft mat that was inked with Ranger Distress Dried Marigold, Wild Honey and Squeezed Lemonade inks and spritzed with water.   When the panel was dry, I die cut enough layers of petals to create 3 sunflowers.   

The color wasn't as bright as I wanted it so I tapped some Lemon Brushos on the petal pieces and Rustic Brown Brushos on the center pieces and spritzed them with water.  After this was dry, I layered the petals on top of each other and adhered the center pieces.

 The sentiments are from an old retired set called Army from The Greeting Farm.


I'm linking my card to the following challenges:

Cupcake Inspirations.  

Addicted to Stamps and More

Creatalicious Challenges

Anything Goes

Fusion 

Inspired by the 3 blooms photo but made them yellow with a blue background.

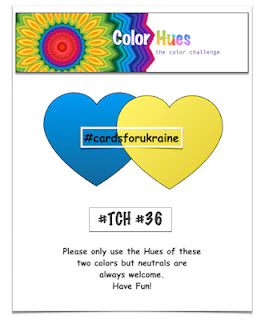
Color Hues


 My thoughts and prayers are with the Ukrainian people during this terrible time.


Stamps: Army - The Greeting Farm (retired)
Ink: Ranger Distress Dried Marigold, Wild Honey, Squeezed Lemonade, Obsidian - Altenew
Paper: Watercolor paper - Canson Cold Press, Harvest Gold - PTI, DP Rainbow Bright 6x6 Paperpad - Sunny Studio.
Accessories: Botanicuts Sunflower Die - The Greetery, Lemon and Rustic Brown Brushos, water mister

Monday, July 19, 2021

Grand Slam Birthday Truck

 All this month, Eileen Hull's Design Team members are creating using her new Chapter 3 dies.  Today I have a project to share using her wonderful new Truck Box Die and I also used the large circle die from her Ornament Box die for the giant baseball I put in the truck!

Wouldn't this be a fun gift box for a baseball players' birthday?! 

The inside box measures about 6" x 1 1/4" x 1".

I filled my truck box with mints, but you could put in a gift card, cash, or small presents!
The sentiment stamps are from 7th Inning Stretch by Papertrey Ink but are now retired.


Here's how I put it together.
I die cut all the truck pieces twice out of matboard.  Then I cut two of the truck piece out of Rinea Star Struck red foil paper - cutting both pieces at once being sure the fronts of each piece of foil were facing each other so the right side would show when adhered to the truck piece.  
I got the baseball image from the computer and just sized it to 3", printed them on white cardstock and die cut them with Spellbinders Circle dies. 
I had printed some smaller baseballs as well as I wasn't quite sure how I was going to use them on the truck at that point.
I glued the truck sides to the box piece and held it with clothespins until it dried.
Then I glued the foil paper to each side of the truck
I glued the end pieces of the box to each end - again holding the glued tabs with clothespins.
I drew baseball stitching on the tire 'hub caps'.
I blackened the 'tires' by pressing them into a black ink pad.  Then glued the hubcaps on top and glued them to the truck body being sure the 'stitching' on the hubcaps were all pointing forward.
I glued the die cut baseball images onto the matboard circles I cut using Eileen's Ornament Box die.  They are about 3" diameter.  
I adhered the large baseballs to each side of the truck bed with a strip of foam tape so it held them slightly away from the outside of the truck.  See the foam strip on one of the sides below.
Then I pressed the baseballs onto the foam tape.
I used Versamark pressed onto the fender pieces to adhere Eileen's Polished Silver Molen Dimensions Powder.  I had to keep adding powder to the piece as I heated it, as some of the powder blew away when I used my heat tool to melt it but I finally got good coverage after several layers. 
 (I solved the problem below when I embossed the doors and end panels!)
I glued the fenders over the tires.  I was happy with all the 'dings' as I liked my truck looking used and well loved!
After I had embossed the fenders, I decided to use the cut out of the window for a door panel and I wanted to emboss them with the same molten powder -  this time I used my Emboss It Dabber as it puts a thicker coat of Versamark on the piece and holds this chunky powder better.  
It worked perfectly with one coat!
I cut a piece of vellum paper to fit behind each of the truck windows and glued them in place.  I glued the 'door' piece I made from the cut out of the window (and embossed as shown in the above photo) just below the window.
I die cut two more pieces of the end panel of the box, cut off the tabs and embossed them using the Emboss it Dabber and the Molten Dimensions
I clued the panels over the front and back ends of the box just to give it a more finished look.

The giant baseball in the back of this truck really cracks me up every time I look at it!  
It came out just as I had envisioned it - which doesn't always happen!

Eileen has posts on her blog every Wednesday sharing the projects from the Design Team members using her new Chapter 3 dies this month.  You can check it out here.

I'm also linking my truck box to:
Creatalicious Challenge -  Anything goes - optional travel/transport

Simon Says Wednesday Challenge - Simon Says Emboss it.


Stamps: 7th Inning Stretch - Papertrey Ink.
Paper: Little Sizzles white Matboard - Sizzix, Red Star Foil - Rinea, Vellum and white paper - Papertrey Ink.
Ink: Obsidian - Altenew, Emboss it Dabber - Ranger, Versamark.
Accessories: Truck Box Die, Ornament Box Die - Eileen Hull/Sizzix, circle die - Spellbinders, baseball image from computer, Micron 01 black pen - Sakura, Fude Ball 1.5 red marker - Ranger, foam tape, heat tool, Polished Silver Molten Dimensions Embossing Powder - Eileen Hull/Emerald Creek, Ultra Bond Adhesive - iCraft.

Thursday, April 2, 2020

A Vintage Journey - April Challenge - It's Gelli Time!

There's a new challenge up at A Vintage Journey today - and I'm the hostess for April.  
Our challenge this month is to get those Gelli Plates out and create 

Yes, get those gel plates out and have a play.  Printing and mark making are unique and somewhat addictive when you start so let us see what you create and how you use it in your project.  Just remember to create your project in one of our preferred styles: vintage, shabby, mixed media, art journaling, industrial, timeworn or steampunk.
 
I'm just sharing some photos of my project today - as I will be posting a tutorial for it over at A Vintage Journey on April 18th.

Here's the print I created and used in my framed project using just a section of a 9"x12" Mosaic Flowers Repeat stencil from Stencil Girls.
I decided to create a framed wedding theme piece with my print as the background.


In the past I hadn't been very successful in getting anything I considered usable with my Gelli Plate - so I spent a couple of afternoons watching YouTube videos on the topic and then playing in my craft room.  I found things that worked for me and things that didn't and learned a lot!  

Here are a few other prints I made after many, many 'pulls'! 
I used a 6"x 6" Gelli Plate for all my prints.
A big 9"x12" print on Bristol Smooth Surface paper.
(I learned if you print words you have to turn the stencil over on the gel pad and ink through the back to be able to read the words on your print!) 
I was playing with mixing different Dina Wakley stencils and colors for this one. 
 I printed this on a piece of 8 1/2" x 11" Deli Paper that I had in my stash using a Stencil Girl Stencil.
These two are printed on white card stock 4 1/4" x 5 1/2" panels using two stencils from Stamplorations.

I'm sure a lot of you are more skilled in Gelli Printing than me and I can't wait to see what you link up over at A Vintage Journey this month!  

Please visit the AVJ challenge blog here - where you will also find lots more inspiration from the Creative Guides joining me this month!

I'm also linking my framed wedding to:
Anything Goes - Optional Wedding

Paper:  white card stock, Deli Paper, Bristol Smooth Surface
Accessories:  Golden Acrylics Quinacridone Magenta, Teal, Diarylide Yellow, Carbon Black, paint brush, Vignette Frames, Remnant Rubs Life Quotes and Elements, Paper Dolls - Tim Holtz/Idea-ology, thick foam dots, Copics YG17, Ell, R02, YR04, R37, B05 Mosaic Flowers Repeat 9"x12" stencil - Stencil Girls,  You Can, Mod, Mini Casey and Penelope stencls - Dina Wakley, Abstract Oats and Bold Florals stencils - Stamplorations,