Wednesday, October 30, 2013

Inlaid Thankful

I was excited to see the PTI Make It Monday challenge this week -  Inlaid Die-Cuts - I've been wanting to do this technique for a long time and just haven't gotten to it! You die cut out of two different colors (I used brown and black) and lay the opposite color inside the cut out so it fills the space.
I used the 'thankful' die from the Counting My Blessings die set from PTI.
Such a simple, fun and wonderful looking technique!  I'm thinking of all the other dies I have that I could use for this now!!

I'm also entering this in these challenges:
Cas-ology Cue Card - Black
Less is More - Recipe/Use Twine

Paper:  True Black, Fine Linen, Dark Chocolate - PTI
Accessories:  cappuccino twine - The Twinery, thankful die from Counting My Blessings set - PTI, rhinestones - Kaiser, glue pen.

Tuesday, October 29, 2013

A Banner Halloween!

Well, actually -  it's a banner FOR Halloween!  
I recently received these cool burlap triangle banners from Pouch Mart to play with (they send me things and I make things with them and post them - pretty cool deal!)

So I took three of the banners and decorated them with triangles of patterned paper layered to black card stock.  I used the same Bloomers ribbon across the top of all three.  I die cut ghosts and bats - adding rhinestone eyes to them
The letters are Black Glitter Thickers.  
I die cut the dangling spider from Memory Box and just put a dab of glue on the banner ties and attached the web piece -  they look so real don't they??!! Yuck!

I tied black and orange wrinkled seam tape around the knots where I tied the banners together.  I let the banner rope ties just hang down for added 'spooky' effect!
I hung this in my dining room window to take the picture since I had hooks there already from some previous drapes and I think I'll leave it there since it looks so spooky cute!
Well, cancel that -  I just sold this at my church fair - and  I miss it hanging on my window already!  Guess I'll have to whip up another one!

Paper:  True Black, white, Patterned paper - Text Style Hocus Pocus - PaperTrey Ink
Accessories:  banners - Pouch Mart.com, brown rose ribbon- Bloomers/Websters Pages,  rhinestones - Kaiser Craft, black glitter letters - Thickers/American Crafts, thick foam dots, wrinkled seam tape - Prairie Bird Boutique Etsy Shop, Scor Tape, dangling spider die - Memory Box, bat and ghost dies - older Sizzix dies.

Monday, October 28, 2013

A Little Bit O' Christmas

Well, Halloween is almost here so the cards are done - and I know Thanksgiving is next up at bat - but today I jumped right over to Christmas for two challenges.

First up I used a long forgotten technique that I learned over on Split Coast last year  (and LOVED!) called Faux Patina - here are Judy's instructions over on SCS.  And here's a close up of how this technique looks when you are done.
I made my card for the Addicted to Cas challenge - Code Word:  One Layer
 My card is one layer - just the card base -   I only added 4 little gold half pearls to it.
First, I embossed my card base after inking the front panel of the folder with Sahara Sand Ink. I removed the card and washed the ink off the folder. Then I sponged over the card with 3 inks, Taken With Teal, then Always Artichoke and finally with Really Rust.  To finish it off, I ran my Versamark ink over the embossing than sparingly sprinkled gold embossing powder over the top, brushing some of it off before using the heat gun as you only want the gold scattered around the card - not solid -  This is a really easy - really impressive looking technique don't you think?!  I love the soft subtle mix of all the colors on this.
For my next card - I was happy to use my Memory Box snow globe that has been sitting in it's little envelope since I bought it last year! 
I used Cas on Sunday sketch for my card  - pretty literally!

 
I used the snowfall die on the blue panel layering the Country Landscape die over it - I adhered some yellow cardstock behind the door and window.  The front panel is up on foam to give dimension to the winter scene. The Peace is from Nutcracker Sweet by Waltzingmouse.

Faux Patina Holidays
Paper - white - PTI
Ink:  Sahara Sand, Taken with Teal, Always Artichoke, Really Rust - SU, Versamark
Accessories:  Gold embossing powder, hot gun, Seasons Greetings Embossing folder - Provo Craft, sponges, gold pearls - Michaels, 

Peace Snow Globe
Stamps:  Peace from Nutcracker Sweet set - Waltzingmouse
Paper:  white, Summer Sunrise, Blueberry Sky, True Black - PTI, Brushed Silver - SU
Ink: Archival Jet Black
Accessories:  Dies - Snowfall, Country Landscape, Medium Snow Globe - Memory Box, foam tape.


Saturday, October 26, 2013

Space Cadet

Can I just say that I am totally 'pooped' from spending last night and all day today at our church's Harvest Fair!?!   We were sitting around a lot of the time - but getting it all set up, selling the two days, and then taking it all down is exhausting!    Every year we seem to have a smaller crowd coming by but somehow we  manage selling $7,000.00 worth of 'stuff'!   We sold $240.00 on our little Card Stamping Table - and at $2.50 a card - that's a lot of cards!  We also sell some stamped crafts so that adds into the total - but this year the cards really went well.

So- as tired as I felt - first Kent and I went for a walk on our town bike path for about 40 minutes just so I could get some fresh air and stretch out a little  -  then I just had to make my card for this weeks' Cas(e) this Sketch the design of which I had been going over in my mind while I was at the fair!
I decided to go with a rocket ship from Waltzingmouse's Half Pint Heroes instead of an airplane - cutting it out and paper piecing the flame part.

 I also added Glossy Accents on the 'window', the beacon and the side panels.  The vapor trail is a splatter stamp from Splat That.  I sponged the earth and sky with Ranger Distress Inks.  The ship is up on foam tape.
So - I'm a happy stamper - I got a card made - and now we're going to order a pizza for supper and snuggle down on the couch to watch the Red Sox play the Cardinals for game 3 of the series - GO SOX!!!
Stamps:  Waltzingmouse - Half Pint Heroes, Splat That
Paper:  White, Harvest Gold - PTI, grey Bazzill
Ink:  Archival Jet Black,  Ranger Distress Mustard Seed, Weathered Wood, Peeled Paint
Accessories:  foam dots, Glossy Accents - Ranger, Copic - YR04, blending tool - Ranger

Wednesday, October 23, 2013

Encaustic Art Challenges

Where has the week gone?!  My church fair is this weekend - and I have been busy making things for the table two friends and I have at the fair selling hand stamped cards and crafts. 

But I had a few challenges I really wanted to get to before the deadlines. I used Encaustic Wax on both of them -  I bought all the supplies for this (wax, small iron, glossy cardstock) a few years ago at Encausticart after seeing Birgit on Splitcoast using it on her cards -  and I've only worked with it twice.  On my cards today - I just melted the waxes on the iron and then ran the iron over the glossy card stock, holding it and lifting it different ways to get different patterns.   There's a ton more you can do with this art but I haven't had time to play with it and figure out how to make actual scenes.  There are lots of You tube videos out there on this art - here's a good introductory one.

So for my first card I used green and brown wax and cut out a circle from the card - my design thought was to make it look like a world globe to go along with my sentiment.
Here's a close up so you can see some of the beautiful detail created with the iron and melted wax. Some of the patterns look like ocean barrier reefs or coral to me.
For this card design I used Cas(e) this Sketch  and for my theme I used the Merry Monday Challenge - Carol Inspired theme.

I made my 2nd encaustic art creation for Mona and Sue's Mixed Media Color Challenge using the sketch from Freshly Made Sketches.  

I'm also entering this in the Moxie Fab Tuesday Trigger - Enthralled with fall  As I think the colors match the leaf colors and the burlap is like the edge of the bowl.
I made a simple card for the Mixed Media challenge this week - being short on time but wanting to play along -  I used burlap, encaustic wax, and Ranger Distress Ink for my mediums.  Here's a close up where you can see all the texture you get using the wax.  For this piece I melted white and red wax together to get the peach and then added some brown and just touched it here and there on the card stock.  You really never know what design your going to end up with - at least I don't!  I think if I play with it more I'll be able to control the patterns better!
Have you joined in on the Mixed Media Color Challenges yet?   Why not try it out this week!

                                                                                 Moxie Fab Tuesday Trigger


Joy to the World
Stamps:  Verve 
Ink:  Archival Black
Paper:  white, true black - PTI, glossy card stock - Encaustic Art
Accessories:  encaustic wax, iron - Encausticart.us, circle Nestabilities, Swiss Dots Embossing Folder - Provo Craft, foam dots

Happy Birthday
Stamps:  Avery Elle - Party Animal
Paper:  white - PTI,  glossy cardstock - Encaustic Art
Ink:  Versafine Sepia, Ranger Distress Frayed Burlap
Accessories:  Encaustic wax, iron - Encausticart.us, corner rounder - Zutter, scor tape, burlap - Joann's, foam dots, enamel dots - My Minds Eye

Saturday, October 19, 2013

The Stars are Brightly Shining

I've been creating so many Halloween crafts and cards -  I just had to move onto Christmas with today's creation.
It's a little purple jute gift bag (3  x 5")  from Pouch Mart (it's a lovely deep purple color - but looks kind of navy here for some reason?), decorated simply with die cut stars of brushed silver card stock.  I added a tag with a silver embossed sentiment from Verve hung with a key chain looped through the bag ties.  I die cut the tag with a Half and Half die from PTI - I trimmed off the edges a bit to fit the sentiment.
I'm entering this in the Cas-ual Fridays challenge - tags and bags
Of course- I still have some fun Halloween stuff to post -  that will come in a day or so - but today was a nice break from orange and black!!

Stamps:  Verve - Peace on Earth
Paper:  White - PTI, Brushed Silver - SU
Ink:  Versamark, Archival Jet Black
Accessories:  purple muslin bag - Pouch Mart.com, Star Nestabilities, Silver sticky half pearls - Michaels, foam dots, Glue n Seal - Ranger, key chain - Tandy Leather, Modern Label Punch - SU, Half and Half Die Collection - PTI, silver embossing powder, heat gun.

Friday, October 18, 2013

October Waltzingmouse Pajama Party!

I'm excited to be participating in the October Waltzingmouse Pajama Party tonight!   Each month Claire hosts a Pajama Party with fun challenges and great prizes (think WMS stamps!!).  Three of the challenges are revealed on the 1st of each month and have to be linked up within 24 hours of the party - but the 4th challenge is a sketch and you have one week from now to link it up over on the WMS blog.

Challenge #1:  Greenish Halloween
I found some colorful bottles at the Christmas tree shop for $1.00 each - I bought 3 (you'll see the others below).  I was thinking I would decorate them and put candy in them to sell at our church fair this month - but I found a label on the bottom after I got them home that said "Not Food or Water Safe" - so I had to rethink the purpose -  and then I found refill bottles of Vanilla Pumpkin oil for reed diffusers at Home Goods and snapped some up for these bottles!  I purchased some wooden barbecue skewers at the grocery store to include to put inside the bottles.

The stamp on the Toad oil round label and the newt below are from Wanda's Pantry - the Oct 31st is from Vintage Witch and the label frame and Happy Haunting are from All Hallows Eve.
I stamped To: and From: on the back of the label for gift giving -  these are from Wanda's Pantry but they are also included in many of Claire's sets.
Challenge #2:  Victorian Ghost Stories - old school spooky

I used another one of my bottles for this challenge -  I figured purple was a good Victorian color and this St. John's Wort verse from All Hallows Eve was old school spooky!
And actually -  I think all of these bottles are decorated in Old School Spooky!   Here's my third bottle - a blue one (bat droppings from Wanda's Pantry) - they make a nice set don't they????   And the Vanilla Pumpkin oil inside smells so wonderfully fall when you put the diffuser reeds in the bottles!
 I placed this warning on the back using my Brother's P-Touch label Maker just so the receiver would know what it was and NOT to drink it!!
Challenge #3:  Art Deco Black and White with a splash of color

For this challenge I made three 2"x2 inch magnetic bookmarks using  Putting on the Ritz.  I love to read, and I love reading real books (not Kindles etc although I do have one!) - and I use these magnetic bookmarks all the time to mark the page and line that I stopped reading on.
There are so many wonderful sentiments in this set -  I used three of them for my bookmarks.  I LOVE the font mix on them.  My splash of color was done with Copics and are red:
purple
and yellow.   
I also added a silver pearl on each one.  I hand drew the frames on each with a 01 Micron Pen
Pajama Party Sketch
Being on the Waltzingmouse Design Team has it's advantages - and one of them is receiving the Bedtime Story sketch early!  I turned the sketch on it's side.  I used Spooky Tree, a sentiment from All Hallows Eve and the bats and star are from Midnight Feast.    I stamped the tree on a white panel, masked a circle and sponged the panel in Ranger Distress Stormy Sky and Chipped Sapphire.  I added a strip of washi tape and the sentiment  circle popped up on foam tape. 

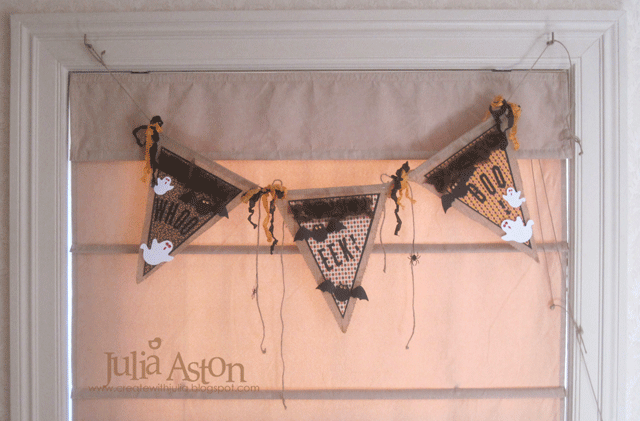
So there you go -  this is one spooky post don't you think??  with a little art deco thrown in the mix!!

Are you coming to the WMS Pajama party this month!!  We'd love to have you join us!  You will find all the details on the WMS blog here.

Wednesday, October 16, 2013

Am I Blue?

Well, today I have two projects to share -  for three challenges that involved the color blue!

First -  I made an ornament/card layering a grey felt snowflake, a glittery plastic snowflake, a white cardstock punched snowflake and a blue rhinestone.  The felt ornament was in a set of three that I bought at Michaels last year in the $1 bin and the shiny plastic ornament was saved from a gift packaging.
 
I made this for the Merry Monday Challenge
 My next project was made for the Cas-ology Cue Card - Pumpkin and the Curtain Call Inspiration challenge.
And here is my blue and white pumpkin card!
My pumpkin shape is a template from Creations by AR - Harvest Pumpkins Set and the Stitched Leaves are dies from Lawn Fawn.  I hand cut the stem.  I sponged the edges with Ranger Distress Weathered Wood.  The Thanksgiving Wishes is from Lil' Inker Designs - Thanksgiving Wishes.   I LOVE the blue and white inspiration gourds - and I LOVE how my little white and blue pumpkin came out!

Snowflake Ornament
Stamps:  Verve - Peace on Earth
Paper:  white - PTI
Ink:  Archival Jet Black
Accessories:  sentiment strips die - MFT, snowflake punch - Martha Stewart, rhinestone - Kaiser Craft, glossy accents (to glue snowflakes together) 1/4" hole punch - Fiskars, grey felt snowflake - Michaels, glittery plastic snowflake - repurposed from gift wrapping, 

Blue Pumpkin
Stamps:  Thanksgiving Wishes - Lil' Inker Designs
 Paper:  off white - Bazzill, Blueberry Sky, Enchanted Evening - PTI
 Ink:  Versafine Onyx Black, Ranger Distress Weathered Wood
Accessories:  stitched leaves die - Lawn Fawn, pumpkin shape - template from Creations by AR/Harvest Pumpkin Set.