Friday, February 28, 2014

Waltzingmouse February Release Day!

Woot Woot!  The day is finally here - today you will be able to purchase the Waltzingmouse February Release stamps and dies!  Gift Card It, Gift Card It Dies and Gift Card It Envelope Die!

Today the Design Team is doing a blog hop -  sharing projects using any combination of the new release sets.  The hop starts at Claire's blog - where you will find the complete list of the Design Team in case you lose your way.
If you arrived here from Lynn's blog you're in the right place!

So now let's see what I've created to show you!
If you came by for my first sneak peek on Tuesday - then you know I have 3 adorable little munchkins in my life (my sister's grandchildren/my grand nephews and niece!)
I babysat for Landon and Mila last week - and I brought along a craft for them to do - decorating little chipboard mailboxes that I picked up on sale at Michaels after Valentine's Day.
 3 1/2 year old Landon, especially,  loves to get mail and is interested in his mailbox out
front of their house where the mailman puts their mail.  So he was excited to have one of his own!  Mila liked mostly the stickers I had for them to put on their boxes!
So I thought it would be fun to make some little cards and envelopes to send to them and they could put them in their mail boxes!  I also made one for their cousin, James - couldn't leave my other grandnephew out!
Here are the envelope fronts - I used the Gift Card It Envelope Die for these.  I stamped their names using the Victorian Alphabet stamp set.  The With Love, flowers and leaf stem are from Gift Card It.
On the backs of the envelopes I faux stitched around all the edges using a white opaque pen.  Sentiment from Gift Card It.  I used round metal clips (that I've had FOREVER!) to hold the envelopes closed.
And I tucked these little cards inside, made with one of the Gift Card It Dies.  All the stamps are from Gift Card It.  I just love the little star burst stamp and the 3 dots stamp!  They add a little whimsy to the stampings!  These cards are the size of a gift/credit card.
I thought the kids would like to color on these little cards themselves - so I stamped images from Half Pint Heroines and Half Pint Heroes on the backs of the cards.  (the florals on the front side of Mila's card bled through a little bit in the corners because I used Copics  -  but she won't notice!)
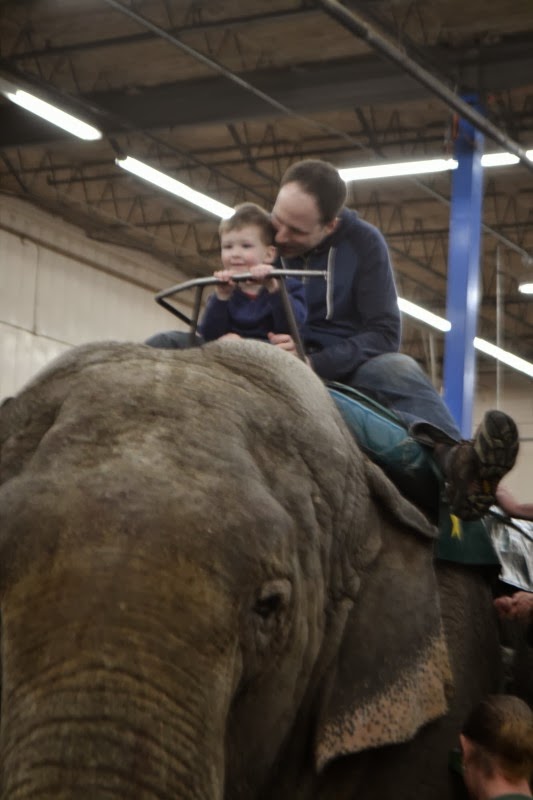
The elephant is on the back of the card I will send to James - as he recently had a ride on a real live elephant with his dad.  I think he'll be excited when he sees this card!
I'm linking this project to the Split Coast Stampers - Love Fest Challenge sponsored by Sweet and Sassy - this is the inspiration photo for the challenge.
Don't forget to comment at each stop along the blog hop route -  the more places you leave a comment the better your chances of winning!  The prize this release is the amount of a large stamp set which you could use on anything in the WMS store (stamps, dies, templates)  One random winner will be chosen from comments left on one of the DT's blogs!  The winner will be posted on Claire's WMS blog on March 4th.

Next on the hop is Laurie!

Stamps:  Gift Card It, Half Pint Heroines, Half Pint Heroes, Victorian Alphabet - Waltzingmouse
Paper:  Pretty in Pink - SU, Pure Poppy, Fine Linen, white - PTI
Ink:  Archival jet Black, Memento Tuxedo black, Lady Bug, Rose Bud, Cottage Ivy, Pear Tart, Nautical Blue.
Accessories:  Gift card It Die and Gift Card It Envelope Die - Waltzingmouse, White Opaque Pen - Inkssentials, Copics (on flowers) YG95, R05, ScorTape.

Thursday, February 27, 2014

Fusion Card Challenge - February 27th

I have two posts today -  if you are looking for my Waltzingmouse Day 3 Sneak Peek - please scroll down to the next post!
It's Thursday and time once again for a Fusion Card Challenge -  It's exciting to see how many of you find the challenges inspiring and link up your projects over at the challenge blog!  Here's today's challenge.
For my project today, I took my inspiration from the photo -  the bag, the linens, the colors and the teacups!
This canvas bag  from Pouch Mart is 5" x 6" -  the perfect size for giving small gifts or treats.  I stamped this wonderful Eleanor Roosevelt quote and the teacup directly onto the bag with Archival Jet Black Ink.  The stamps are from two Waltzingmouse sets - Afternoon Tea and Afternoon Tea Sentiments.  I colored the teacup with Gelatos mixed with water using a small paint brush. (I put a cardstock panel inside the bag just in case the colors bled through.)  I hand sewed the lace and buttons onto the bag.  I stamped the tea tag, cut it out, stapled a piece of twine to it and adhered it to the bag with a foam dot - adhering the end of the twine on the teacup with Glue N Seal.  To finish it off, I added gold Tiny Twinkles around the rim and on the sentiment.
Now I just have to fill it with some teabags and biscotti - and I'll be ready with a gift for someone who needs a lift!

So, what inspires you the most this week??  The photo or the sketch??


WinnersWill be chosen by all of our teammates in two weeks! We each will choose one favorite! The winners will be announced at 4am (PST) on 3/13/14!! Please check the linky for the days left to play with us!

Here are links to the Design Team for some great inspiration for you - 


Sindhu
Stephanie Severin

I'm linking my bag to the Eclectic Paperies Blog Challenge -  do something with a bag.

I'm also linking to this week's ColourQ 
Stamps:  Afternoon Tea, Afternoon Tea Sentiments - Waltzingmouse
Paper:  Summer Sunrise - PTI
Ink:  Archival Jet Black
Accessories:  Glue N Seal - Ranger, lace- Ellen Hutson, Gold and Snow Cone Gelatos - Faber Castel, stapler, foam tape, 5"x6" canvas bag - Pouch Mart.com 

Waltzingmouse February Release - Sneak Peek Day 3

Welcome friends to day 3 of the Waltzingmouse February Release Sneak Peeks!  Today, Claire has charged us to show how the new sets Gift Card It and Gift Card It Dies, can be used for projects other than gift cards!  Well, we all love a challenge right?!  So here are 3 cards I made using the gift card rectangle die as a panel on my creations along with some sentiments from Gift Card It.

For this card - I added washi tape, a sentiment strip, enamel dots and a key charm to the Gift Card It Die and layered it onto the card base with foam dots.  The NEW Home sentiment is from Gift Card It
I used the Paper Players Sketch for my card and I used metal (key charm) for this weeks Less is More challenge.
For my next card I die cut the gift card in black and scored it on an angle down the whole length of the panel.  I also scored a frame on the white panel.  I stamped the sentiment from Gift Card It on a sentiment strip and adhered it to a striped straw.
Close up of the scoring on the black. 
I'm  linking this card up to this weeks' Waltzingmouse Fanatics Challenge - For the Boys and 
the Split Coast Stampers  -Love Fest Challenge -  Let's Score sponsored by ScorPal.

And for my third and final card today, I die cut and overlapped two of the gift cards.  I stamped a portion of one of the sentiments from Gift Card It (the full sentiment says For Lovely You from Lovely Me) on the panel and stamped the little bouquet on a punched circle coloring it with Copics.  After putting the pieces together, I embossed the whole panel and then the base panel with mixed dots.

My design for this card was this weeks' Seize the Sketch
 I hope I've given you some ideas on using the Gift Card It Stamps and Dies - They're not just for Gift Cards!   Now let's go check out the rest of the Design Teams creations!!

Claire Brennan - Owner
New Home
Stamps:  Gift Card It - Waltzingmouse
Paper:  white - PTI
Ink:  Archival Jet Black
Accessories:  Gift Card It Dies - Waltzingmouse, enamel dots - My Minds' Eye, Sentiment strip die - MFT, key charm - Marks' Finest Papers, washi tape - Michaels, blue eyelet, Crop a dile, Ocean twine - The Twinery, foam dots.

Congratulations
Stamps:  Gift Card It - Waltzingmouse
Paper:  white, true black - PTI
 Ink:  Archival Jet Black
Accessories:  ScorPal, Gift Card It Die - Waltzingmouse, striped straw - Michaels, ScorTape, thick foam dots, Sentiment Strip die - MFT.

For Lovely You
Stamps:  Gift Card It - Waltzingmouse
Paper:  White, Vintage Cream, Simply Chartreuse - PTI, Tempting Turquoise - SU, DP Sidwalks - October Afternoon
Ink:  Memento Nautical Blue and Tuxedo Black.
Accessories:  Caribbean Blend sequins - Avery Elle, Copics - YG95, B21, B05, Circle Nestability, circle punch, Gift Card It Die - Waltzingmouse, Dots embossing folder - Darice


Wednesday, February 26, 2014

Waltzingmouse Feb Release - Sneak Peek Day 2

Welcome to Day 2 of the Sneak Peeks for the Waltzingmouse February Release!  Today the Design Team is using the Gift Card It Stamps that we saw yesterday along with the Gift Card It Envelope Die - and look how cute this little envelope is!
I used  the wedding /gift sentiments along with the lovely  half vine from the stamp set - embossing everything in gold.  I adhered the little envelope directly to the card panel.  There is a little heart outline stamp with the set - and I stamped it twice - overlapping it on the envelope flap.  The envelope measures 3 1/2" x 2 1/4"
 I used Fabriano card stock for this project and it is a little bit thick so I used a Velcro circle to hold the envelope closed.  You can see the gift card tucked inside (this is a Starbucks gift card that I had - I  probably wouldn't be giving this as a wedding present!!)
 Like yesterday's babysitting gift card -  I made this a panel card - no fold.  I gold embossed this sentiment from Big Day Additions on the back - where I will also write my note to the wedding couple!
And here's a view again of the front!
I'm entering my card in the SCS Love Fest Challenge sponsored by Simon Says Stamp - to use Dies

I'm off to see what the rest of the DT has made with this cute little envelope!  Hope you'll come too!  Tomorrow I'll be back with Sneak Peek Day 3!


Stamps:  Gift Card It, Big Day Additions - Waltzingmouse
Paper:  Fabriano Cards
Ink:  Versamark
Accessories:  gold embossing powder, heat gun, Velcro Circle, ScorTape, Gift Card It Envelope Die - Waltzingmouse.

Tuesday, February 25, 2014

Waltzingmouse Feb Release - Sneak Peek Day 1

Welcome friends - to the first day of the Waltzingmouse February Release sneak peeks!  The Design Team will be posting inspiration for 3 days - and the Release Day will be Friday 2/28!  Claire has designed some wonderful gift card dies, a little envelope die and a beautiful sentiment set that can be used for gift cards and more!  Today we are showing you the Gift Card It stamps and Gift Card It Dies

I have two nieces with little ones - and I just LOVE babysitting for them -  so I made two cards today - one to send to Christie and one to send to Katie. (not that they need a gift card to entice me to sit!! - I'm usually begging them to go out so I can!)
There are so many sentiments in the set for all kinds of occasions and in different fonts!  The die set includes one to cut this card.

On the card below - I've used some of the bold font sentiments.
 
 The picture below shows one of the slot dies in the set - with the card removed.  It just slips in between the scallop cuts.  I made these cards as just fronts -  no fold or back.  I will write my note to them on the back of the panel.

 
 I'm linking my projects to this week's  Dynamic Duos Challenge 

 I'm also entering my cards in the SCS Love Fest Challenge sponsored by Simon Says Stamp - to use dies.

Here are pics of the three little munchkins I love to babysit for!
James (visiting the New England Aquarium)
Mila and Landon (Visiting Drumlin Farm, Lincoln, MA) (Landon's most interested in the puddles!)

Here are links to the Design Team participating today - Let's go see what they have created with these exciting new sets!


Stamps:  Gift Card It - Waltzingmouse
Paper:  White - PTI, White - XPress It - Ellen Hutson (used on gift card with Copics), Wild Wasabi & Groovy Guava - SU, DP - Amy Butler, K& Co
Ink:  Archival Jet Black, Memento Tuxedo Black, Grout Gray - Color Box/MFT
Accessories:  Copics - R35, YG03, YR02, Tiny Twinkles - Taylored Expressions, Charles (chevron) embossing folder - Provo Craft.

Saturday, February 22, 2014

Three for Six

I'm finding I don't have enough days to singly post the blog challenges I want to participate in.  So today I have three cards covering 6 challenges!  
For my first creation, I die cut a piece of watercolor paper with a stitched mat die from Lil'Inker Designs then dragged it over my non-stick craft mat that I had inked with some distress inks and spritzed with water.  I dried the panel a bit with my heat gun then spritzed it with Sheer Gold Shimmer Mist (that I just purchased on sale at Joann's!).  The stamps are Fresh Cut Florals and dies from WPlus9.  The sentiment strip is MFT.
I hope you can see the gold shimmer better on this close up.
I'm entering this card in the following challenges:
WPlus9 Birthday Celebration Week 3: Trend Watch - I used misting, metalics, enamel dots, watercolor

STAMPlorations - Stamps and Stitches (faux stitched edge)
 The Card Concept 4 - Use a Floral Theme - mine is clean and layering
I used the same color inks for my second card - but this time I sponged the inks onto my watercolor paper panel (cut again with the stitched mat rectangle die) and then flicked water on it with my fingers - then blotting it a little to get any pools of water off - and drying it with my heat gun.  I embossed the panel with a wicker weave embossing folder then cut it into 3 equal pieces.  I layered them to a panel of Berry Sorbet that I had embossed with a Square Lattice embossing folder.

I gold embossed the sentiment from PTI onto vellum and adhered it to the card with pink brads.
I'm linking this card to the following challenges
So sorry to keep you so long -  I just have one more to show you!
The heart stamp on this card is from Nordic Winter, the Happy and Wishes are from Say It Loud - Winter Holiday by Waltzingmouse.  The birthday die is from PTI.  I used my Sprayza Blow pen to get the spray on the birthday.
 My card design was based on one of the images in the Cure for the Monday Blues #5 challenge - Frame it can you see which one?


On Your Special Day
Stamps:  Fresh Cut Florals - WPlus9
Paper:  Watercolor paper - Canson, white - PTI
Ink:  Ranger Distress Worn Lipstick, Mustard Seed and Victorian Velvet, Grout Gray- MFT, Archival Jet Black
Accessories:  Fresh Cut Floral dies - WPlus9, sentiment strip die - MFT, non-stick craft mat, Stitched Mat Rectangle die - Lil' Inker Designs, sheer gold shimmer mist spritz - Tsukineko, heat gun.

Birthdays are Like Quilts
Stamps:  Quilters Sampler - PTI
Paper:  white, berry sorbet - PTI, vellum - SU, watercolor paper - Cranson
Ink:  Versamark, Ranger Distress Mustard Seed and Worn Lipstick
Accessories:  heat gun, gold embossing powder, wicker weave embossing folder - Provo Craft, Square Lattice Embossing Folder - SU, pink brads, Stitched Mat Rectangle die - Lil' Inker Designs.

Happy Birthday Wishes
Stamps:  heart from Nordic Winter, Happy and Wishes from Say it Loud - Winter Holiday -  Waltzingmouse
Paper:  white, fine linen, spring rain - PTI
Ink:  Memento Toffee Crunch
Accessories:  foam dots, birthday die - PTI, Sprayza Blow Pen

Friday, February 21, 2014

Latte and a Hoppy Frog

I have two cards to share today - the first is a coffee card -  Latte to be exact!  
I've had this coffee cup stamp from Art Impressions for more than a year and this is the first time I've used it.  The stamp set has instructions for making it a gift card holder by stamping the cover onto a flap and folding the flap over the cup - that you stamp, cut out and adhere just around the edges so a gift card fits inside the cup, revealed when you flip up the cover.  I thought it was so fun!  But today I just stamped it, paper piecing the cup and band using digi papers I won from All About Scrapping.  Doesn't the band look like it's corrugated cardboard?!  it's just a print! nice and smooth so it was easy to stamp the sentiment on it.

I'm putting this card in the Addicted to CAS - Code Word: Coffee challenge.
 And my second card was made for Cas-ology Cue Card - JUMP
 
 I was looking through all my stamps trying to find something different and creative for JUMP. All I could come up with is my little frog saying "you make me hoppy". Stamps and Framed Art die are from PTI.  I used a new washi tape that I picked up at Michaels on sale this week -  circles always seem to go with frogs (I guess because they are bumpy on their backs or their clear eggs are round?!) and I liked all the bright colors.  I colored my frog with a green Gelly Roll pen that is very sparkly - you can see the sparkle on the close up here.
When I was trying to find something special for JUMP - I googled 'Jack Be Nimble' - since he jumped over the candle stick -  and I found lots of new and vintage images but this one cracked me up - translating Jack's jump into a small business plan -  Prep - be quick, agility - be nimble, challenge - jump -  I was going to just print it and put it on my card for the challenge - but the writing isn't too clear so I went to Plan B with Mr. Frog!


Thanks a Latte
Stamps:  Coffee Keeper - AI (Art Impressions)
Paper:  white, dark Chocolate - PTI, digi papers Brown Grunge Texture Set - All About Scrapping Etsy shop.
Ink: Archival Jet Black

You Make Me Hoppy
Stamps:  Tiny Treats Valentine - PTI
Paper:  white, true black - PTI
Ink:  Archival Jet Black
Accessories:  washi tape - Michaels, framed art die - PTI, green Gelly Roll Pen - Sakura,  red pen - Spica, foam dots.

Thursday, February 20, 2014

Make it Monday - Layering Ink

There is another fun Make It Monday challenge out this week -  layering of pigment and die ink. You'll find the challenge and a video tutorial here.
When looking over all of my many PTI stamp sets - I realized I didn't have many solid stamps - which work best for this technique.  So I went with the Water Color Wonder set.  For the backgrounds stamped in Fresh Snow Pigment Ink I used 2 stamps from Background Basics Retro.   The sentiment is from Big and Bold Wishes

The technique is to first stamp the background images with a pigment ink, in this case I used Fresh Snow ink on white cardstock - you can also use a cream pigment ink on cream cardstock.  After letting it dry for a while - I than inked up the Water Color stamps with various die inks.  When you stamp over the background with die inks, the pigment ink shows through.   Here's a close up - you can see the circles and loops behind the colors.  A fun technique!
Stamps:  Background Basics Retro, Water Color Wonder, Big and Bold Wishes - PTI
Paper:  White, New Leaf - PTI
Ink:  Fresh Snow - PTI, Memento Tangelo, Teal Zeal, Cottage Ivy, Love Letter
Accessories:  enamel dots - My Mind's Eye.