Showing posts with label Rubbernecker. Show all posts

Monday, April 28, 2025

Group of Seven Cardmakers - April Technique - Gilding Flakes on Acetate

This month, the Group of Seven Cardmakers is playing with Gilding Flakes on Acetate.

I watched this YouTube Video to learn this technique - it is also linked to, over at The Group of Seven Cardmakers blog.

This was my first try with the technique.

I'm not sure everyone looking at my card would immediately realize it's King Hopkins (a frog!) sitting on a pile of stones?
You can see how clear and detailed the stamp is below.
I found with both of my cards - you couldn't really see detail and might not know what you were looking at, on first glance.     
So, for my second try, I went a little rogue and created my own technique - Stamping on Acetate with Gilding Flakes and a Shadow Behind It -  I have to work on the title - it's a bit long!?!  

So I thought I'd try stamping the image on a white panel and layer the acetate panel with the gilding flake image over it - slightly off set.   And I really love the dimensional look it gives it!  It shows some of the detail of the stamp that didn't show up on the stamping with gilding flakes on the acetate.


A few pics on how I did it:
On the video I watched, the woman had a stiff net-like sponge to apply the tacky glue and to rub off the Gilding Flakes.  I did not have an item like that so I used a sponge brush, pressing it into a pool of tacky glue and then pressing the sponge lightly over the stamp - the idea is to just get the glue on the image, not down into the crevices.  I recommend pressing your gilding flakes over the stamping and then quickly washing the stamp off  before the tacky glue dries on your stamp.  Then I rubbed off the gilding flakes with the clean side of the foam sponge and my fingers.  I scrubbed it pretty hard so that just the image is left.

photo on right shows the stamped image in glue on the acetate

So - gilding flakes -  still not my favorite thing to use - it flies everywhere - and for this technique it was difficult to find an image that would work well, but I am happy with my two acetate panels -  particularly the one I shadow stamped behind!
  
We'd love to see cards you make trying this technique!  There's a Mr. Linky over at the blog!


Also sending my Kiss Me card to:

first time using King Hopkins

Sending my trees card to:

ends 4/29


Week 4  A - Anything Goes


I just have 2 more weeks of wearing the sling after my shoulder surgery! Then I'll be back to full blown crafting!


Kiss Me 
Stamps:  King Hopkins - Lavinia, Kiss me stamp from Heroines Fairy Princess - Waltzingmouse (retired).
Ink:  Gold Pigment Ink - Color Box
Paper:  Acetate, True Black - Papertrey Ink, Kraft Metallic Gold - Tim Holtz/Idea-ology.
Other Supplies:  Inca Gold Gilding Flakes - Cosmic Shimmer, embossing powder brush, Stitched Rectangle Scallop Frame Die - MFT, Tombow Tacky Glue, foam brush.

The Creaking of Trees
Stamps:  Silhouette Trees #1 - Rubbernecker (retired), Creaking Trees - Technique Junkies.
Ink:  Nocturne - Versafine Clair.
Paper:  Clear Acetate, White - PTI, Hammered White - Amazon.
Other Supplies:  Inca Gold Gilding Flakes - Cosmic Shimmer, embossing powder brush, Stitched Rectangle Scallop Frame Die - MFT, Tombow Tacky Glue, foam brush, foam dots

Saturday, November 16, 2024

Inkspirational #329 - Word Prompt: Santa!

 There's a new challenge up at Inkspirational and it's a Word Prompt: Santa!  

And this is the card I created.


The Santa die is from Rubbernecker (now Brass and Bliss), the HoHoHo is a die from Impression Obsession and the DP is from a great paper pad from Waffle Flower called Seasons Greetings.  The die cuts are all up on foam dots.  I added 3 red enamel dots.

Inside I stamped: Here Comes Santa Claus

We'd love to see all of your 'Santas'!  Please link up your creations over at Inkspirational!

This challenge ends 11/29


I'm also sending my card to:

First time using the HoHoHo die

Anything Goes using DP
ends 11/30

ends 11/20

Big text, Santa, colors  ends 11/20

Any Holiday in the Year ends 11/30


Paper:  Hammered white - Amazon, DP Seasons Greetings - Waffle Flower
Other Supplies:  Santas Face Die - Rubbernecker (now Brass and Bliss),  HoHoHo die - Impression Obsession, foam dots, red enamel dots - Altenew.

Friday, June 28, 2024

Group of 7 Cardmakers - June 2024 - Monochromatic

 This month the Group of Seven Cardmakers are playing with the technique of Monochromatic -  using only shades of the same color for our card designs.  It can be stenciling, stamping, layered die cuts - but everything has to be in shades of the same color - neutrals can be used as well but should not be the main color.


For my 1st card I used two shades of blue ink on the stenciled background and the die cut sentiment.

The stencil is Modern Mosaic (3 stencils that layer over each other) by Taylored Expressions.  The Sentiment stamp and die is from Written in Ribbons by The Greetery.  The frame die is from Rubbernecker.  The Happy is up on foam dots.  I used two shades of blue ink - Iceberg and Persian Blue and added 3 blue enamel dots, all from Altenew.

For my second monochromatic card, I used die cut flowers out of three shades of purple card stock.

I added Gold Liquid Pearls to the flower centers, I embossed the purple card base with Feather Spiral embossing folder from Simon Says Stamp and added 3 purple enamel dots on the background.


So, please check out the other talented GO7 designers monochromatic creations over at the blog.  

We'd also love to see what colors you use to make a monochromatic design - you can link up your card over at the GO7 blog!

I'm also linking my cards to:

First time using this feather spiral embossing folder
on my purple anniversary card


Entering my stenciled Birthday card in the following challenges:

inspired by the blue and white and pillows
ends 7/8

Birthdays  ends  6/29


Birthday Card
Stamps:  Written in Ribbons - The Greetery.
Paper:  White - Papertrey Ink
Ink:  Iceberg, Persian Blue - Altenew
Accessories:  Written in Ribbons Die - The Greetery, Simple Strips Die - Taylored Expressionk, Frame Die - Rubbernecker, foam dots, Enamel Dots - Altenew.

Anniversary Card
Stamps:  Simple Strips: Background - Taylored Expressions
Paper:  Lilac Grace, Winter Wisteria, Royal Velvet - Papertrey Ink.
Ink:  Nocturne - Versafine Clair
Accessories:  Fresh Picked Anemone dies - Spell Binders, Feather Spiral Embossing Folder - Simon Says Stamp, Simple Strips: Straight Edge Die - Taylored Expressions,  Gold Liquid Pearls - Ranger, purple enamel dot - home made from Perla beads.

Thursday, June 13, 2024

A Stenciled Birthday In the Woods

 Today I'm thrilled to begin my time as Surprise Party Guest over at Seize the Birthday.  How excited I was when I received an e-mail from Nancy asking me if I'd be interested??  Ummm, YES! And what a thrill to be working with this wonderfully creative team for June and July!


This is today's challenge.


So Double Stenciling is a special technique where you take a card panel and  lay one stencil over another stencil and ink through both stencils.  Then you lift up the top stencil and ink through the bottom stencil with another color.  Usually a lighter color first and a darker color second - and you have to think about how the colors will mix so not to make mud.

SO -  here's my card followed by a few creation step photos -  
if you are a visual learner like me, and so I remember how I made this!  

I have to say, I tried a number of stencils and ink color combinations before coming up with something I really liked.

and here's the inside to prove it is a birthday card - a nice masculine design for the guys in our lives - or for anyone who loves the outdoors!

How I made it:  
Taped a white panel onto my work surface.  Placed the Birch tree stencil over the card panel, taping the stencil along the top.   Placed the Moc Croc Stencil over the Birch Tree Stencil, taping it along the top.  Sponged over all these layers with Evergreen Bough Distress Ink. 
It looks pretty crazy like this - hard to tell what it's going to look like, right?
Lifted up the Moc Croc Stencil and sponged through Birch Tree Stencil with Mermaid Lagoon Distress Ink.  
This stencil is a Slim Line so it's longer than my card panel.
Lift off that stencil and your design is done!   Pretty magical right?!
The Birch Tree stencil came with a 2nd stencil to mark the brown bits on the birch and I wanted those on there - so I just matched up that stencil over the trees and sponged with a brown ink.  
(But that's extra, not part of Double Stenciling!)

I stamped the sentiment and adhered it over the panel with foam dots.

So, we invite you to join in and add another card to your birthday stash!  You can use the topping of Double Stenciling or just make it birthday!  You'll find the challenge here.

Also linking my card to:

First time using the birch tree stencil

Stencil Fun  ends 6/29
Birthdays


Just Us Girls ends 6/19


Stamps: Peek a Boo Pals - Camp Wanna Stamp - Ellen Hutson, inside Birthday Basics - PTI.
Ink: Mermaid Lagoon, Evergreen Bough - Ranger Distress, Espresso - Altenew
Paper: white - Papertrey Ink.
Accessories: Moc Croc Stencil - AALL and Create, Slim Line Birch Tree Stencil - Rubbernecker, foam dots, blender brushes.

Tuesday, February 20, 2024

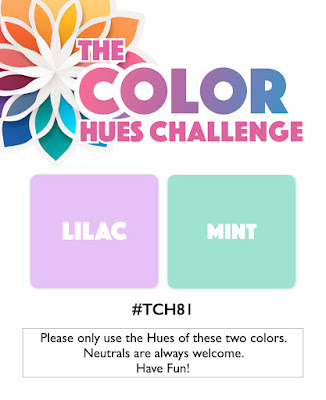
Lilac and Mint Easter

 I keep wanting to join in with the Color Hues Challenge and today is the day I finally did it!


I thought they were perfect colors for Easter and created this card.

The lilac image is a rub-on from Taperlogy.  I applied it to a panel of hammered white card.   The Decorative Floral Circle is a die from Rubbernecker.  I cut out the center of the floral circle so it would be like a frame.  I used two nesting circle dies to cut a thin circle out of a sheet of double sided sticky foam so I could pop up the frame over the lilac rubon.  I cut the sentiment strip with the circle so it fit inside the frame, also up on foam dots.  I added 7 enamel dots from Altenew.

I'm also linking my card to:
Inspired by the colors in the bottom left photo


Stamps:  Easter Allelulias - Papertrey Ink.
Ink:  Nocturne - Versafine Clair.
Paper:  White, Mint Julip - PTI, Hammered White - Amazon
Accessories:  Lilac rubon - Taperlogy,  Circle dies - Nestability, Decorative Floral Circle Die - Rubbernecker, Twin Stick Foam Sheet, enamel dots - Altenew, foam dots.


Saturday, November 11, 2023

Aging Pumpkins

 I found a really fun technique over at Splitcoaststampers - Aging Textured Die cuts.  here's the link to the YouTube video by Lydia.    Basically you smoosh your textured die cuts into several DOX inks and then sponge over them with Distress Vintage Photo.


 I die cut the pumpkins from the Autumn Harvest Die set by The Greetery.  I rubbed Dox inks in Squeezed Lemonade, Carved Pumpkin, Crushed Pistachio and Salt Water Taffy onto my glass board, spritzed each color with water and pounced into each color with my die cut pumpkins until I liked the mix. I dried the pumpkins and then rubbed over them with my finger with Ranger Distress Vintage Photo ink which also highlights the texture lines.

I wanted to age the wagon as well as the pumpkins - so I die cut the wagon from Rubbernecker out of Hammered White card and rubbed over the pieces with with Ranger Distress Hickory Smoke and Vintage Photo ink pad before putting the pieces together.

I adhered the wagon with the pumpkins as well as a tree sticker and leaves from Jolee onto a piece of patterned paper from Rubbernecker with this lovely fall field scene.  I stamped the sentiment and splattered over the panel with my black POSCA pen.  Inside a stamped Happy Thanksgiving.

I'm linking my card to:

Just Us Girls


NBUS

First time using the wagon die.


Stamps: Autumn Bounty - Sweet N Sassy (retired set)
Paper: Hammered White - Amazon, White - PTI, DP Festival of Colors paper pad - RubberneckerInk: Ranger DOX Squeezed Lemonade, Carved Pumpkin, Crushed Pistachio and Salt Water Taffy, Ranger Distress Hickory Smoke and Vintage Photo, Nocturne Versafine Claire
Accessories: Autumn Harvest dies - The Greetery, Wagon - Rubbernecker, Tree and Leaf stickers - Jolee, Black POSCA Pen, foam dots, Enamel dots - Altenew,