Monday, November 18, 2019

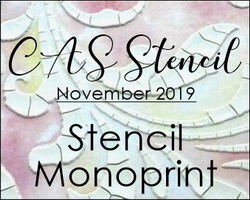
Mid Month Reminder - November CAS Stencil - Stencil Monoprint

I'm here today to remind you there is still time (until 11/24) to link up your CAS Stencil Monoprint card!  Linda is our host this month and here is her challenge:
I used another newly purchased stencil from Stencil Girls called Chinese Garden Koi.  I rubbed Ranger Distress Fossilized Amber and Spiced Marmalade over the back of the stencil, spritzed with water, then flipped the stencil over onto a panel of water color paper.  

I pressed over the stencil with a paper towel then removed the stencil carefully from the panel.  I blotted the panel with another paper towel and dried with my heat tool.  

I cut down the panel to make it CAS and layered it over a white card base with foam dots.  
I added a Small Talk Sticker for the sentiment.
 You'll find a link to a technique video over at CAS Stencil as well as lots of inspiration from the Design Team -  please join us!  You have until 11/24 to link up your CAS card using this technique!


Paper:  water color paper - Canson, white - PTI
Ink:  Ranger Distress Fossilized Amber, Spiced Marmalade.
Accessories:  Chinese Garden Koi Stencil - Stencil Girls, Small Talk Stickers Occasions - Tim Holtz/Idea-ology, craft mat, water mister, paper towels, foam dots.

Saturday, November 16, 2019

Cards for Giving Thanks

Since Thanksgiving is almost upon us here in the USA, thought that I'd share a few cards I have made for various challenges over at Splitcoaststampers.  
All supplies are listed at the bottom of my post.

For my leaf card- I water colored a big leaf Sizzix die cut from watercolor paper.  I adhered it to the panel just along the center of the leaf so the edges would curl up a bit off the panel.

The panel behind the leaf is  monoprint stenciled using a beautiful succulent stencil from Stencil Girl but the leaf ended up covering most of it!  Monoprint stenciling is the November challenge over at CAS Stencil. Check out my blog post here to see the technique!

I splattered the next layer panel with a brown water color paint.  The stamp is from an older PTI set - Autumn Abundance.
My next card was inspired by a cardigan sweater - I thought this Orchard stencil from Stencil Girl looked rather like knit and pearl!  I sponged the wheat stencil from The Greetery in Frayed Burlap Distress and then stamped the sentiment from Give Thanks by PTI in Dark Chocolate. I added a little acrylic red heart to give a pop of color and to complement the sentiment. I sponged the edges of the panel with Scattered Straw and layered it to a Cocoa Bean panel and then to a Vintage Cream card base.
Same sweater inspiration for this card - but I used a Rib Knit Mini Stencil from Stencil Girl, the same wheat stencil from The Greetery and a sentiment from  Sentiment Staples Thanksgiving set from PTI.
For my final Thanksgiving card today - I used stamps and dies from Butterfly Kisses by Lawn Fawn, coloring the images with Copics.  The background is stenciled with Festive Flourish by Echo Park and sprayed with Perfect Pearls to add some shimmer. The sentiment is from an older Thanksgiving Wishes set by Lil Inker Designs.

I'm linking my leaf card to:
Inspired by the orange and green colors - mixed media style (stenciling and watercoloring)


Autumn Blessings Card
Stamps:  Autumn Abundance - PTI 
Paper:  Watercolor paper - Canson, Rustic Cream, Vintage Cream - PTI 
Ink:   Cocoa Bean - PTI, Ranger Distress Bundled Sage 
Accessories:   leaf die - Sizzix, Succulent Stencil - Stencil Girl, Kuretake Water color paints Cadmium Scarlet, Yellow Ochre, Lemon Yellow, Burnt Sienna, water brushes, water  

Grateful Heart Card
Stamps: Give Thanks - PTI
Paper:   Rustic Cream, Vintage Cream, Cocoa Bean - PTI
Ink:  Ranger Distress Wild Honey, Scattered Straw, Frayed Burlap; Dark Chocolate - PTI 
Accessories: Orchard Stencil - Stencil Girl, Mason Jar Fillers Stencil - The Greetery, Red Hots Acrylic Heart - Honey Bee Stamps     

 Happy Thanksgiving Card
Stamps: Sentiment Staples: Thanksgiving Set - PTI
Paper:  Rustic Cream, Vintage Cream, Cocoa Bean - PTI
Ink: Ranger Distress Wild Honey, Scattered Straw, Frayed Burlap; Dark Chocolate - PTI
Accessories: Rib Knit Mini stencil - Stencil Girl, Mason Jar Fillers Stencil - The Greetery, Red Hots Acrylic Heart - Honey Bee Stamps    

Simple Pleasures Card
Stamps:  Butterfly Kisses - Lawn Fawn, Thanksgiving Wishes - Lil Inker Designs
Paper:  white, Terracotta Tile, DP First Fruits Collection - PTI, Strathmore Bristol Smooth Paper.
Ink:  Hero Hues Black, Spring Rain - PTI
Accessories:  Butterfly Kisses Dies - Lawn Fawn, Sentiment Strips - Neat and Tangled, Pierced Feature Frames - PTI, Festive Flourish Stencil - Echo Park, Sunflower Sparkle Perfect Pearls Mist, foam dots.

Tuesday, November 12, 2019

Setting the Thanksgiving Table

Today I have 2 projects to share using some of  Eileen Hull's Sizzix Dies that will help you set a festive table for Thanksgiving!  These will also be posted over on Eileen's blog on Wed 11/13/19.

I've created a pocket to place the napkin and silverware in at each place setting using Eileen's Gift Card Folder Die and a little house treat box using her House Ornament Die, decorating it with leaves from her Journaling Cards Flowers and Leaves Die.
I folded a Thanksgiving paper napkin and slipped it inside the folder and then placed the utensils on top.
I stamped some Thanksgiving sentiments on the top of the folders.
Here are a couple of process photos. 
I die cut just the folder piece on the die out of water color paper.  I colored the inside top half by pressing it into Distress inks rubbed on my craft mat and spritzed with water, first with Fossilized Amber and then with Frayed Burlap, drying with my heat tool after each color.
I die cut the folder piece again out of a piece of DP from Abandoned Paper Stash and adhered it to the front of the die cut.  
Then I folded it on all the score lines and adhered the flaps where they overlapped.  Here's the front of one and the back of the other.
I stamped some Thanksgiving sentiments at the top and adhered die cut skeleton leaves on the bottom fronts.
 I made the treat boxes using Eileen's House Ornament Die.  Here are the four sides of the finished house.  I have a few process photos below as well.
I stamped 'for you' on the little house tag that is on the House Ornament die.
I put Hershey Kisses inside my treat box.
Because this is made from patterned paper, I cut a second piece just of the bottom flap and adhered it to the connected flap to give it a little more sturdiness.  I also adhered the bottom of the flap to a die cut coaster.  It made it a little easier to open the box - you put your finger on the coaster piece and lift the top of the house and the candies fall out!
I die cut the house piece twice - once without the bottom flap since you only need one flap.  (although in retrospect, if I had cut both with the flap, I could have used that second flap to reinforce the other one!) 
The thankful die was wider than one piece, so I connected the two pieces at the tab (see the ScorTape?) and then die cut the word.
Here it is laid out on my cutting pad.  Be sure the die is not laying over the tab on the left.
I adhered a piece of vellum on the inside - covering the windows and the cut out word.
There were a couple of little pieces from the die cut word I had to adhere to the vellum so you could see what the letter was.
A piece between the t and h, two pieces on the a, and a piece between the k and f.  Luckily I didn't lose any of those little bits!
  (If I had lost them I would have cut the word again from the same paper)
Then I die cut leaves using the Journaling Cards die out of the same patterned paper.  I adhered them to the sides of the house with foam dots after curving their edges a bit for more dimension.
I also colored the corners of the windows and some edges of the letters with a yellow Copic.
Some creative and festive additions to each guests place at the Thanksgiving table!

I hope you will visit Eileen's blog every Wednesday when members of her Creative Team will be posting inspiring projects using many of her fabulous Sizzix dies!

I'm linking my projects to:
Just Us Girls

Creative Artiste Mixed Media
Anything Goes

Die Cut Divas
Thanksgiving


Place Setting Pocket
Stamps:  First Fruits - PTI, Thanksgiving Wishes - Lil Inker Designs
Paper:  Water color paper - Canson, DP Abandoned Paper Stash - Tim Holtz/Idea-ology.
Ink:  Ranger Distress Fossilized Amber, Frayerd Burlap, Cocoa Bean - PTI.
Accessories:  Gift Card Folder Die - Eileen Hull/Sizzix, Skeleton Leaves - Sizzix, ScorTape, Tombow Glue.

House Ornament Treat Box
Stamps:  Happy Scripts - Penny Black
Paper:  Abandoned Paper Stash - Tim Holtz/Idea-ology, Vellum - PTI
Ink:  Hero Arts Black
Accessories:  House Ornament Die, Journaling Cards Flowers and Leaves - Eileen Hull/Sizzix, Cozy Cup Coaster Die - The Greetery, Thankful Die - Counting My Blessings set - PTI, ScorTape, Foam dots, twine, Yellow Copic.

Thursday, November 7, 2019

Card #2 for 2019 Coffee Lovers Fall/Winter Blog Hop

I was able to create another card for the Coffee Lovers Fall/Winter Blog Hop!
This one is pretty CAS even though it's covered in splatter!
The stamps are from Coffee With a Splash by Altenew.  I stamped the images in Espresso Ink onto watercolor paper.  Then I splattered pink and then dark tan water color paint over the panel drying it with my heat tool and then layering it to an Hibiscus panel and then to a Dark Chocolate panel and finally to my white card base.  My card is 4 1/4" x 4 1/4".

The blog hop ends on Friday at 11:55 pm Pacific time so there's still time to link up your cards for a chance to randomly win prizes from 81 sponsors!

I'm also linking my card to:


Stamps:  Coffee with a Splash - Altenew
Paper:  watercolor paper - Canson, Hibiscus Burst, Dark Chocolate, White - PTI.
Ink:  Espresso - Altenew
Accessories:  pink and tan water color paint, brush, water

Wednesday, November 6, 2019

Coffee Lovers 2019 Fall/Winter Blog Hop

Today, I suddenly realized that the 2019 Fall/Winter Coffee Lovers Blog hop started on Nov 1!  I'm so glad I remembered before it was over!  

You'll find the blog hop here, and it ends Nov. 8th at 11:55 pm Pacific time.  There are 81 sponsors giving prizes to random cards chosen from all entries so it's worth entering a card or two not to mention that it's also great fun!
Here's the card I created.
Almost everything on my card is from The Greetery, Cozy Cup stamps and dies, Cozy Cup Coaster Die, and the Crimped Frame Die- I just LOVE this gorgeous cup with the floral design in the latte as well as the cute little coaster to set the cup on!
My card is 4 1/4" x 4 1/4".

I splattered orange water color paint on the background piece but ended up covering most of it up with the subsequent layers! My design changed several times during the creation process.  The sentiment says: "leaves are falling, coffee is calling".  

I hope to get at least one more coffee/tea card done before the blog hop is over Friday night.   

A huge thank you to Amy Tsuruta and Chaitali Narla for co-hosting this massive event, to every one else who assists the hosts and to all the sponsors who offer prizes!

Stamps:  Cozy Cup - The Greetery
Paper:  White, Vinage Cream, Rustic Cream, Canyon Clay, DP Text Style/First Fruits - PTI.
Ink:  Limestone, Silver Stone, Moca, ROcky Shore - Altenew, Hero Arts Black.
Accessories:  Cozy Cup Dies, Cozy Cup Coaster Die, Crimped Frame Dies - The Greetery, foam dots, orange water color paint, brush, water.

Monday, November 4, 2019

November CAS Stencil Card Challenge - Stencil Monoprint

Welcome to November and the new challenge over at CAS Stencil!  Linda is our host this month and she wants us to use the Stencil Monoprint technique!  
So - what is that you ask?  Well we just happen to have a technique video linked up over at the Challenge blog -  but I'll also show you with photos of how I made my card!
I got out a recently purchased stencil - Stone Face from Stencil Girls.  I wanted to do it in blue so I pulled out Salty Ocean Distress Ink - then I chose a color opposite blue on the color wheel, Carved Pumpkin.  First I pressed the orange onto the stencil, then the blue.
Then I spritzed with water, you want to spritz liberally, but not so much if runs all over the place or you'll lose the distinct colors.
I flipped the stencil over onto a panel of water color paper and pressed over the stencil with  a paper towel to help the watery color absorb into the paper.
I carefully removed the stencil.
and laid a paper towel over the panel, pressing over the paper towel to absorb any pools of water on the card panel.
I dried the panel with my heat tool.  
Using this technique, you get a negative print of the stencil, so with the stencil I used, I feel like I have to focus on the image a minute to see the face!
To make it CAS, I trimmed down the panel, cutting it with a Crimped Frame Die from The Greetery and layering it over a teal panel.   I stamped the sentiment from Sentiment Suite: Thinking of You onto a banner cut with Sentiment Suite Basics die - both from The Greetery.
I made one exactly the same but with Ranger Distress Fossilized Amber and Spiced Marmalade inks (yellow and orange).  The image is more readily seen using these colors for some reason.
(to my eye anyway!)
So please join us and try out this Stencil Monoprint techniqe and share it with us over at CAS Stencil!  You'll find lots of inspiration from the Design Team as well as our talented guest designer for November,  Lucie.  

Stamps:  Sentiment Suite: Thinking of You - The Greetery
Paper:  water color paper - Canson, white, White, Tropical Teal, Bright Buttercup - PTI
Ink:  Ranger Distress Salty Ocean, Carved Pumpkin, Fossilized Amber, Spiced Marmalade; True Black - PTI
Accessories:  Stone Face Stencil - Stencil Girl, Crimped Frame Die, Sentiment Suite Basics die - The Greetery, craft mat, water mister, paper towels, foam dots.