Showing posts with label Lavinia Stamps. Show all posts

Saturday, September 20, 2025

Bats, Pumpkins and Boo to You!

 I don't send many Halloween cards but I do like to have some on hand.  I have two boxes of Halloween stamps, dies and ephemera - some of it never used yet -  so there's that reason too!


So for this card I used three new Lavinia Stamps for the first time (pumpkins and bats), a baseboard frame from Tim Holtz that I've had a package of for a year and never used one of them, and Regions Beyond die set (candle and crow) that I've also had for over a year and never used!
  
I seem to buy things after season when they are on sale and then forget I have them?!?

I'm sending my card to:

Inspired by the pumpkins, window and candle.
ends 9/26


first time using pumpkin and bat stamps, Baseboard window frames, Regions Beyond die cuts (candle and crow)


ends 9/24

Inspired by Fall  


Stamps: Playful Pumpkin, Ickle Pumpkins, Flittermice - Lavinia, A Great Big Owl (sentiment)- Waltzingmouse (retired).
Ink: Nocturne - Versafine Clair.
Paper: White, True Black - PTI, DP Enchanted - Authentique, Ghosts and Goblins - DCWV.
Other Supplies: Baseboard Window Frames - Tim Holtz/Idea-ology, Regions Beyond die set - Tim Holtz/Sizzix, Tiny Twinkles - Taylored Expressions, Orange Peel Stickles, Copics Y38, YG03, E37, E00, C1, foam dots.

Monday, August 4, 2025

Fairy Birthday Wishes

I have so many Lavinia stamps that I decided to get them out and make a bunch of cards for my stash and here is one of them!


I stenciled the background with Light Carnation ink from Gina K Design and I stamped the images with Morning Mist from Versafine Clair.    All the stamps are from Lavinia. I added pink enamel dots and heart.  The sentiment is up on foam dots.

I'm sending my card to the following challenges:

ends 8/14

inspired by the circles and pink colors
ends 8/15
week 1 - ink

ends 8/12


Stamps: Seasonal Tree, Quinn, Heart Felt Verses, Fairy Charms, Orchard Grass - Lavinia.
Ink: Light Carnation - Gina K Designs, Morning Mist - Versafine Clair.
Paper: White - Papertrey Ink.
Other Supplies: Semi Circles Mid Century Modern Stencil - Claire Brennan Design (retired), enamel dots and heart - Altenew, foam dots.

Sunday, July 13, 2025

Fluttering Butterfly Birthday

 Today I made a birthday card for a few challenges.  

I stenciled the background then added the Lavinia stampings and the Better Press Happy Birthday.


Here's a close up to show the shimmer added to the wings with a yellow glitter gel pen.

I combined this weekends Splitcoast Stampers Inspiration Challenge and Featured Stamper challenge for my design

Anything Goes option  ends 7/31

ends 7/22

ends 717
bottom horizontal - Flowers/Butterfly/AnySentiment


Stamps: Quinn, Bell Flower Vine, Flutterbies - Lavinia
Paper: white - PTI
Ink: Nocturne - Versafine Clair, Caramel Toffee - Altenew
Other supplies: Semi Circles Mid Century Modern Stencil - Claire Brennan Design (retired), A Little Message Sentiments Press Plate and Die - Better Press/Spellbinders, Better Press, Blender Brushes, yellow glitter Gel Pen - Kaiser (on wings), foam dots.

Saturday, June 28, 2025

June Group of Seven Cardmakers - Second Generation Stamping

 Here is my 1st card for the June Group of Seven Cardmakers post.  

This month we are playing with Second Generation Stamping -  when you stamp an image fully inked then stamp it again without reinking either once or twice.  You'll find a link to Videos on the technique over at the GO7 Blog.

 It creates a wonderful depth to your card design.

I went very CAS with this card, simply stamping the image on the left fully inked with Portobello Versafine Clair Ink then stamping again to the right of that stamping and a bit higher, without reinking.

Next,  I stamped the image off the bottom and half off the right side fully inked - then stamped above it (only the left half of the stamp) again way over to the left off the edge with the right half of the stamp.

   My card base is watercolor paper and the sentiment is from Paper Artsy.

Trees seem to be the first thing I grab when I think of Generation Stamping (or off stamping) so I wanted to stretch myself and use other stamps and also add some color!
   
So this card was born (after about 5 aborted attempts using various Lavinia stamps!)
I started by stamping a text background - inking the stamp and stamping it off on paper before stamping on the card panel as I wanted it just to be a shadow.

Then I stamped the dandelion in black and off stamped it - repeating again and the same with the leaf.  And finally I stamped and off stamped the Orchard Grass along the bottom.

To add color (after I made sure the black ink was dry!) -  I sponged over the top with Distress Speckled Egg and over the bottom with Shabby Shutters.

I stamped the sentiment on white card and punched it with an oval punch.  I sponged the edges with the Speckled Egg and popped it up on the card with foam dots.


We hope you'll give this technique a try 
(you probably have done this already at some point in your stamping career?! but maybe not for a while?)
   
You'll find Mr. Linky and lovely inspiration from the rest of the GO7 team over at the blog.
We'd love to see how you use this technique!


Also sending my card to:
4th week - A - Anything Goes

Nature Inspired ends 7/1

CAS  ends 7/5


Tree Card
Stamps:  Silhouette Trees #1 - Rubbernecker (retired), Sentiment from Paper Artsy Alison Bomber set EAB01.
Paper:  Water color paper - Canson Cold Press
Ink:  Portobello Versafine Clair

Dandelion Card
Stamps:  Background Script, Orchard Grass, Tall Dandelion - Lavinia, Dandelion Wishes Sentiment set - Papertrey Ink.
Paper:  White - Papertrey Ink
Ink:  Nocturne, Morning Mist - Versafine Clair, Ranger Distress Speckled Egg and Shabby Shutters.
Other Supplies:  oval punch - SU, foam dots, blender brushes.

Monday, April 28, 2025

Group of Seven Cardmakers - April Technique - Gilding Flakes on Acetate

This month, the Group of Seven Cardmakers is playing with Gilding Flakes on Acetate.

I watched this YouTube Video to learn this technique - it is also linked to, over at The Group of Seven Cardmakers blog.

This was my first try with the technique.

I'm not sure everyone looking at my card would immediately realize it's King Hopkins (a frog!) sitting on a pile of stones?
You can see how clear and detailed the stamp is below.
I found with both of my cards - you couldn't really see detail and might not know what you were looking at, on first glance.     
So, for my second try, I went a little rogue and created my own technique - Stamping on Acetate with Gilding Flakes and a Shadow Behind It -  I have to work on the title - it's a bit long!?!  

So I thought I'd try stamping the image on a white panel and layer the acetate panel with the gilding flake image over it - slightly off set.   And I really love the dimensional look it gives it!  It shows some of the detail of the stamp that didn't show up on the stamping with gilding flakes on the acetate.


A few pics on how I did it:
On the video I watched, the woman had a stiff net-like sponge to apply the tacky glue and to rub off the Gilding Flakes.  I did not have an item like that so I used a sponge brush, pressing it into a pool of tacky glue and then pressing the sponge lightly over the stamp - the idea is to just get the glue on the image, not down into the crevices.  I recommend pressing your gilding flakes over the stamping and then quickly washing the stamp off  before the tacky glue dries on your stamp.  Then I rubbed off the gilding flakes with the clean side of the foam sponge and my fingers.  I scrubbed it pretty hard so that just the image is left.

photo on right shows the stamped image in glue on the acetate

So - gilding flakes -  still not my favorite thing to use - it flies everywhere - and for this technique it was difficult to find an image that would work well, but I am happy with my two acetate panels -  particularly the one I shadow stamped behind!
  
We'd love to see cards you make trying this technique!  There's a Mr. Linky over at the blog!


Also sending my Kiss Me card to:

first time using King Hopkins

Sending my trees card to:

ends 4/29


Week 4  A - Anything Goes


I just have 2 more weeks of wearing the sling after my shoulder surgery! Then I'll be back to full blown crafting!


Kiss Me 
Stamps:  King Hopkins - Lavinia, Kiss me stamp from Heroines Fairy Princess - Waltzingmouse (retired).
Ink:  Gold Pigment Ink - Color Box
Paper:  Acetate, True Black - Papertrey Ink, Kraft Metallic Gold - Tim Holtz/Idea-ology.
Other Supplies:  Inca Gold Gilding Flakes - Cosmic Shimmer, embossing powder brush, Stitched Rectangle Scallop Frame Die - MFT, Tombow Tacky Glue, foam brush.

The Creaking of Trees
Stamps:  Silhouette Trees #1 - Rubbernecker (retired), Creaking Trees - Technique Junkies.
Ink:  Nocturne - Versafine Clair.
Paper:  Clear Acetate, White - PTI, Hammered White - Amazon.
Other Supplies:  Inca Gold Gilding Flakes - Cosmic Shimmer, embossing powder brush, Stitched Rectangle Scallop Frame Die - MFT, Tombow Tacky Glue, foam brush, foam dots

Saturday, June 15, 2024

Inkspirational #318 Magical Inspiration

 Here is my DT card for Inkspirational Challenge #318.  Today the challenge is a Mood Board


Adapted from: https://picsandcheesecake.blogspot.com/2014/05/dt-lifepaperscrapbook-may-mood-board.html

I was inspired by the yellow flower on the bokeh background, all of the colors, the banner flags and  the circles!
I used a Circles Stencil from Lavinia and White Pigment ink to create the Bokeh background on the  panel of Mint Julep. I die cut the panel with A2 Arches from the Greetery.  I stamped the Lavinia Dandelion and sponged over the flower with Fossilized Amber Distress Ink.  Then I added white Nuvo drops. I die cut the banner and placed it over the panel on foam dots.  The sentiment is from the Magic and Wonder set from PaperArtsy.  I layered the arch panel over a piece of Distressed Dots DP.

We hope you will be inspired by the challenge Mood Board and will link up your card over at Inkspirational!

You have through June 28th to link up!


Also joining in on these challenges:

Fabulous Florals  - Ends 7/3

Bokeh


Stamps:  Tall Dandelion - Lavinia, Magic and Wonder - PaperArtsy.
Ink:  White Pigment Ink - Hampton Art, Nocturne - Versafine Clair, Ranger Distress Fossilized Amber.
Paper:  Mint Julep, DP Distressed Dots and Bitty Big Tropical Teal - Papertrey Ink
Accessories:  White Orbs Stencil - Lavinia,  A2 Arches Dies - The Greetery, Flag Banner Die - from a magazine, Gloss Simply White drops - Nuvo, foam dots, finger sponge.

Tuesday, May 28, 2024

Group of Seven Cardmakers - May 2024 Bokeh Technique

 This month, the Group of 7 Cardmakers are working with the Bokeh technique.

There is a link to a YouTube video on this technique as well as written instructions and supply list over at the G07 blog.

Here are two cards I created with my Bokeh backgrounds.

The beautiful trees are a stamp called Forest Scene from Lavinia.

Here is my second card using the same colors on my 2nd panel.  The stamps used here are Tall Dandelion (the stem is really straight on the stamp but I bent it a bit to turn into the center of the card) and Drooping Dandelion also from Lavinia.  I added White Nuvo drops to the dandelion bits.
Here is how I made my cards.
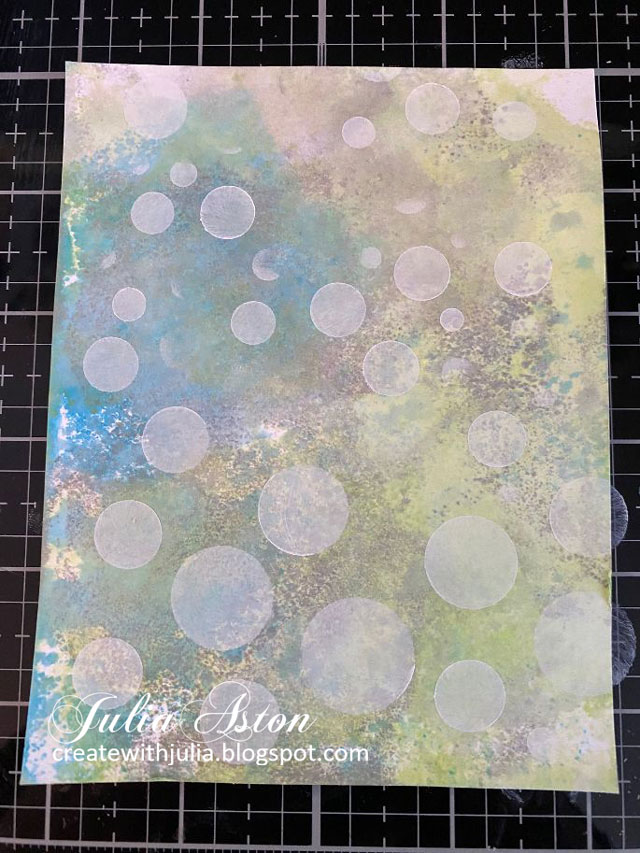
I chose 3 Distress Inks - Mermaid Lagoon, Twisted Cintron and Hickory Smoke.  I smooshed them on my craft mat (one color at a time going light to dark), spritzed with water and pressed a panel of white card stock into the colors.  I kept inking and smooshing until I got a coverage that I liked.  I made two panels in case I ruined one later!  Luckily both survived and I made two cards!

I put double sided removable tape on the back of my panel to hold it down on my glass mat, laid my White Orbs stencil from Lavinia over the panel and taped the edges to hold it.
I took a finger sponge, inked it on a White Pigment ink pad and then dabbed it over random circles.  My stencil was already a mix of big and small circles so I didn't have to move it around.  

Below are my two finished panels.  You can see that even though I used the same inks for smooshing- they look quite different.

NOTE:   I have to confess -  I hadn't gone back to the group instructions after reading it once - and I forgot the part about overlapping some of your circles to make it look more mystical -  probably because my stencil had all the different size circles and I didn't have to move it at all (that's my excuse anyway!)  -  so consider my cards as examples of how it looks if you don't overlap the circles!!??!!  I was afraid to go back when I was done - and try to overlap some -  we all know what happens when you try to fix or add something right??!

I also didn't really achieve darker white on small circles and lighter white on big circles although I tried!  My first panel may be better than the 2nd on this point.

So please check out the rest of the G07's beautiful Bokeh cards over at the Group of Seven Blog.  We hope to inspire you to try it out if you haven't yet, or even play with it again if you have!  You can link up your cards there so we can all see! 


I'm linking my dandelion card to:

first time using the Tall Dandelion stamp

Girly theme -  Flowers  Ends 5/31

Polka Dots ends 6/2


Stamps:  Forest Scene, Tall Dandelion, Drooping Dandelion - Lavinia, Birthday Basics - PTI, Simple Strips - Sympathy - Taylored Expressions.
Paper:  White - PTI, Easter Grass - Bazzill.
Ink:  Twisted Cintron, Mermaid Lagoon, Hickory Smoke - Ranger Distress, White Pigment - Hampton Arts, Nocturne - Versafine Clair.
Accessories:  White Orbs Stencil - Lavinia, A2 Arches - The Greetery, Gloss Simply White Nuvo Drops, Simple Strips flag end and straight end dies - Taylored Expressions.