Thursday, September 28, 2017

Triple Boo!

I'm back today with a Halloween Card.  Clean and Simple -  and triple scary!
I was going to use just one spider on the web (there are two dies here both from Memory Box - the web and the spider) but I cut several spiders as I was making multiple cards.  So - I thought how much more creepy this would be with 3 spiders on the web -  and it is, don't you think???  
I'm getting the shivers just looking at it again!!
I've used the spider die before and I've had the web for just as long 
(4-5 years?! these are both so old Memory Box no longer has them on their site) 
but somehow I never used the web die.
The spiders bodies are popped up on foam dots and the top of their 'string' is glued to the web.  I added orange Tiny Twinkles for eyes just to make them even MORE creepy!  The sentiment is white embossed on black and popped up on foam dots as well.  The panel is white linen so has a little texture to it but you really can't see it in the photo.

Which is why I love Darnell's NBUS challenge
it makes us look at what we have stashed away, get it out and use it!
 I'm also linking my card to:


Stamps:  Boo - Amuse
Paper:  White, Fresh Snow Linen, True Black - PTI
Ink:  Versamark
Accessories:  Creepy Web Die, Dangling Spider Die - Memory Box, foam dots, Tombow Blue, Tiny Twinkles - Taylored Expressions, white embossing powder.

Wednesday, September 27, 2017

In Thanks for Fall Leaves

I've been busily making both Halloween and Thanksgiving cards to sell at our October Church Fair.  I love how I can sit down and stamp all day if I want to, now that I'm retired!  
Today I have a Thanksgiving card to share.
I used my brandy-new Mix and Mat - Pinked Edge Die that has this beautiful leaf cut out in the middle of it.  I cut it out of Arches Watercolor paper and then colored it by rubbing Distress Inks on my craft mat, spritzing the inks with water, and dragging and pouncing the die cut panel in the colors.  
I layered it to a panel of Brown Kraft Core Coredinations paper that I sanded to reveal some of the Kraft Core.  I embossed the sentiment in gold on a strip of vellum and attached it over the panel with small brads.
 Tomorrow I'll be back with a Halloween Card!

I'm linking my card to:
 this is the first time I've used the pinked edge leaf die


Make My Monday - Autumn Colors

Stamps:  Peace and Plenty - Waltzingmouse (no longer available)
Paper:  Arches Watercolor Paper, Rustic Cream, Vellum - PTI, Brown Kraft Core - Core-dinations.
Ink:  Versamark, Ranger Distress Barn Door, Spiced Marmelade, Crushed Olive, Gathered Twigs.
Accessories:  Gold embossing powder, heat tool, small brads, mini sander - Ranger, nonstick craft mat.

Tuesday, September 26, 2017

Fourth Sneak Peek of Book Club Dies from Eileen Hull/Sizzix

Every Tuesday in September, Eileen Hull's Inspiration Team will be showing sneak peeks of the fun new Book Club Dies that will be coming out in the fall  -  we just want to get you excited now and will show more details about our projects just before the dies are released!

One word that sums up the new Sizzix Book Club collection is VERSATILE! 
Eileen is happy to introduce new Three-in One dies- dies that serve multiple purposes to fit into every area of your life. 

There are three new ScoreBoards dies for sturdy project bases and three die sets to embellish them. Each die may be used in many ways- on books, cards, gift boxes, home decor projects, and for storage and organization.

Imagine a die that can create a box, a book and a frame all on one die- we have that! Come explore the Book Club collection with the Inspiration Team and let us know which one is your favorite! Releasing this fall...
Today I'm previewing my project using Eileen's Sizzix Card Box Planner Storage and Organizer die.  I made a holder to put Christmas cards in either for those received - or to give cards as a gift to someone!
I also used Eileen's Sizzix Flower Heart and Soul Die to decorate the sides.
So that's it!  I hope it whets your whistle - and you'll be looking forward to seeing more details here in the fall!
Check out Eileen's Blog for the full gathering of the team's project sneaks each week in September!

Monday, September 25, 2017

September Papertrey Ink Blog Hop

I'm excited to be playing along with the September Papertrey Ink Blog Hop.   Nicole gave us this lovely image for inspiration.
Last month I purchased the Beautiful Berries - Autumn and the coordinating dies and was anxious to ink them up so here is my inspired card.
I used a piece of Kraft Core Coredinations paper for the base panel and I sanded it a bit to reveal the kraft beneath the color.  I layered the black panel to a white card base so the white shows through the dots.  The circles frame was die cut using one of the dies in the Mix and Mat Flourishes Die Set.  I white embossed the sentiment.  After stamping the die cut bittersweet pieces, I sponged all the edges with Ranger Distress Frayed Burlap Ink and layered them over the die cut frame with foam dots.  I added 3 gold enamel dots.

Now I'm off to check out everyone's inspired cards -  are you hopping too?  You'll find lots of inspiration at the PTI blog hop here.  You have until midnight to link up.

Also linking my card to Darnell's NBUS Challenge - the beautiful Berries Autumn is new
 

Stamps:  Beautiful Berries - Autumn - PTI
Ink:  Pure Poppy, Cocoa Bean, Orange Zest, Simply Chartreuse - PTI, Versamark, Ranger Distress Frayed Burlap
Paper:  White - PTI, Black Kraft Core Coredinations.  
Accessories:  mini sander - Ranger, foam dots, Mix and Mat Flourishes Die, Beautiful Berries - Autumn Die - PTI, enamel dots - home made from Perla beads.

Saturday, September 23, 2017

Nevermore Quoth the Raven

Here are a couple of Halloween cards I was inspired to make for today's Splitcoaststampers Inspiration Challenge -   we were to be inspired by the items in the Kirklands Web Store - Fall Decorating Section

Nothing spooky there - not a raven, a crow or even a cat -  so my inspiration came from this frame design and the fall colors!
I used watercolored gold embossed tissue paper (that I created using Loll Thompson's wonderful tutorial) for the background inside the frame.  The raven and cat are Tim Holtz/Alterations Movers and Shapers die.   The Nevermore stamp is from Waltzingmouse All Hallows Eve (no longer available).  The cat sentiment below is from Rubbernecker Halloween Set 1.  The frame is Rectangle Peek a Boo Window die from MFT.
Hope everyone is having a great weekend -  summer has returned to New England - it was 80 degrees today -  I'm actually ready for cooler fall - hope it comes soon!
Kent and I are going to a local antiques fair Sunday afternoon - should be a good day for it!
 
Stamps:  When Black Cats Prowl -  Halloween Set #1 - Rubbernecker,  Nevermore Quoth the raven - All Hallows Eve - Waltzingmouse (no longer available)
Paper:  Canyon Clay, white, true black - PTI, white tissue paper
Ink:  Versamark, Ranger Distress Seedles Preserves , Peeled Paint, Twisted Cintrol, Carved Pumpkin
Accessories:  gold embossing powder, heat tool, foam dots, rhinestones - Amuse, Mini Cat and Raven Dies - Tim Holtz/Alterations, Rectangle Peek a Boo Window die - MFT.

Wednesday, September 20, 2017

But First: Coffee!

Here's my third card for the Fall Coffee Lovers Blog Hop!  You'll find all the details here.  TONS of prizes to be won if you link up your cards!
The rules?
When: Friday, September 15 – Friday, September 22 
THEME: FALL
USE: coffee, tea, or cocoa images
Here's my fall card:
I water colored tissue paper by laying it in 3 Distress inks I had rubbed on my craft mat and spritzed with water. After the tissue paper had dried I glued it to a panel of white card and let that dry.  Then I rubbed Versamark over the creases on the tissue and gold embossed the panel (brushing off any gold powder that got in the spaces)  - Loll Thompson has a wonderful YouTube video on this technique here.  I die cut the dotted frame and white embossed the sentiment and cup on a strip of black card.

I chose my colors from this week's Just Us Girls challenge
I used Ranger Distress Inks in Mustard Seed, Seedless Preserves and Carved Pumpkin.
 
Now it's time to check out all of the other fall coffee/tea cards linked up at the Coffee Loving Cardmakers Blog!
Stamps:  Coffee Set - Ali Express.com
Paper:  White, True Black, white tissue paper
Ink:  Ranger Distress Mustard Seed, Seedless Preserves, Carved Pumpkin, Versamark.
Accessories:  Gold Embossing Powder, heat tool, Mix and Mat Flourishes Die - PTI, foam dots.


Tuesday, September 19, 2017

Third Sneak Peek of Book Club Dies from Eileen Hull/Sizzix

Every Tuesday in September, Eileen Hull's InspirationTeam will be showing sneak peeks of the fun new Book Club Dies that will be coming out in the fall  -  we just wanted to peak your interest now and will show more details just before the dies are released!

One word that sums up the new Sizzix Book Club collection is VERSATILE! 
Eileen is happy to introduce new Three-in One dies- dies that serve multiple purposes to fit into every area of your life. 

There are three new ScoreBoards dies for sturdy project bases and three die sets to embellish them. Each die may be used in many ways- on books, cards, gift boxes, home decor projects, and for storage and organization.

Imagine a die that can create a box, a book and a frame all on one die- we have that! Come explore the Book Club collection with the Inspiration Team and let us know which one is your favorite! Releasing this fall...

Today I'm previewing my project using Eileen's Sizzix Movers and Shapers Magnetic Die - Book Binding .  I made a little book to hold photos from Christmas past!
(the mini discs binding the book are from Me and My Big Ideas)
So that's it!  I hope it whets your whistle - and you'll be looking forward to seeing more details here in December!
Check out Eileen's Blog for the full gathering of the team's projects sneaks each week in September!

Monday, September 18, 2017

2nd Card for the Fall Coffee Lovers Blog Hop

Here's my second card for the Fall Coffee Lovers Blog Hop!  You'll find all the details here.  TONS of prizes to be won if you link up your cards!
The rules?
When: Friday, September 15 – Friday, September 22 
Time: 6 am pacific
THEME: FALL
USE: coffee, tea, or cocoa images
Here's my fall card:
I made a floating image window on my card using the Rectangle Peek a Boo die from MFT.  I added a piece of tulle between the layers of DP and card base and adhered my coffee grinder die cut with foam dots over the tulle. I added a reverse die cut of the grinder to the back so you don't see the foam dots when you open the card. I fussy cut another Peek a Boo Frame out of Dark Chocolate card and layered it over the opening with foam dots.  The leaf is die cut out of a piece of thin wood.  The sentiment is from a coffee set  and the grinder is from a coffee die set - both sold on Ali Express.

You will find a wonderful YouTube video by Jennifer McGuire on the floating image window design here
Now it's time to check out all of the other fall coffee/tea cards linked up at the Coffee Loving Cardmakers Blog!

Also linking my card to:
I used the colors
Happy Little Stampers
Stamps:  Coffee Set - Ali Express
Paper:  Rustic Cream, Dark Chocolate, Text Style Autumn Abundance - PTI,  brown - Kraft Core Coredinations, thin wood sheet.
Ink:  Coffee Bean - PTI
Accessories:  Rectangle Peek a Boo Window Die - MFT, Coffee Grinder Die - Ali Express, stitched leaf die - Lawn Fawn, foam dots, tulle.
  

Sunday, September 17, 2017

Sharing a few Cards!

Just wanted to share a few cards that I've made in the past few days for various challenges over at Splitcoaststampers!

This card was made for the Inspiration Challenge. 
I was inspired by this Ceramic Tree Bowl on Audrie's My New House Idea Pinterest board.
Loll gifted me the die for this lovely tree (thank you Loll!) that I cut out of Kraft Core Coredinations paper and sanded a bit to distress it. I popped it up on the Soft Stone panel cut with a stitched edge rectangle die from Lil Inker to try and make shadows like on the bowl.
I stamped this lovely sentiment from a stamp set by my friend Alison Bomber for PaperArtsy using Cocoa Bean Ink and layered it all to a white card base.

  I made these cute pumpkin place settings (or decorations) for this week's Try a New Technique challenge - 3D pumpkin placecards! (you can find the tutorial on SCS  here if you are a member)
 I made my pumpkins 2" so I used 6 pieces of DP for each pumpkin, measuring 1/2" x 6" each. I used ScorTape to adhere the strip ends.
I adhered my pumpkins to die cut leaves that were adhered to grunge board to make them sturdy. I used Kraft Core paper for the leaves and sanded them so some of the kraft showed through.

I made the stem of my pumpkins out of short pieces of real cinnamon sticks and knotted three pieces of green twine around the stems. The words are Big Chat Stickers that I layered to brown card and adhered to the stems with my hot glue gun.

My last card was made for several challenges at SCS, the Ways to Use It Challenge - to use a light house, the Free 4 All challenge to use an encouraging sentiment, and the Featured Stamper who was Sue this week, and I CASED  this lovely light house card in her gallery.

I made my background by rubbing Broken China Distress ink and Salty Ocean Distress Oxide ink on my craft mat, spritzed with water and then dragged a panel of watercolor paper though the inks, drying, re-dragging through the inks, drying - until I was happy with how it looked.

Then I cut a piece of computer paper with a wavy line (I actually have a paper cutter that does that!) and laid the mask along the bottom of my panel and sponged with Walnut Stain Distress to create the darker layer of earth - moved the mask up a little and sponged again with Frayed Burlap Distress ink to make a lighter layer of earth.

I die cut and stamped the light house, sponged one side with Frayed Burlap and layered it over the panel with foam dots. I stamped the birds and sentiment directly onto the panel.
 
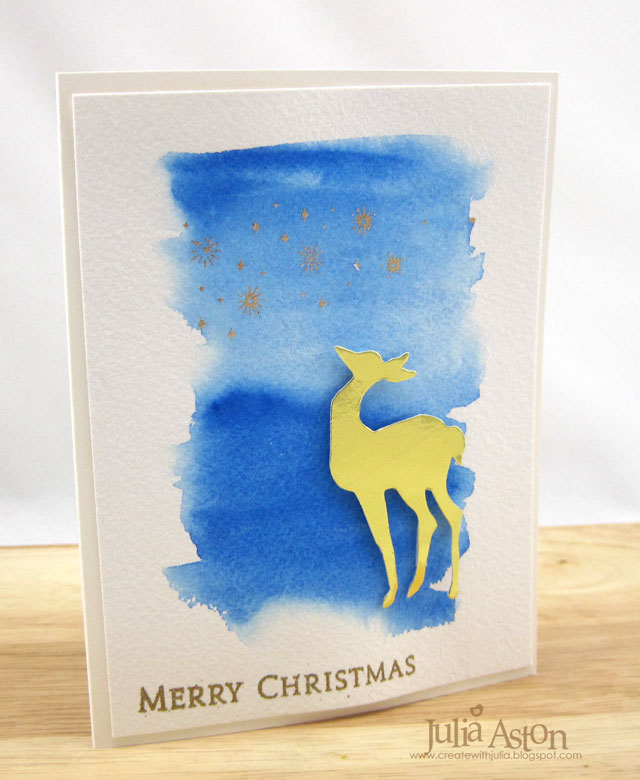
and I wanted to share a 2nd card I made just like the one above but used MultiMedia Paper instead of Watercolor paper for the panel - and used a mix of different blue Distress and Oxide inks - every time you make a background with this technique it comes out differently!
A group at my church sends out cards to the elderly at home and I thought these cards would work well for that purpose.
I hope everyone has had a lovely weekend!
Trees are Poems
Stamps: PaperArtsy Eclectica3 - EAB01
Paper: White, Soft Stone - PTI, tan Kraft Core Coredinations
Ink:Cocoa Bean - PTI
Accessories:Tree die - gift from Loll, Stitched Mat Rectangles - Lil Inker Designs, foam dots, mini sander 

Pumpkins
Paper:DP-Text Style Autumn Abundunce - PTI, Kraft Core Coredinations green and orange, grunge board - Ranger, Dark Chocolate - PTI
Accessories: mini sander, Tattered Leaves Die - Tim Holtz/Alterations, Glue Gun, Tombow Glue, Scortape, Big Chat Stickers - Idea-ology, Peapod Twine - The Twinery, Cinnamon sticks 

I am the Light
Stamps: Guiding Lights, Light of Life - PTI
Paper:Arches watercolor paper, white, True Black - PTI
Ink:True Black, Soft Stone - PTI, Ranger Distess Broken China, Walnut Stain, Frayed Burlap, Ranger Distress Oxide Salty Ocean
Accessories:Guiding Lights Dies - PTI, non stick craft mat, water mister, foam dots.
 

Friday, September 15, 2017

CAS Mix Up Challenge - Watercolour Wash - Mid Month Reminder!

I'm here today to remind everyone that there's still time to join in the September CAS Mix Up Challenge
You have until Sept 24th to link up your watercolour wash CAS card.
There are several YouTube videos on watercolour wash over at the challenge blog so you can learn a new technique in the process!  We're always looking for new ways to be creative on our cards right?!

For my reminder card I used stamping, watercolour wash, wet embossing, dry embossing, Nuvo Jewel Drops and sequins!
I stamped my sweet Agatha Flower from Stampotique and the Monet quote from PaperArtsy using Archival Jet Black ink on a panel of watercolor paper.  I quickly covered the stampings with clear embossing powder and heat embossed them.  I did a water colour wash over the background with blue and green watercolor paints and water.  After the background dried, I water coloured the flower girl image  
(I had a little color bleed off her hair - oops! Oh well, no art is perfect right??)

 I added Orange Marmalade and Key Lime Nuvo Jewel Drops to the flower center and stem for a little gloss and dimension. 
 (Trying to show the gloss in this close up)
 So please join us and link up your watercolour wash CAS card up over at the CAS Mix Up Challenge blog!  


Stamps:  Trees and Flowers - Eclectica3 Alison Bomber - Paper Artsy, Flower Girl - Stampotique
Paper:  Canson Watercolor Paper, White - PTI
Ink:  Archival Jet Black
Accessories:  Clear embossing powder, heat tool, watercolor paints, water, paint brushes, painters tape (to mask edge), Heritage Embossing folder - Provo Craft, Vintage Chic Sequins - Lucy's Shop, Key Lime and Orange Marmalade Nuvo Jewel Drops.

Fall Coffee Lovers Blog Hop!

Time to get your coffee on!   It's the Fall Coffee Lovers Blog Hop!  You'll find all the details here.
The rules?
When: Friday, September 15 – Friday, September 22 
Time: 6 am pacific
THEME: FALL
USE: coffee, tea, or cocoa images

My Fall Coffee card:
I die cut stitched leaves out of a thin real wood sheet, layering them over the plaid paper that I cut with a Tipped Top Die from PTI.  I die cut and stamped the cup and layered it over the leaves with foam dots.  I stamped the sentiment directly onto the paper and added 3 small brown enamel dots.
I layered the whole panel onto an orange Bazzill panel to add more texture.
Now it's time to check out all of the other fall coffee/tea cards linked up at the Coffee Loving Cardmakers Blog!

Also linking my card to:
I used the colors
Happy Little Stampers

Stamps:  Tea cup - Tea for Two Additions - PTI, Sentiment - Coffee Set/Stampabilities.
Paper:  Vintage Cream, Text Style/Autumn Abundance - PTI, Bazzill Orange, thin wood panel.
Ink:  Coffee Bean - PTI
Accessories:  Tea cup die and Tipped Tops Die  - PTI, Stitched Leaves dies - Lawn Fawn,  brown enamel dots - My Minds Eye, foam dots.

Wednesday, September 13, 2017

A Golden Deer

Today I have a card to share that I made for a few challenges.
I made my watercolor wash background by first brushing water over the area I wanted to have color on.  Then I added blue watercolor paint to my brush and brushed it across the water from side to side moving the brush down each 'row'.  I added more blue to my brush when I hit midway to have a little delineation between sky and ground. 
I added a golden deer silhouette that I cut with the Mini Reindeer Movers and Shapers die from Tim Holtz.  I added golden starts using Remnant Rubs/Gilded Holidays from Idea-ology.  And I stamped the Merry Christmas with Versamark and embossed in gold.

I'm linking my card to:
I used stamping, watercolor wash background, rub ons, and a die cut.
I love ALL the Holiday Movies - but especially love the kids ones so my card was inspired by Rudolph the Red Nose Reindeer!
(although here, Rudolph has matured and is more contemplative!)
My gold stars/snowflakes, the deer and the embossed sentiment really sparkle IRL!
One more for the Christmas Box!

Stamps:  Inside and Out Holiday - PTI
Ink:  Versamark
Paper:  Arches Watercolor Paper, gold cardstock - Michaels
Accessories:  watercolor paints, brush, water, Gold embossing powder, heat tool, Remnant Rubs/Gilded Holidays - Idea-ology, Mini Reindeer Movers and Shapers Die - Tim Holtz/Alterations, foam dots.