
It's time for the Group Of Seven Cardmakers September post. This month we are playing with the technique of Stencil Monoprinting. You will find links to how to videos over at The Group of Seven Cardmakers blog.
You can create beautiful backgrounds or focal points for your cards, depending on the design of the stencil. Basically you are using the background of the stencil to create your panel. You can leave it as is on your card, or you can place the stencil back over top to add different ink colors or embossing paste to fill in the design.
Due to the larger/longer sizes of the stencils I used, I made all my cards Mini Slimline size - 3" x 6".
Rosette Stencil from Tim Holtz/Stampers Anonymous - Salty Ocean Ranger Distress Ink
Gondola dies are Alexandra Renke

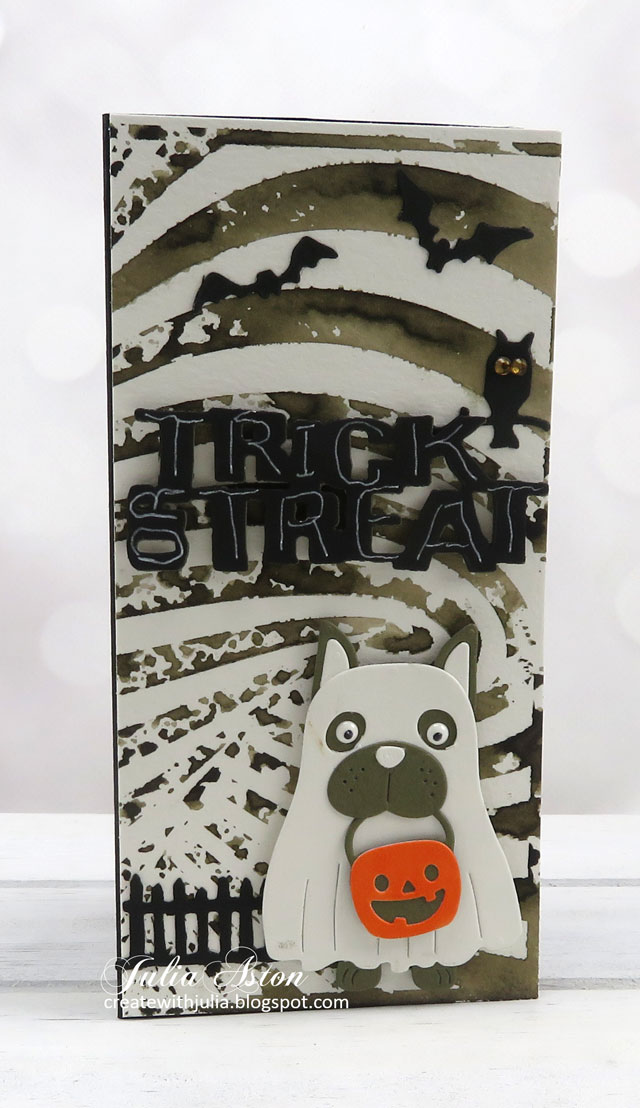
Illusion Twist Stencil from Altenew - Scorched Timber Ranger Distress Ink
Succulent Stencil from Stencil Girl - Mowed Lawn and Forest Moss Ranger Distress Inks


A few photos of how I made my backgrounds.
Rub water reactive ink (like Ranger Distress inks) over stencil and spritz liberally with water. For this panel I used two colors - Mowed Lawn and Forest Moss.
This stencil is 6"x6" so I was able to make 2 mini slim line cards from it (3"x6")


Flip the stencil over onto a panel of watercolor paper and press over the stencil to help the watery ink absorb into the paper.


Remove the stencil and again press over the panel with paper towel or cloth to absorb any pools of watery ink.


We hope you'll give this stenciling technique a try! We have a Mr. linky over at The Group of Seven blog so you can share your card with everyone. We'd love to see what you create!

I'm linking my Halloween card to:

First time using the ghost dog die

Linking my Gondola card to:
Peace on Earth Christmas ends 10/3
red and blue colors

ends 10/1

Linking my plant card to:
ends 10/2


Gondola Ski Christmas Card
Stamps: Two Feet Deep - PTI (retired)
Paper: Watercolor - Canson Cold Press, White, Pure Poppy, True Black - PTI
Ink: Salty Ocean - Ranger Distress, Nocturne- Versarine Clair
Accessories: Rosette Stencil - Tim Holtz/Stampers Anonymous, Die - Small Cable Car - Alexander Renke, foam dots, twine, paper towels or cloth, water mister.
Dog Ghost Halloween Card
Paper: Watercolor - Canson Cold Press, Olive Twist, True Black - PTI, hammered white (on ghost) - Amazon.
Ink: Scorched Timber - Ranger Distress.
Accessories: Illusion Twist Stencil - Altenew, Ghost Dog die - Amazon, Halloween Shadows - Tim Holtz/Alterations, orange Copic, foam dots, tiny gold gems - Gina Marie Designs, white enamel dots - Altenew, Black sharpie pen (pupil on eye), water mister, paper towels or cloth.
Succulent Cards
Stamps: Plant Kindness - Stampotique, Way to Grow - The Greetery.
Paper: Water color - Canson Cold Press.
Ink: Mowed Lawn, Forest Moss - Ranger Distress, Nocturne - Versafine Clair
Accessories: Succulents Stencil - Stencil Girl, Dimensional Plant Stickers - Recollections, water mister, paper towels or cloth.


.png)


.png)


.png)


.png)


.png)