Saturday, October 3, 2020

October CAS Christmas Card Challenge - Christmas Birds

Today I have a card to share for the October CAS Christmas Card Challenge.  Christine is our creative and talented hostess this month and she wants to see Christmas birds!
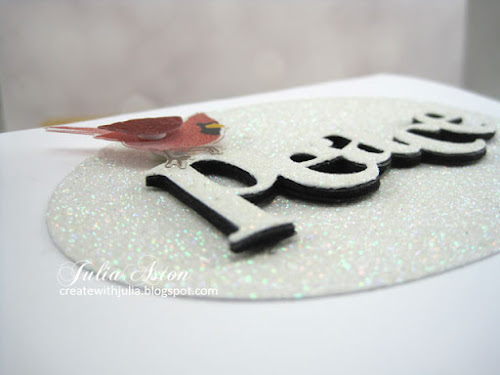
I used a cardinal for my Christmas bird - one of my favorite birds summer or winter, but they do look so lovely with their bright red against the sparkle of snow!  
This cardinal is from a 3D sticker set I found at Michaels.  There are 9 cardinals in the package, two different sizes and some facing left, some facing right - they are plastic and the wing is popped up on a foam dot.  I love their little feet too!  I bought them months ago just because I loved them - and this little cardinal was perfect for this months challenge!
I die cut the oval and the Peace (both from PTI) out of white Glitter Card stock from Michaels.  I die cut another PEACE out of  black Fun Foam and glued the glitter Peace on top of the foam - this gave the word depth and also defined the edge so it can be seen being white on white.  I added an extra foam dot to the one that came on the cardinal since it's popped up on the thick word. I used glue on the dot as well as the back of the PEACE so it would stick to the glitter card.
 
I love the cardinals little feet perched right on the P!  This card is very sparkly IRL but it does not show up well in the photo.
Here are some close ups


This was such an easy card to make but looks quite impressive I think?!!

So please join us in getting those Christmas cards done before the rush (it's already October people!!), and share with us your Christmas Birds on your CAS design cards!

You'll find lots of inspiration from the Design Team as well as our October Guest Designer over at the CAS Christmas Card Challenge here.


Paper:  white - PTI, White Glitter Cardstock - Michaels.
Accessories:  Pierced Feature: Ovals die,  Wonderful Words: Holiday - PTI, foam dots, black Fun Foam sheet - Darice, Cardinal Stickers - Michaels, Ultra Bond Adhesive - iCraft.

Thursday, October 1, 2020

Eileen Hull's Chapter 4 Sizzix Dies Blog Hop - 3D Tea Cup and Post Box

Eileen Hull's Inspiration Team is so excited to share the news that Eileen has two new Chapter 4 Sizzix Dies being released soon - and we are joining in a blog hop and a FB Release Party to show you lots of ways to create with them!


The new dies are 3D Tea Cup and Post Box -and will be available in October. Here are the projects I made using each one.  I made mine for Christmas time!

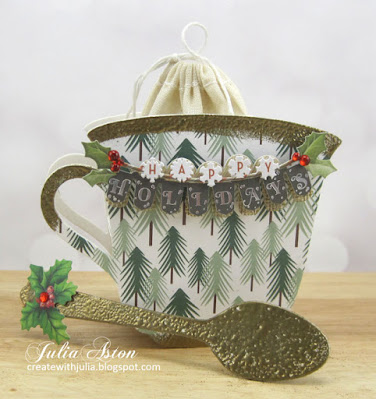
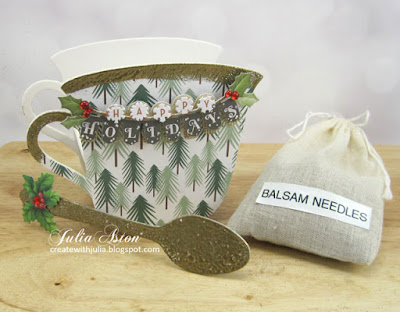
I made a little holiday gift  using the 3D Tea Cup Die - perhaps for a hostess gift or a little present for a friend or loved one.   

The teacup has a front, back and sides to make it a box and measures 4 1/8" x 3 3/8" x 1 3/4" 

You can also just use the teacup front on a card, create a garland or use it as a book cover.

I filled a muslin bag with pine needles (purchased at a garden shop also available on Amazon)  and placed it in the teacup!  Not to drink (!) but to give that lovely pine smell when it's picked up and squeezed!

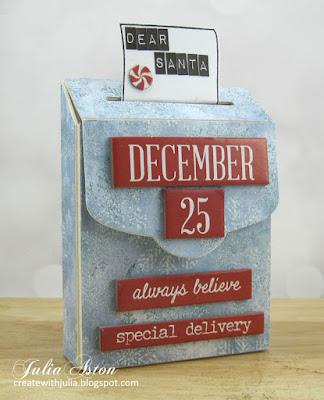
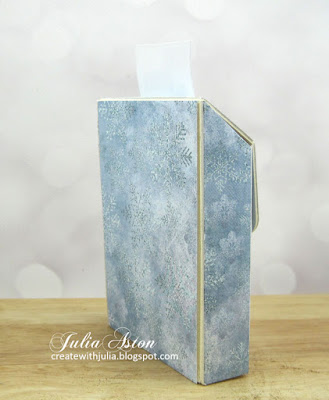
I used the new Post Box Die to make a little 'mail box' for a child (or an adult!) to put their note to Santa in.  

This cute box measures 3 1/4" x 4 3/8" x 1 1/8".

I used Velcro to hold the top flap closed.

Next week I'll be posting brief tutorials on how I put these two projects together (they were both very simple!), here on my blog, so I hope you'll check back -  but for now we'd love you to go on the blog hop!

Here are the links to the Design Team's blogs participating in the hop. 

 Leave a comment at each stop and at 12 noon EST on FB live at Eileen Hull Designs for a chance to win one of the new dies!  Two random comments will be chosen!

Eileen Hull

Tonya Trantham

Elizabeth Robinson

Julia Aston:  you are here!

Pam Bray

Maggi Harding

Lisa Hoel

Anna-Karin Evaldsson

Karen Bearse

Susie Bentz

Jenny Marples

Mitsyana Wright

Jennie Atkinson

Anita Houston

Madeline Arendt

Sarah Lizzie Dodd

Sue Eldred

Debbie Bankston


3D Tea Cup

Paper:  Little Sizzles White Matboard - Sizzix, DP - Patterns and Pine 6x6 Paper Pad - Catherine Pooler.

Ink:  Versamark

Accessories:  3D Tea Cup Die - Eileen Hull/Sizzzix, Happy Holidays Stickers - Jolees Boutique, Holly sticker - K and Co., Golden Rod Molten Dimensions embossing powder - Eileen Hull/Emerald Creek, Heat Tool, Balsam Needles - Garden Shop or Amazon, Muslin Bag - purchased on line, Ultra Bond Adhesive - iCraft.


Post Box

Stamps:  My Type - Hero Arts

Ink:  Obsidian - Altenew

Paper:  Little Sizzles White Matboard - Sizzix, DP North Wind 6x6 Paperpad - Craft and You.

Accessories:  Post Box Die - Eileen Hull/Sizzix, Tombow Glue, Quote Chips: Christmas, Label Letters - Tim Holtz/Idea-ology, Chipboard Peppermint sticker - K and Co.

Friday, September 25, 2020

A Linky Birthday Party for Nancy

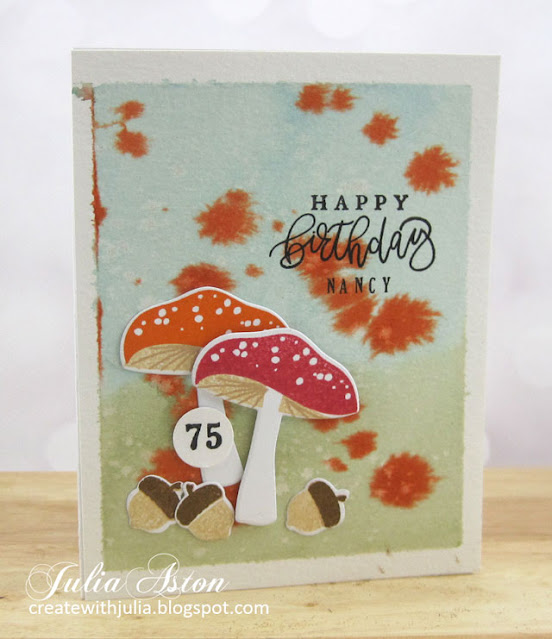
Today, Loll is hosting a linky birthday party for Nancy Littrell who is turning 75 today!  I have known Nancy for many years as we both participate in challenges over at Splitcoaststampers and also are on Design Teams for Loll's CAS Challenges.  What a milestone of a birthday!  She is certainly a very YOUNG 75, as she is so active: hiking, gardening, preserving and canning the crop from her garden, camping and, of course, stamping!

So with this card I'm wishing Nancy a very Happy Birthday!

I did a watercolor wash for the background on watercolor paper that I had masked the edges on and then flicked watery orange re-inker over it.  I added a little sparkle to it by flicking some Clear Glitter Wink of Stella over the panel.    You can hopefully see the sparkle a little better on the close up below (the white splatter?!)

 
If you'd like to add your birthday card to the Linky party or just see lots of inspiration for birthday cards -  you'll find it on Loll's blog here!
The linky is open for two weeks. 

I'm also linking my card to:
 
200th challenge
I was inspired by the watercoloring and splatter


Stamps:  Forest Floor: Autumn - PTI, Just Sentiments: Birthday Stamp Set - Ink to Paper, Karen Foster Snap alphabet and number stamps - (retired)
Paper:  Water color paper - Canson, White - PTI
Ink:  Obsidian - Altenew, Really Rust, Soft Sky, Mellow Moss - SU Reinkers, Pure Poppy, Fine Linen, Classic Kraft, Orange Zest, Cocoa Bean - PTI 
Accessories:  
brush, water, heat tool, Forest Floor-Autumn Dies - PTI, Clear Glitter Wink of Stella, foam dots, 5/8" circle punch - EK Success.

Tuesday, September 15, 2020

A Christmas Tree for the Chickadee

I have Christmas card to share today - a reminder that there is still time to join in on the Sept. CAS Christmas Challenge
I made a Christmas Tree for a chickadee to celebrate the holidays.  Animals need to decorate their woodland homes too right??!!

Stamps and dies are from Winter Woods by PTI.  I inked the pine branch using Distress Walnut Stain and Forest Moss.  I inked the bird with Stormy Sea and True Black from PTI. 

The sentiment is a Metallic Sticker/Holiday Talk from Idea-ology.  I added 3 enamel dots from Altenew as either ornaments or berries!  Little chickadee is popped up on foam dots.
We'd love to see your CAS Christmas Tree card design!   Check out the inspiration from the Design Team and our lovely Sept Guest Designer and add your card to Mr. Linky over at the blog!

Stamps:  Winter Woods - PTI
Paper:  White - PTI
Ink:  Ranger Distress Walnut Stain, Forest Moss, Stormy Sea, True Black - PTI.
Accessories:  Winter Woods Die Collection - PTI, enamel dots - Altenew, Metallic Stickers Holiday Talk - Tim Holtz/Idea-ology, foam dots.

Thursday, September 3, 2020

September CAS Christmas Card Challenge - Christmas Tree

Today the September CAS Christmas Card Challenge is up on the blog.   Colleen is our creative hostess this month and she would like to see Christmas Trees on our CAS cards this month.
 
 I was happy to get out my recently purchased Tim Holtz Layered Pine die from Sizzix.  I cut the 2 layers of the tree out of Glitter Cardstock from Michaels.  Since the die cuts both pieces of the tree with one swoop - I also made a card with the green as the background and the blue as the smaller front layer! 

I used the Halftone Cover Die from Altenew to cut the circle 'ornaments' out of white Glitter Cardstock.  It's a background die of graduating size circles and was an easy way to get lots of perfect circles cut at once!

   I layered the tree over an oval cut using Pierced Feature Frame: Oval die from PTI.  
The sentiment is a Small Talk Occasions Sticker from Idea-ology. 

I used glue to adhere all the pieces as you need something strong to stick to the glitter cardstock.   The tree is up on foam dots and I added glue to the back of the dots as well so the tree would stick to the oval.
We hope you will join us in getting a jump on your Christmas card needs this year and link up some CAS Christmas Tree designs!    
You'll find lots of inspiration from the rest of the Design Team as well as our talented September Guest Designer.    
You'll find the challenge here and you have until Sept 24th to link up!


Paper:  White - PTI, Glitter Cardstock - Michaels.
Accessories:  Layered Pine Bigz Die - Tim Holtz/Sizzix, Halftone Cover Die - Altenew, Pierced Feature Frame: Oval - PTI, Small Talk Occasion Stickers - Idea-ology

Tuesday, September 1, 2020

Life is Better Around the Campfire

This month Eileen Hull's Inspiration Team is creating Celebrate the Great Outdoors projects using her dies. 

For my project I've created a vignette of a Camp Site - using her retired (unfortunately!) Travel Trailer  Die. (you may find it on Ebay or Amazon).  I used her House Pocket die for the windows and door on the trailer and her Gift Box Scalloped Die to make the base and back piece of the scene.    

I have tons of photos I'm excited to share.

Here first, are views of my finished camp site.


Here are some photos of how I put it together. 
I die cut the pieces of the trailer out of Sizzix Mixed Media Board as well as Kraft Stock Metallic Paper from Tim Holtz.  I trimmed off the tabs on the silver pieces as they are just glued to the inside of the trailer.  I sanded the silver to make it a little less shiny.


 I cut additional 'tires' out of black cardstock and punched smaller circles of silver for hubcaps.  Then I adhered the tires on the inside of the trailer as shown below.


 Here it is from the front, you can see the tires


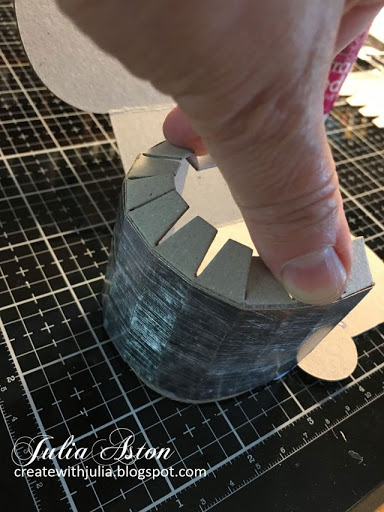
 I folded up the tabs and adhered one end to the trailer as shown, curving it to fit the edge.


I pressed  down on the top until the glue took hold.


Here it is with both sides adhered.  Then I put glue on the top tabs and pressed the other side of the trailer onto the tabs, adjusting them to the edge before the glue dried.
 

  Then I adhered the piece with the trailer hitch to the bottom
and here's the little trailer all ready to have it's windows or other decorations put on.

I die cut windows and a door out of silver metallic paper using Eileen's House Pocket Dies.  They are a perfect size for the trailer, but I could have just cut squares and rectangles if I didn't have these dies
I placed a piece of tape behind the windows and die cut more windows out of a light blue paper (it looks white here) I placed the blue 'glass' inside the frames held by the tape, then trimmed the tape off any edges.

I thought it would be nice to make a step up into the trailer and after fiddling around with a piece of silver metallic paper, I came up with this simple design

Here's a view from the side

And here it is on the trailer.  I glued the 1/4" end piece to the bottom of the trailer under the door.

I used Eileen's Gift Box Scalloped Edge die to create the base and back board for my scene.  I cut 3 of the box sides out of matboard and covered them with paterned paper. I wanted the front piece to be the sandy beach and the lake (or ocean) that the campsite was on.  I taped the two bottom pieces together with packing tape and then decided to add a full piece of cardboard to it for extra support.  I glued the bottom edge of the back piece onto the grass piece angling the sides in to create an enclosure.

I die cut trees from Tim's Village Landscape Sizzix Die and painted them with watercolor paints.  I die cut a camp fire and a coaster to put under the steps so no sand would get tracked into the trailer! (I ended up using a different piece of DP for my final mat.


To add a little dimension to my scene, I added some stones to the waterline, a deer and mushrooms around the trees, and I brushed Crackle Accents over the waves.   I removed the trailer for these photos so you could see the background.  The image panels are from Forest/Stamperia, the sentiment is from Taylored Expressions.

The white rocks are Art Stones from Prima and worked perfectly along my shore line.
The fire pit was made by die cutting two circles out of black fun foam and then cutting them again with a slightly smaller circle die and gluing the two pieces together.   The fire is a die from Taylored Expressions.  The mushrooms and flowers are from Field Notes Ephemera Snippets Pack from Tim Holtz.
I would love to be staying in this sweet little trailer right on the water!


You can see the crackle on the waves below.


I hope you have enjoyed seeing my little campsite - I really had fun creating it.   

Please check out Eileen's Blog every Wednesday in September to see what the rest of the Inspiration Team has come up with for our Celebrate the Great Outdoors projects!


Stamps:  Paddle Out - Taylored Expressions.

Paper:  Mixed Media Board, White Little Sizzles Matboard- Sizzix, True Black, Pure Poppy, Dark Chocolate, Orange Zest - PTI, Kraft Stock Metallic Silver - Tim Holtz/Idea-ology, Clouds and Grass Paper Pad - Joann, Cottage Stripes and Dots Paper Pad - Memory Box,  Beach Vibes Paper Pack - Honey Bee Stamps, River Rock Paper Pad - Provo Craft.

Ink:  Obsidian - Altenew

Accessories:  Travel Trailer Die, House Pocket Die, Gift Box Scalloped Edge Die - Eileen Hull/Sizzix, Circle Nestabilities, S'more than a Feeling Die - Taylored Expressions, Coaster Die - The Greetery, Bigz Die Village Landscape - Tim Holtz/Sizzix, plastic deer from stash, Neutral Candy Dots - SU, Black fun foam, Art Stones - Prima, Crackle Accents - Ranger, Beacon 3 in 1 Glue, Packing tape, Kuretake Water color paints, Ultra Bond Adhesive - iCraft.