There's a brand new challenge out there - the brainchild of Autumn, of
Sew Paper Paint. The Challenge blog is called
Mini Album Makers Challenge - and it's all about making mini books, albums, journals etc! There is a super talented design team that will be sharing tutorials and creative ideas each month.
So, I love miniatures - and I was looking for some book inspiration over on Pinterest and ended up on this wonderful ETSY shop -
WeLoveMiniatures - by Annie Fryd Christensen from Denmark. She sells miniature printouts of old books - botanicals, shells, poultry, and she shows you how to make them into tiny books on
YouTube.
So I immediately ordered 5 of her PDF files
(they come to your e-mail to download as soon as you've completed payment!), printed them out and pretty quickly (two hours) made two tiny books and a box to put one of them in.
Here are photos of the process in creating these sweet little books.
Supplies:
The PDF file of the Philipo Bonnani Shells 1684 book printed on computer paper - I've cut the strips of pages and the cover pieces.
Glue Stick
Tacky Glue
Die Pic or other pointed object to score edges for folding
a metal ruler
a brown or tan ink for distressing
Gold Leaf - Rub N Buff (or anything gold for lines on binding)
a small piece of white cardstock to glue book cover to
You glue the front cover to a piece of white card stock with a glue stick. Then cut it out close to the edges. Then you turn the cover over and glue the inside piece with the binding lines on it to the cardstock.
Then score along the binding lines with a Die Pic so it folds cleanly
Leave to dry a few minutes then curve the binding around the pic to round it.
To age the cover, rub a brown ink pad over the edges, inside and out.
Score all the lines on the two strips of book pages.
Attach the two strips of pages at the blank piece using a glue stick
Fold up the pages.
Reopen the pages and lay flat, face down. Add glue using the glue stick to all the pages accept the first and last (they will be adhered to the covers). Press each group of two pages together all along the folds so there's a front and back to each page - leaving the first and last free.
Add Tacky Glue to the inside cover along the binding lines and press the back edges of folded pages into the binding. Let dry.
Add some Tacky Glue to the back cover and press the back page onto the back cover. Do the same with the front cover and page.
Rub your brown ink pad on all the edges of your pages
Add some gold to the edges on the outside binding.
(The box has a soft pink roses pattern on it but it got a little washed out in the photo!)
I added a piece of Tim's Tissue Wrap inside the box to wrap around the book.
I tied some twine around the box and the other book.
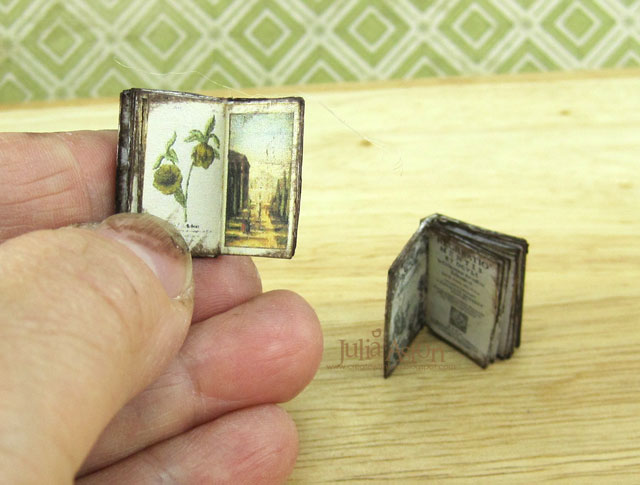
Here are some of the pages in the tiny books.
The floral one has images in color, the shell one is black and white.
(I should have washed the ink off my thumbnail!)
I wanted to make miniatures to sell at our upcoming church fair along with hand stamped cards - and wanted them to be fairly easy to put together but look professional - and I think these really fit the bill!
I used
the PDF files J. Duke Compleat Florest Botanicals 1747 and Philipo Bonnani Shells 1684 for my books. I still have the Birds and Nests, Miniature Muses and Medical Bothany to make - and will no doubt soon purchase the Miniature Fruit and Poultry!
So what Mini Albums will you create for
the challenge? There is a prize of Seth Apter products to one lucky random entry this month! You have until Sept 30th to link up!
I'm also linking my vintage tiny books to:


 I die cut stitched leaves out of a thin real wood sheet, layering them over the plaid paper that I cut with a Tipped Top Die from PTI. I die cut and stamped the cup and layered it over the leaves with foam dots. I stamped the sentiment directly onto the paper and added 3 small brown enamel dots.