
 The rules for this award:
1. The winner can put the logo on her blog.
2. Link the person you received your award from.
3. Nominate 7 other blogs.
4. Put links of those blogs on yours.
5. Leave a message on the blogs you've nominated.
So I am, in turn, passing this award on to the following blogs I enjoy checking out - Please click on their names and hop on over to say hello and check out their 'stuff' !!!
Zakka she makes all kinds of fun crafts - especially for kids
Neva She often covers multiple challenges on one card!
Cindy - always has a story to go with her card!
Pam - a fellow Design Team member for Artful INKable Stamps who makes lovely cards!
Beth - a fellow DT member who makes beautiful cards!
Kim - a fellow DT member from Canada who makes super detailed cards!
Jenn - the 4th DT member from Hawaii who makes works of art cards!
And here are the 5 cards that I made at Lauren Meader's Class at the Papertree in Manchester, NH that I took last Sunday. I told you about them on a previous post and finally got them photographed.
I don't have the names of all the papers and stamps we used - but I can tell you how we made them.
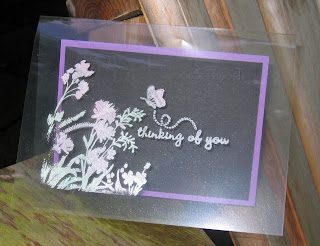
On this first card - the flower was made by running a piece of DP through a Xyron laminating machine to put sticky adhesive on top of it - then you attach a piece of acetate over the DP. Stamp your flower (or whatever you want stamped) on the acetate with black Stazon Ink. Let it dry - then soak the DP/acetate square in water for 3-4 minutes - then gently rub off the dp from the acetate until there is just a thin layer of DP left so you can almost see through it. Let it dry and then attach to the card. I think she called this 'stained glass acetate' technique.

On this second card we attached a colored circle to the groove in these clear buttons using a thick glue dot. Then you turn the button over and stamp a flower on the flat side using white stazon ink. Then attach to the card - stamp leaves and make stems with a piercing tool.

On this cute card - we punched a circle in the strip of DP - marked the circle on the white card beneath - then stamped and colored the penguin within the circle on the card. We used a white dottted bg stamp to stamp on the acetate square with white stazon to look like snow. Then attached the acetate panel behind the circle in the DP. We attached the panel with foam dimensionals over the stamped penguin on the card. Stamped the sentiment and attached over the panel.


Thanks so much for stopping by!
4 comments:
Julia, it looks like you had a fun filled class. GREAT cards!!!
These are lovely! What a fun class that must have been! Thank-you so much for sharing the techniques with us. And thanks for the special recognition!!
These are fabulous, love those buttons!!!
Great cards my friend just a wonderful job! I enjoy my self everytime i come to visit your site.Thank you so much for sharing your ideas and others with us all.
hugs ginger(lovestodream)
Post a Comment