Friday, February 29, 2008

The Simplest Things


I went out to eat with a friend tonight and I was already late - but I had this card in my head all day at work for todays Split Coast - Limited Supplies Challenge - to use just one flower on a card - no cuttlebug, no designer paper - so I had to do it before I went out!

I used just one stamp - by Cornish Heritage Farms and colored it with my Prismacolor markers. Sometimes simple is more expressive than layers and ribbons, brads and punches.

It's funny - when I first started to stamp many years ago - all my cards were like this - just the stamp - no layers or embellishments - more so because I didn't have supplies or the knowledge of how to put things together - and I do like putting more things on cards now - but once in a while a simple one like this hits the spot - like a breath of simple fresh air.
Thanks for coming by on this Friday night! I'll see you tomorrow with my Inspiration card and maybe something else!

Stamps: Cornish Heritage Farms - Cat Dancing Designs
Paper: Papertreyink white
Ink: Pitch Black Adirondack
Accessories: Prismacolor markers

Thursday, February 28, 2008

Music in My Heart

Good evening everyone! I'm late in posting tonight because I had my hair cut after work - a girl has to do what a girl has to do, right?! So then I had to make supper before making my card because I was starving!

Today's Ways to Use it Challenge on Split Coast was to use music on your card - either a music stamp or a card about a song. I decided to go with music stamps since I had a few.
I used my music sheet stamp from Penny Black on a heart that I cut with my nestability dies and layered it with 2 other hearts that I also ran through the Cuttlebug using 2 new folders - Swiss Dots and Floral Fantasy. I just love these 2 new folders . I also got the numbers one - and hope to use that on a card soon.
Don't you just love the striped DP from K&CompanyAmy Butler? It's textured and has such nice vibrant colors. I bought a 4x6 book of a variety of Amy Butler prints at Michaels. They also sell little purses made out of the same paper - they are so cute! You have to go see them!
But I digress! Back to my card...... my sentiment from Stampabilities goes along with the music theme. I stamped some notes by Magenta on the sentiment in Soft Sand Shadow Ink by Memories that you can just see like a shadow in the picture!
I punched a slot in my sentiment and laced my pretty new ribbon from PapertreyInk through it and slipped a pearl pin through the knot.
Thanks for coming by today! I've hit 1000 views in two weeks so I'm very excited about that!
I'd love to hear what you think of my blog -click comments below!
Stamps: Music sheet- Penny Black, Sentiment: Stampabilities, Music Notes: Magenta
Paper: Sage Shadow, Very Vanilla, Chocoloate Chip, DP: Bohemia My Minds Eye, K& Co Amy Butler
Ink: Pitch Black Adirondack, Soft Sand Shadow: Memories
Accessories: Nestability hearts, PaperTreyInk Ribbon Spring Moss, Cuttlebug folders: Swiss Dots and Floral Fantasy, pearl pin, slot punch, dimensionals, ticket corner punch.

Wednesday, February 27, 2008

Go Round and Round with Circle Cards

Sometimes it's fun to do a 'different' kind of card - not your regular 4 1/4 x 5 1/2 rectangle or 5 x 5 square card.

Enter - the round card!

Here are some cards that I have created for different challenges on Split Coast. Some of them are complete circles - some have circle fronts - some are rectangles with circle shapes attached to the fronts - they are all just a little different than your everyday shape. I hope they inspire you to make something a little different!
This card was created for an SCS Sketch challenge seen below.


I made the circle the front of my card by cutting all around it with my colluzzle accept for a little part at the top so it stayed attached. The outside edges of the inside of the card show when you look at the card before opening it. I used a cardinal bird pattern from Paper Crafts Magazine Holiday issue that I had cut out and put on my desk for several weeks before finally using him on this care - I think heis so cute!

I cut out the DP with my nestability scalloped circle and attached it to the circle. The bird and message are up on dimensionals. For the front message I used a Michaels $1 stamp that had a bird with it so I just inked the message with an SU marker and stamped it. I did the same on the inside message - not inking the first part of the sentiment.

Stamps: It's your birthday: SU, Michaels $1.00
Paper: cool caribbean, blue bayou, DP: Figgy Pudding Basic Grey, White
Ink: certanly celery, bravo burgandy
Accessories: sponge, bird pattern PaperCrafts Mag, SU night of navy marker, dimensionals, tag punches, nestability scalloped circle, black micro pen, glue stick


I made this circle card as part of the Jan 2008 Virtual Stamp Night challenge to make a circle of Friendship card - you can tell these little girls are friends. I used my coluzzle again to cut out the circle - not cutting the very top so that there was a hinge on the card. I ran the circle through my cuttlebug and cut the black panel with a scalloped rectangle nestability. I love this cute little stamp of little girls playing dress up - it's from Art Impressions. The sentiment and frame around it are from Verve Visual.

Stamps: Art Impressions, sentiment: Verve Visual
Paper: pixie pink, black, white, SU DP
Ink: black, white craft
Accessories: word punch, corner punch, nestabilities, black micro pen, gingham ribbon, cuttlebug folder, coluzzle circle cutter


This card above was created for an inspiration challenge on SCS - the inspiration piece is seen below.
My card is a 4 1/4 x 4 1/4 card. I cut a circle with my nestabilities and then another one inside that circle. I freehand drew the profile of the moon on that inside circle - cut it out and attached it to the outer circle outline. I used a gel pen to outline the moon face.
The sun is a sizzix die that I embossed with my cuttlebug. The face is a from a set of foam face stamps I have. I punched the stars, flowers and fern and attached to the rim with dimensionals. Then I applied crystal ice stickles so they sparkled.

I chose this sentiment because we have been sending so many RAK's (Random Acts of Kindness cards) to people with cancer on SCS that I am VERY VERY thankful to God for what I have - especially my health.

Stamps: Sentiment: Aip's VIPs , foam face stamp - unknown
Paper: white, taken with teal, real red, non SU green, apricot appeal, black, gable green, DP - DCWV Silver Star
Ink: Noir Black- Palette
Accessories: White gel pen, cuttlebug, sizzix die, nestabilities circles, star, rectangle, circle, fern punches, prismacolor markers, crystal ice stickles, dimensionals


I made this half circle card for a friend at work who asked me to make a funny 40th birthday card for her friend - This card really took on a life of it's own and changed direction several times! I was afraid I was making it a little too depressing!

Not having a big enough coluzzle to cut out the circle - I used my trusty little protractor to do the job. The other circles I punched. I frayed the ribbon to add a little dimension to the card.

Stamps: unknown numbers, Sentiment - Inky Antics, Rain - Rubber Soul
Paper: 2 shades of gray Bazzill, black
Ink: white craft
Accessories: primas, brads, ribbons & jewels- Michaels, foam adhesives, white gel pen


Here is another circle card that was made for an Inspiration challenge. The inspiration picture is seen below.
I chose the round to reflect the plate shape. I used paisley DP, a leaf sprig from Papertrey Beautiful blossoms set as BG on the card and punched flowers. I attached a gold paper punched tab on top to reflect the gold edging of the plate. The sentiment is from Verve Visual - Wonderful Wishes set.

Stamps: Verve Visual - Wonderful Wishes, Papertrey: Beautiful blossoms
Paper: Peach Bazzill, Certainly Celery, Navy scrap, DP: Paisley Heidi Grace, gold scrap
Ink: Craft Certainly celery, Noir black: Palette
Accessories: dimensionals, tab punch, flower punch, circle punch, scallop circle punch, Coluzzle circle, fiber, dimensionals, white gel pen, hole punch

My last circle card for the night! This one - a circle on top of a square - was made for an inspiration challenge on SCS also - the inspiration was a sticky note pad seen below.

I pretty much went with a literal translation! - using the same colors and stamping my Martha Stewart bird on a stem with craft white ink. I Stamped the grey BG with the Floral stamp by SU and used my nestability to cut the scalloped circle. The sentiment is Papertrey Borders and Corners - the circle set . I punched holes in the scallops and did a lot of doodling with my white gel pen. This is a 4 1/4 by 4 1/4 card.
Stamps: Floral BG: SU, bird: Martha Stewart, Sentiment: Papertrey Borders & Corners Circles
Paper: Taken with teal, going grey, marigold morning
Ink: white craft, so saffron, going gray
Accessories: white gel pen, hole punch, nestabilities, sponge, dimensionals, watercolor crayons, aqua brush, glue stick, corner rounder


I hope I've inspired you to think outside the 'square' !
Have a great night! I'm off to bed finally!!

The Easter Message

Okay - so we are now halfway through the week - only 2 more working days to go to the weekend - Yay! I have some Easter crafts to work on later so I needed to get my card done and loaded early if possible tonight - usually I'm sitting here around 10 pm! And here it is just 7:30 pm.
Today's card was made for the Sketch Challenge on SCS. You can see the Sketch layout just above. I turned it on it's side for my card and I used flowers instead of a star shape - all legal maneuvers in the world of sketch challenges!

And I can't believe that I just got this card done in about 10 minutes! I even had a different idea for the card initially - but once I decided on the main Easter sentiment stamp, which is from Denami Design, it just sort of fell together.
All the papers (accept for the white which is PapertreyInk) are from the SU scrapbook kit called Special Delivery - Girl. The CS colors are Groovy Guava and River Rock and the DP is from the kit too. The papers are etched like Bazzill.
The Flowers are Primas popped up on dimensionals and I used 4 orange brads. (3 in the right corner for the Trinity.) The sentiment is up on dimensionals also.
I didn't use any sponging or distressing because I wanted this to be a clean crisp card with it's wonderful message for Easter!
I'll be back later, after supper, to load up some round cards as I promised yesterday!
Thanks for checking out my blog - I appreciate your coming by and your comments!!

Tuesday, February 26, 2008

How Frazzled are You Today??


Well - It's raining cats and dogs here right now! It started out as snow this afternoon - then turned to very wet snow - and then it warmed up a bit and changed again to a downpour of rain!

So I guess it's appropriate that my card today is a cat! and even a very frazzled cat! I love my new stamp by Stamps by Judith (can you tell I just bought a whole slew of stamps from them - my last few cards feature their stamps!)

I highly recommend that you buy their catalogue for $10. They have a lot more stamps then they show pictures of on their website - but you can order them all from their site - they are all listed on one of their web pages by number so you need the catalogue to know what they are - or you can click on them to see but it would take forever.... anyway - they have a ton of really cute stamps and sentiments so check them out!

So - back to my card! I made this for todays color challenge on SCS - to use River Rock, Black and White. I stamped up my frazzled cat on a panel I cut using a rectangle nestability die and then embossed it - doesn't he just look like he's had a very bad day today!! LOL!!

I used the Cross Hatch background stamp from Stampin Up. I hand cut around the sentiment with my pinking edge scissors. I frayed a piece of grosgrain ribbon by cutting off the bound edges and then ripping down the cross threads with a needle. Then I attached the ribbon to the back of the sentiment. I thought this all added to the feeling of 'Frazzle'! The sentiment is up on dimensionals. I think this is a great color combination!

Since we're on the topic of cats - I thought I'd share with you a few pictures of my two cats, Scout and Boo. They were named for characters in To Kill a Mockingbird (the daughter and the neighbor). The people who had them before us named them - we got them a year and a half ago when they were 2 years old - as the former owners could no longer keep them. They are sisters - Scout is smaller than Boo - and Boo tends to be shy and hides a lot (so aptly named Boo!)

This is Boo - she always extends her left arm out like this - I tell my husband she must have a bad shoulder like he does! She is certainly not frazzled here!

And this is Scout - you can see she is having a terribly distressing day also! We could all take lessons from cats on how to relax - especially the laying in the sun thing they do!

And here they are together for their professional portrait - can't believe I was able to snap this before they jumped away from each other. Boo is in the back and Scout in the front. They mostly ignore each other - or chase each other around the house!
Thanks for coming by my blog today! I'm going to post a bunch of round cards tomorrow - those are kind of fun to make!

Monday, February 25, 2008

Bags and Boxes, Oh My!


As promised yesterday - here are a few bags and boxes I have made.

Can you believe that this bag is only 3 3/4" x 2 5/8" x 1 1/2"? Doesn't it look just like an LL bean bag?? I made this cute little thing for the Dare To Get Dirty challenges held a while back on SCS.

The challenge was to make a box container. I got the pattern out of a book called Paper for All Seasons by Sandra Lounsbury Foose - Watson-Guptill Publications http://www.watsonguptill.com/. I had taken the day off to clean my stamping room and came upon this book and took a glance through it and Eureka - when I saw this I knew that I would make if for the Inside the Box challenge!!

I bought the book several years ago and forget where - but you can find it on Amazon.com for under $10.00 used. It is full of all kinds of neat paper things such as this beach tote.

I used Ballet Blue and Naturals Ivory paper. You need some fast drying glue like Scotch Quick-Dry Adhesive (available at Michaels) and some clothespins to hold things together as they are drying. There are quite a few steps to it - but if you take your time - it's not difficult and the instructions are very clear.


I made these cute little pies from a Pillsbury Recipe found here: I found this link to the recipe on Nicole's blog at Papertrey.

I made these to give to family on Christmas day to take home to enjoy another day. I used my Papertrey set - My Punny Valentine for the labels - and the colors indicate the type of pie - red/apple, blue/blueberry, saffron/apple. I sponged the edges with so saffron ink.

I bought the flat bottom bags from Clearbags.com (they have bags for everything - I buy all my card envelopes from them too - the more you buy the cheaper they are) I just love these little single serving pies and they fit perfectly into these cute bags.

I got the silverfoil cups at Stop and Shop in the housewares aisle where there are other kinds of aluminum pans etc. but they have not had them since - but I found them on line here.


I made this one sheet box for one of the May 2007 VSN challenges on Split coast. We had to use a nautical theme.


You can find Beate's tutorial on SCS for this little box here:

Stamps: wood grain bg - All Night Media, Journey - Limited Edition RS, Freedom Ring - My Sentiments Exactly, Sailboat - unknown
Paper: Creamy Caramel, So Saffron
Ink: basic brown
Accessories: flag sticker, tooth pick, grosgrain stitched ribbon true thyme - SU, dimensional adhesives, circle punch, scalloped oval punch, torn edge scissors, one sheet box pattern


I made this cute little Halloween themed box for another challenge in the Sept 2007 VSN on Split coast - (See how much we learn doing the Virtual Stamping Nights!)

Here is a tutorial on how to make this box from Amy Rysavy.
I tied a really neat Halloween colors fiber through holes on the sides for the handle. This is such a cute box and so easy to make! I'm sure to be making more of these!

Stamps: Web - Northwoods Rubber Stamps, Spider - Stamp of Excellence, Bat - Michaels $1, Splatter - Hampton Arts, Visit the Web - Penny Black
Paper: Vintage Violet
Ink: Vintage Violet, Craft White
Accessories: Sponge, Fibers, foam adhesive, double sided tape, tacky tape


I made this box for a try a New Technique challenge on SCS to make a peek a boo box.
Here is Qbee's great template:
I used a DP for the box and punched some circles to decorate it. I stamped the butterfly from Papertey set Butterfly Kisses on vellum cut it out and folded the wings up for the 3 D effect on the top of the box.
Inside I attached a circle and stamped the sentiment from Papertrey Faux Fibbon set on vellum. I tied a knot in the middle of the ribbon and attached it around the sides of the box. I had a little trouble getting a clean slice for the tab to go into. I didn't put anything in my boxes yet - but will probably put some kind of yummy candy for the recipient!
This is a terrific little pattern - I'll definately be making more of these for many different occasions!
Stamps: Butterfly kisses & Faux Ribbon : Papertrey
Paper: Cameo Coral, Gable green, DP- Bookshelf: American Crafts
Ink: Taken with teal, Noir black: Palette
Accessories: dimensionals, nestabilities, acetate, circle punch, super sticky tape, SU markers, polkadot grosgrain ribbon, Oval punch


This is a Jenn Box (designed by Jenn Balcer) that I made for another SCS challenge.
Here is the tutorial
I love boxes of all kinds so was excited to see this challenge! This is so cute and easy to make!
I used a piece of heavy DP instead of cardstock. I punched the flap with the corner rounder with the guide removed - then punched a piece of white with my lacy corner punch in the same fashion - then punched another corner rounder piece in celery and layered the edges.
I stamped the flower with blue craft ink on the back of the DP which is brown - then colored the petals with white gel pen.
The leaves are real fossil leaves - sort of fragile but I thought they looked good here. I got this neat Bakers Twine by Martha Stewart at Michaels - this is 3 colors tied together - Green - Green and white - Black and white - I thought it would be fun to use instead of the usual ribbons.

Stamps: Flower & Sentiment - Hero Arts
Paper: White, certainly celery, DP- Bohemia: My Minds Eye
Ink: Certainly Celery, Bashful Blue Craft
Accessories: dimensionals, Bakers Twine: Martha Stewart, white gel pen, corner rounder, lace corner punch, sponge, 1/8 hole punch, fossil leaves - Natures Hand Made Papers


Last up for tonight! I made these bags for the Christmas treats I make for my sister, nieces and son every year. This year I filled these with packages of homemade fudge, oatmeal raisin cookies and vanilla rum bundtlette cakes - Yum!! The bags are from clearbags.com and are lined with plastic to protect from any leakage. The label stamps are from Papertrey Holiday Treats set.

Stamps: Papertrey: holiday treats
Paper: Kraft, white
Ink: real red, sahara sand, white craft
Accessories: ribbon, ticket corner punch, slot punch, lined bag
Well - I hope you have enjoyed seeing my bags and boxes and that they inspire you to make a few for the celebrations in your life!
I'd love to hear what you think! Please post a comment by clicking below!
Thanks for stopping by tonight!!

A Mixed Recovery

Happy Monday everyone! Well, it was back to work for me today. At least it was sunny and warmed up enough by lunch time so that I could go out for a 40 minute walk. It's nice to get out and stretch my legs during the work day - especially since when I get home I want to get right into my stamping room to make my daily card!!

Here is my card for today's Try a New Technique on SCS - today we had to use a mix of patterns and figures of DP on a card. The sentiment and frame are from the Wonderful Wishes set by Verve Visual. I used the front and back of the SEI DP called Winnies Walls that I got from Eclectic Paperie on line- one side is flowered and the other side is dotted.
I used another cute new stamp I just got from Stamps by Judith - the big chicken comforting the little chicken (I think they are chickens!?!) The spots are also a stamp by Judith. I cut out one of the flowers from the DP and put it on the sentiment to tie it all together. The top of the flower and the two panels are up on dimensionals. I used my Nestabilities to cut the panels.
Using both figures and patterns certainly makes this card pop and would hopefully make the receiver feel better just looking at it!

Sunday, February 24, 2008

Nested Easter


Loading up my second card for today - a flowery Easter Blessings!

Todays Featured Stamper on Split Coast is Mary Jo Albright - who has a super gallery! We are to pick one of her cards and copy it changing a few things on it.
I chose this card to CASE (Copy And Share with Everyone) this card where Mary Jo created a medalion using a lot of punches. Instead of Stampin Up punches as she did - I layered several scalloped and plain circle Nestabilities that I also embossed. And I used several pastel colors - Pretty in Pink, Blue Bayou, Pixie Pink, Blush Blossom, Cameo Coral and Bashful Blue - instead of just groovy guava.
Then I added punched flowers (EK Success) and leaf stems (Martha Stewart) that I direct to paper inked with Soft Sky. I also bent the edges of the flowers and leaves over my finger tip to give them a little dimension.
The flowers are popped up on dimensionals as is the sentiment.
The designer paper is that delicious Basic Grey Two Scoops called Spumoni. I punched the corners of the Blue Bayou with a ticket corner punch.
I really like all the dimension on this card with the popped up flowers - in real life they stand out much more than in the picture!
Tomorrow I'm going to load up some different bags and containers that I have made.
Thanks for spending some of your Sunday with me!

One Old Buzzard


Hi everyone - hope you are having a wonderful Sunday afternoon! It's sunny and 37 here right now and I just got back from an hours walk through our neighborhood with my husband. I needed some fresh air after working on my cards for a while. I need to be reminded to get out of my stamping room sometimes!

I made this birthday card for Beate's weekend sketch challenge seen here.

I used this fun new stamp and sentiment from Stamps By Judith. I stamped the buzzard on a piece of River Rock CS that I then punched with my nestability square and embossed. I mounted him to a Mellow Moss square that I also had punched and embossed.
I used my Scor-pal to border the sentiment panel and added black heart brads. Both panels are mounted on dimensionals.
The DP is by K & Co. Inside I stamped 'A year older; a lot cuter' - a fun sentiment from Penny Black that seemed to go well with my old buzzard theme!!
I figure the hearts and inside sentiment sort of soften the buzzard part!!

Saturday, February 23, 2008

Coaster Books and Altered Journals

As promised yesterday - here are several altered journals that I have made as well as a couple of coaster books that I made with my Bind It All. I just love being able to make my own books with this fun tool! Check it out here especially the detailed instructions with step by step pictues on how to use it.


I made this coaster book for a color challenge on SCS (River Rock, Choc Chip & Really Rust). The challenge also included a request to make and send a card to Victoria, a young girl suffering from Cancer. They were hoping to have cards from each state in the US coming to her.

I decided to make Victoria a little book using the challenge colors - with clip art of things in Massachusetts on the pages as well as encouraging sentiments. There were 6 pages in my book - here I show the cover and 2 of the pages.

I mailed this off to Victoria and hope that she enjoyed looking through it and learning a little bit about my state.


I made this little spiral book for another SCS challenge - we had to use spirals of some sort on our card. I used my Bind It All again and 2 coasters for the covers. First I put the designer paper on the front and back covers. Then I cut out 8 white card stock pages and punched the corners with the corner rounder. Then I used the Bind It All to punch through all the layers and to attach the spiral coil. I tied coordinating ribbons in knots on the spirals. Easy peasy! And what a quick fun little book!


This is a $1 journal from Michaels that already has pink circles on it and a solid pink bottom with a white circle that says Journal in it. I added a piece of Infuse Basic Grey paper framed in Chocolate Chip, a framed sentiment stamp and Infuse Die Shapes from Basic Grey.
I used a Glitter String clasp from K & Company to close the journal and added a friend charm at the end of the string to secure the end. I taped a length of dotted grosgrain ribbon to the back cover to use as a book mark with a brad at the folded end of it - you can see it sticking out at the bottom. I tied coordinating gingham ribbons around the coils at the top.
The Sentiment says: The place you have left forever is always there for you to see whenever you shut your eyes - Ian Myrdal.


I made several of these Cowboy theme journals to sell at our church fair last fall. The journal was $1 at Michaels and was already printed with the background and lace that you see. I added the stamped Wild West and Sheriff badge circles ($1 stamps from Michaels) and the stamped Journey square and tied 3 coordinating ribbons on the coil bindings. I made a book mark out of a wider black ribbon and taped it to the inside back cover - I put a star metal brad on it to weigh it down a little - you can see it sticking out at the bottom.


A friend at work commissioned me to decorate an artist sketch book for her teenage daughter's birthday. I found a great bound journal with blank white pages in it so she could use it for drawing. I have since seen other artist sketch books at art supply stores such as Utrecht.
I made several panels of card stock and designer paper. I used the photo corner punch for several corners and attached some great brads I got at Target for $1. I distressed the edges on the sentiments and sponged with Bordering Blue ink. I tied coordinating ribbons on the spirals. I also put a panel of one of the designer papers inside a Pentel pen so that it would match the sketch book.


I made this little altered book during the January 2008 VSN (Virtual Stamp Night) on SCS. This is a little composition book measuring 4 1/2 x 3 1/4 - you know like the big black and white composition books we used to get for school. I bought this little one at CVS.
My friend Jeannine gave me this great stamp by Inkadinkadoo and the paper is from Basic Grey. There is a narrow grosgrain brown ribbon that you attach while putting it together - to use as a bookmark - you can see it on the top left as well as sticking out a tad on the bottom.

I didn't think I was going to like making this book - covering the whole thing with DP and all - but I love how it came out! I'm going to use it to write down the directions for cards I make. I made a matching Pentel pen too by rolling a piece of the DP and slipping it inside the pen.
Here is a tutorial on SCS on how to make this cute book so you can make one too!
Well, these are all the journals and bound books that I have made so far. I already have some other $1 journals purchased from Michaels that I'm itching to alter - and I want to make a bound coaster calendar that Beate did a tutorial for on SCS a few weeks ago. So look for more of these to come here on my blog!
Thanks for stopping by! See you tomorrow!

An Inspired Easter Basket

Well - we woke up today to find the storm over and the sun was shining brightly on all the newly fallen snow! My husband had to go out again and shovel up what had fallen after he came in last night. I was inside cleaning the house as I had my sister and brother-in-law and my college room mate and her husband over for dinner this evening.

I did allow myself 2 hours to work on my card for the SCS inspiration challenge before the company came!

Todays inspiration piece was a colorful scene from Country Living Magazine seen here.

I was inspired to make an Easter card - using a Bazzill green for the basket which is like the refrigerator - a brown plaid DP which is like the floor, a band of twill which is like the floor board - and piles of eggs - sort of like the piles of pillows and boxes.

I used Sizzix dies for the basket and eggs. I stamped on the eggs with a few cute Easter stamps I have and colored with my Prismacolor markers. The basket and two of the eggs are up on dimensionals. I layered the eggs on the basket the way I wanted them - then flipped it all over and taped them together to hold them in place.

The ribbon has a piece of silvercording in with it and I attached it to the basket handle with a glue dot.

A fun little Easter card with an old fashioned kind of Easter Basket on it!

Friday, February 22, 2008

Sign It With a Flourish!

Happy Friday everyone! We are in the midst of a snowstorm here in Massachusetts! My dear husband, Kent, is outside snowblowing while I'm inside making my card! What a guy! Sorry for the glare - the flash reflected off the falling snow.


My card today was made for the Limited supplies challenge on SCS - to use your own handwriting on your card instead of a stamped sentiment. It is also covering Sharon's (NoTimeToStamp) challenge to use flourishes.

First I stamped flourishes on the Blush Blossom card in Pitch black Adirondack ink using a BasicGrey Winterland clear stamp.

I outlined all the flourishes with a French Grey Prismacolor marker to give them some depth.

Next I made an embossed frame on the card using my new Scor Pal to give definition to the edges of the card. I love how this works and it's so easy to use!

I cut a square of Basic Grey Two Scoops/Spumoni DP, framed it in Blue Bayou and mounted it over the flourishes with dimensionals.

To fulfill the challenge - I hand wrote the sentiment with a fine tip micron pen, stamped over it with a little flourish using Memories Soft Grey ink and mounted the two ovals with dimensionals.

To balance the top right corner, I added 2 felt flowers with a small flourish stamped beneath them. I added a gold gem to the center.

I was trying to keep this simple for both challenges - but no card is ever really simple is it?? until you make a second one of the same thing - then it's easy peasy! LOL!!

I'm sure I'll be stamping over the weekend so please drop by - tomorrow is the Inspiration challenge on SCS and I always love to do that.

I'm also going to load up some journals that I have decorated - they are so fun and easy to do!

Thursday, February 21, 2008

A Window on Easter


Well, here it is Thursday already! Only one more working day until the weekend - Yay!! They are predicting 3-8" of snow for us tomorrow starting at noon - so I'm sure the commute home will be ucky for me! All the snow had just about melted around here and now we'll be shoveling once again!

Well - my card today is a little breath of spring that we can enjoy before the snow gets here.
I designed this for today's Way to Use it Challenge on SCS. We had to use a window on our card - either a punched out shape or a stamp of a window or whatever you wanted to create that was 'window-like'!
This card is a 4 1/4 x 4 1/4 square card. I love this smaller size card. I use a regular size envelope to mail it so that it doesn't cost more than a first class stamp. I guess a smaller card won't go through the automatic stamping machines so they charge you more since they have to pull it out and hand stamp it. Anyway - that's why I use a regular size envelope rather than making a 4 1/2 x 4 1/2 one.
I cut an oval out of the white card and the DP using my nestabilities and framed it with a scalloped rim that I made by cutting a scalloped oval then cutting out a smaller plain oval inside of it. This pretty DP is by Imaginisce called Drapin Daisies and it has a little sparkle to it.
I stamped my cute little potted eggs (Alias, Smith & Rowe) on a Papertrey white oval that I also embossed. This oval came out of the front of the card. I don't know if you can see it a speck - but I put a 3x3 panel of Apricot Appeal inside the card and mounted the stamped oval on it with dimensionals. It looks pretty when you open the card to see the Apricot framing the white oval.
To be sure the oval was lined up with the opening - I put it inside the opening on the front of the card with the dimensionals already mounted on the back - then closed the card and it placed it in just the right spot.
I stamped my sentiment (Savvystamps) right on the DP. I knotted the ribbons (Martha Stewart) through the opening. I think it looks a little like tie backs on window curtains, don't you?
Well, I've got to go make my starving husband some supper. He patiently waits while I make my daily card after I get home from work ('cause you KNOW I have to make my card before doing anything else!) I hope you like my little window card. Thanks for stopping by today! I'll be loading something else up here tomorrow that's for sure.

Wednesday, February 20, 2008

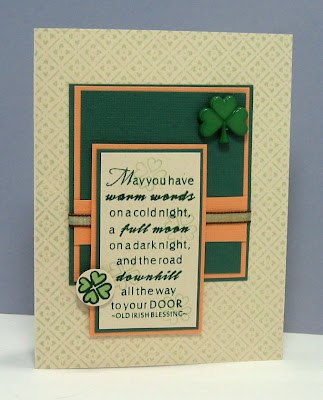
May You Have Warm Words


Hi everyone - are you checking out the total eclipse of the moon tonight?? It's almost total here right now (10:30 pm). I always find eclipses amazing events. I saw a full solar eclipse on Cape Cod when I was in my 20's - we had to use special panels to look at the sun or we'd burn our eyes.

I made this St. Patrick's Day card for today's sketch challenge on SCS. I used an Old Irish Blessing stamp by My Sentiments Exactly. I stamped over the sentiment with a heart shamrock stamp by AipVip's using a light soft sage ink by Memories. I used that soft sage ink again on the Pretty Pattern background stamp by Cornish Heritage Farms.
The sentiment and popped up heart shamrock are stamped in Forest Green Stazon Ink which gives a great dark image. You have to be careful you don't smoosh it though as it's a juicier ink!The card is Naturals Ivory by SU and the green and orange panels are textured card stock by Bazzill.
I attached a Martha Stewart ribbon around the panel and a plastic shamrock in the corner.
This is a great sketch and I'm sure I'll use it again. I have a lot of stamps that will fit in that front panel!
Thanks for looking in again - see you tomorrow!

Tuesday, February 19, 2008

Lauren's Nest


Isn't this just the cutest basket?! I found the tutorial on how to make this on Lauren's blog here. You can also see her gallery on Split Coast Stampers here.

It is made with 4 large scalloped rectangle nestability panels and one large scalloped square for the bottom. I did emboss all the panels as well.
You score the side panels on the sides and bottom and you score the front and back panels only on the bottom so you can glue the panels together. I used Scotch Quick Dry Adhesive for this and it worked great as it does, in fact, dry quickly! I got mine at Michaels.
I cut 2 scalloped circles, one very vanilla and one Wild Wasabi, for the front - stamped it with my Michael's $1 stamp, then colored it with Prismacolor Markers and put dimensionals on both of them and attached them to the front of the basket.
The handle is 11 x 1 1/2 and I also put panels of the DP on it. The handle is just attached to the inside walls of the basket and it gives the basket stability. This cute double sided designer paper is by SEI called Winnies Walls. I got mine on line at Eclectic Paperie.
I am so excited to find a fun craft to make using my nestabilities. It helps justify my buying them!
I'll be making these for our Easter sale at church for sure. They'd also be fun as place settings for Easter Dinner with the family!
Thanks for stopping by - I really appreciate your checking out my cards and crafts! See you tomorrow with whatever I do next!

Monday, February 18, 2008

Sneezie, Wheezie, Queezie


All righty! here is my third card for today. Boy, it's amazing what you can get done when you don't have to go to work all day!

This card was designed for the February Fan Club Sketch challenge on SCS.
I used orange shimmery card stock by Bazzill that has a beautiful sheen to it, a panel of Soft Sky card stock by SU and 2 sides of a DP by Imaginisce that I just got this weekend at Ink About It, a great stamping store in Westford, MA. They have the most terrific papers there as well as stamps, inks and everything else you could want for stamping!
I used these cute little images - both by Lockhart Stamps. I cut out around the opening of the box with my x-acto pen and slipped an actual piece of Kleenex in the box which gives a little fun interest to the card! The ribbon is by Martha Stewart sold at Michaels.
The panel is also mounted on dimensionals to make it pop a little. Inside it simply says 'feel better'. I made the green dots simply by punching with a hand punch and using the circles!
I figure this could be used for a female or male - no flowers or frills! Seems like everyone I talk to has a terrible cold or is going through a bout with the flu - I've been needing a lot of get well cards lately so this will be added to my 'stash' of cards.
Thanks for coming by today and checking out my cards!

Baby Shower Pouch


Here is my second completed project done on this holiday off from work.

It is a little candy favor pouch made from an envelope! Yes that's right - an envelope. It was the 'Try a New Technique' challenge on Split Coast today. You can see Amanda's tutorial for this on her blog here.

I designed mine for a baby shower - using the traditional yellows and greens for not knowing the sex of the baby! I used my Stampin Up Baby Time wheel stamp on the yellow designer paper from SU for the border on the bottom. I cut the edges with scalloped edge scissors and colored in with my Prismacolor markers. The 2 scalloped circles are punched, stamped, sponged and layered. I added papershred to the inside and would add some kind of candy or nut treat when actually using it at a shower.

The 'For Baby' tag, shower umbrella and star are all stamps from Stampin Up. I used black and So Saffron inks. I attached the tag with a cute little star brad. I used dimensionals to attach the light circle to the DP circle so it's popped up a bit. I tied a little bow using green threaded ribbon and attached it to the umbrella handle with a glue dot.

I want to try this again with different size envelopes to see what other looks you can get from this design. You could also make other themes - St. Patrick's Day, Valentine's, 4th of July, Birthday - any event you need a party favor for. Let me know what you might make one for by clicking on comments below!

Simply Sympathy


I'm off from work today for President's Day and it's been cloudy and rainy all day. That's all the excuse I need to spend the day in my stamping room making new cards! I've completed three so far - so look for two more getting loaded shortly here on my blog. The temperature actually got up to 60 here in Massachusetts today so we did have the heat off and windows open to air out the house and smell the sweet air!

I made this sympathy card for Sharon's (notimetostamp) Friday challenge - to make a statement with this simple layout and one important focal point.
This is a top fold card that is 4 1/4 x 11 folded in half. I used a great twig wreath stamp that I have by PSX that I inked with Ranger Tea Dye Distress Ink. I colored the berries with a Prismacolor marker to coordinate with my BasicGrey Figgypudding DP. The sympathy sentiment is from Stampin Up.
I layered the image, that is stamped on Papertrey white, with a panel of Cranberry Crisp by SU. The card is SU Blue Caribbean. I chose all my colors to coordinate with the DP.
Sharon's challenge is proof that Simple can be Stunning. I'd love to hear what you think by clicking on comments below!

Sunday, February 17, 2008

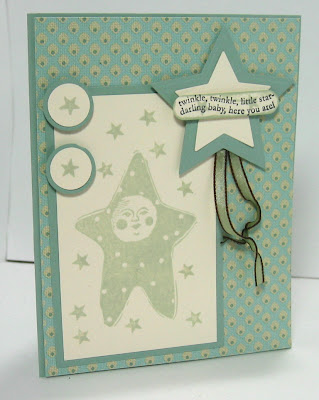
Star Baby


I'm on a stamping roll tonight - tomorrow's a holiday so after going out to supper at the IHOP tonight as a treat (I love the strawberry and boysenberry syrups there!) I got to work on this card for Beate's weekend sketch seen here.

I just got this sweet star stamp over the weekend and couldn't wait to ink it up. It seemed to fit perfectly in the block on Beate's sketch. I used this beautiful Amy Butler DP from K&Co that I was introduced to in a recent inspiration challenge on Split Coast. The stars are cut with the nestabilities dies and also embossed. You can't really see the embossing dimension on them in the picture unfortunately. Then I punched the sentiment with the word punch. The stars and circles are mounted with dimensionals. I heated the ribbon a bit with my hot gun to curl it.

The paper colors are Sage Shadow and Very Vanilla. The sentiment and little star stamp are from the Small Sayings set from Stampin Up and the big star is A Stamp in the Hand. I mounted the star and circles with dimensionals. I used Pitch Black Adirondack ink and Memories Soft Sage.

Let me know what you think about this cute baby stamp by clicking comments below!

Betty's Well

Hi everyone! I hope you are having a blessed Sunday. It is cloudy and rainy here today - a good day to be inside working in my stamping room and not feeling guilty that I am not out enjoying the out of doors!

I made this card for the Featured Stamper challenge on Split Coast. Today's featured stamper was gbedwright - that's her Split Coast name. What does that mean??! I'll let you know if I find out! Betty is her real first name and you need to check out her gallery - she has lovely cards there! I chose to case this beauty. I made my card smaller than hers - mine is 4 1/4 x 5 1/2 and I think hers must be at least 5x5. I used a different stamp - mine is a Thomas Kinkade that can be bought at Cornish Heritage Farms. And I used fewer layers and a different designer paper. The colors on mine are all from Stampin Up. I used Sage Shadow, Very Vanilla, Sahara Sand and the DP is from K&Co. I love this sentiment stamp - a little different than your usual get well verse - and it is from Verses Rubber Stamps. Check them out for all kinds of sentiment stamps for your cards.

I was very interested in using the Lumiere on the cuttlebug panel - this design is called Tiny Mosaic. You can get the Cuttlebug & embossing folders at Michaels or AC Moore - or a lot of places on line - I've bought them at Eclectic Paperie. Ok - so back to the Lumiere - I bought a bottle of Lumiere quite some time ago for a project that I wanted to do. But the project instructions are somewhere deep in my 'to do pile' of papers and I have never even opened the bottle! Lumiere is a white shimmery paint-like substance that you can put directly on paper alone or mix with colors. It gives a wonderful shimmer that I think you can see on the vanilla Cuttlebug panel on my card above. There are probably other ways to use this Lumiere and I'll let you know if I find some!

So after seeing Betty's wonderful card and reading that she used the Lumiere on it - and because it was so softly beautiful - I knew that was the card I wanted to CASE. I punched the hole for my big eyelet with my Cropadial and threaded a piece of bakers twine from Martha Stewart through it. I used Peeled Paint by Ranger and Versafine Vintage Sepia for the inks on this card. On the well - I first inked it with the Vintage Sepia which is the brown and then taped it lightly with the Peeled Paint which is a green. Can you see the hint of green on the image?

I think this would make a great get well card for a male given the colors and lack of 'frills' don't you? Please click on comments below and let me know!

Saturday, February 16, 2008

Inspiring Bird


I designed this card for todays SCS Inspiration challenge. The Inspiration piece chosen by SmilynStef can be seen here - a piece of artwork by Charley Harper. Stephanie had seen a program on CBS Sunday Morning a few weeks ago that highlighted a book about this artist. Hence her inspiration to chose this for our inspiration!
I was away all day today attending a card workshop but I had looked to see what the inspiration piece was before going (I always do this challenge on Saturdays and hated not getting it done before I left!) So I was thinking in the back of my mind all day what I might do when I got home. Well - at the workshop we learned that there was a wonderful card stamping shop nearby so my friend, Elizabeth, and I just had to stop there on our way home! It was well worth the trip - I found all kinds of beautiful designer paper and several stamps that I just had to add to my supplies!! One of the papers I found was an acetate piece that had a grid pattern printed in black on it and I thought "ah ha - perfect for the inspiration challenge!"
There is actually no stamping on this card at all - I had my newly purchased acetate grid that is called 3/4 graph by Mambly and I applied a white BasicGrey rub on bird from the Periphery set to it. I cut squares of card stock based on the colors in the inspiration piece - soft sky, black, chocolate chip and creamy caramel - all from Stampin Up. I attached the panels to the acetate with the brown brads then attached the whole thing to a Close to Cocoa card. This is a small square card measuring 4 1/4 x 4 1/4. I'm so pleased with how this came out!
I'd love to hear what you think - click on comments below.

Friday, February 15, 2008

Round the School


Here is my card for today's limited supplies challenge over at Split Coast Stampers - to use circle stamps, no designer paper, no cuttlebug, only round punches, and all embellishments have to be a circle. This also fits the CT0208 dirt pile challenge to make a card any size/shape accept the usual 4 1/4 x 5 1/2 size. This card is 4 1/4 x 4 1/4.
I used a fun porthole stamp from Aunt Lynnies Craft Closet for my circle stamp. I punched a circle of soft sky and stamped my school of fish on it. Then I embossed it with clear embossing powder to give the look of water (which unfortunately you can't really see in the picture) and attached it over the porthole window area. I attached silver brads where the stamped screws were around the rim and punched two circles for my sentiment one white and one black. I used Karen Foster Snap Stamps alphabet to create the words. These are neat stamps - the separate letters snap together so you can make the words that you want to for your sentiments. Then I made white dots all around the edges with my gel pen.
My husband just told me I should have used gold brads - he said they would never use silver on a marine window because it would rust - they would use brass....... he said I should have asked him first..... oh well!!
It's tough to make a card with limited supplies - for some reason when I know I can't use something - that's the thing I keep reaching for!!! I'd love to hear what you think of this card - please click comments below.
Paper: White-PapertreyInk, black, soft sky, going grey all SU
Stamps: Porthole - Aunt Lynnies Craft Closet, School of Fish - Rubber Tree Stamps, Alphabet - Karen Foster Snap Stamps
Ink: Pitch Black Adirondack, Soft Sky - SU
Supplies: Clear embossing powder, embossing pad, hot gun, circle punches, white gel pen, silver brads, silver pen, Prismacolor markers, dimensionals.

Thursday, February 14, 2008

Smocked Dress Friends

Todays challenge over at Split Coast was to use Fashion as your inspiration for your card. I decided to use this great smocked dresses on the line stamp from Serendipity Stamps. I bought this stamp when I first started stamping cards about 5 years ago. I bought it because it reminded me of when my sister and I were growing up and our Aunt Helen made us smocked dresses every year. Aunt Helen never married and lived near us so we were like her children. Our cousins lived out of state so we got most of her attention accept when she traveled to visit them. So this is a nostalgia card for me!

I first stamped the dresses on the natural panel, then I stamped it again on 3 different designer papers all in the river rock shade. I cut out each dress, colored the clothespins with a brown marker, and attached the dresses to the natural panel over the stamping using dimensionals. I just got my Scor-Pal this week so I wanted to try that out. I scored a line on each side, intersecting at the corners. It really does work well. You just want to remember to have the card stock face down when you score so that it 'bumps' out in the front (ask me how I figured that out - there is one natural panel in my trash right now!). I used my piercer, graph and pad to pierce lines inside the scored lines all around. Then I sponged all around the edges and the stamping using River Rock ink. The sentiment circle is made with 2 stamps from PapertreyInk - the circle from Borders and Corners set and the sentiment from Faux Ribbon. I die cut it with an oval scalloped nestability and mounted it with dimensionals. I added a knot of ribbon and a glass bauble for a little interest.

So there's my 'old' fashion card for today's challenge - let me know what you think by clicking Comments below!