Saturday, April 26, 2008

A Sketch, A Double Dare, and an Inspiration!

Sorry I haven't posted for a few days - I've been making cards - just not having time to get them loaded here! Last night my niece, Christie, invited 7 friends over to her house and I went and ran a card stamping party for them. They each made 4 cards. We had a great time but it was a late night with all the chatting, munching and wine tasting going on!
So here are two cards for you to check out!
I made this card for Wednesday's sketch challenge on SCS as well as a weekly double dare I do with some SCS friends. Sleepyinseattle's dare was to make a card that involved music.

I used my brand spanking new stamp set called Pond life from PapertreyInk with the cute Hippity Hop sentiment (like 'at the hop' - a dance - music - get it??? LOL!) I stamped the reeds on the Summer Sunrise panel with my versamark watermark ink so it's just a suggestion. And I used my brand new Martha Stewart butterfly punch (after seeing it so much on No Time To Stamps cards I finally broke down and got it!!) The music DP is from Provo Craft.

Stamps: PapertreyInk: Pond Life
Paper: Very Vanilla, basic black, Summer Sunrise: PTI, DP: Provo craft
Ink: Pitch black and Lettuce: Adirondack, Summer Sunrise PTI, Versamark watermark
Accessories: zots, Martha Stewart Butterfly punch, dimensionals

My next card is for today's Safari Adventure Inspiration challenge by Stef as well as Beate's weekend sketch challenge found here.

Our inspiration was this picture from a Party in a Box website she found.

I was inspired by the animals, bright colors and circles! I used this cute hippo stamp from Rubber Soul and fun big eyelets. I dotted around the image with my Prismacolor markers.

I'll be loading up some ATC's later so be sure to check back. Thanks for dropping by today!

I really need to go out and do some gardening now! Spring is coming and there's lots of winter mess still out there amoung the shoots that are finally coming up!

Today's thought from Poor Richard's Almanac: "If thou would'st live long, live well: for folly and wickedness shorten life".

Stamps: Rubber Soul
Paper: Taken with teal, PapertreyInk White, DP: DCWV The Stack III
Ink: Adirondack Watermelon
Accessories: dimensionals, big eyelets: We are Memory Makers, Crop a dile, prismacolor markers

Tuesday, April 22, 2008

Origami Butterfly Tutorial - Take A Deep Breath!

I posted this origami butterfly card last week and many of you asked if I could do a tutorial on it. So here it is!

With Origami you really need to see each step clearly as it can be confusing the first time you make anything. There are 11 steps shown here!

I suggest you use a piece of plain computer paper the first time you try to make this butterfly. Once you get it - you can whip them out in just a couple of minutes! It may take a few tries to figure out the folds so don't get discouraged. I hope my pictures help you visualize them.

To make the small butterflies that end up to be about 1 3/4" x 2 " I used a piece of Origami paper 2" x 3". I purchased my paper at The Paper Source but there are many places to get it. I like the colors/patterns they have and you can see all of the pieces that you are buying - most packages you only see the first and last piece so you're not always sure what's in between!


For this tutorial I'm using a piece of Origami paper 4 x 6 and it makes a butterfly about 3" x 4". I made this one bigger so you could hopefully see the steps better. The smaller 2" x 3" size is best for regular size cards if that's what you are making them for.

You should use a piece of double sided Origami paper - ie. printed on each side - since both sides end up showing and it makes it more colorful. Note: Although you can use any kind of paper, it needs to be light weight so you can make good creases and folds. Origami paper is best.

So - let's take a deep breath and get started on it! My husband, Kent, was the photographer for me since both of my hands were busy!!


Step 1: Hold paper with the longer side at top and bottom, front side up.

Step 2: Fold in half bringing top down to meet bottom and crease.

Step 3: Open the paper back up, turn it over & rotate it so that the short side is at top and bottom (Note - I had already made a butterfly out of this piece so you can see many folds - yours will only show the center fold!)


Step 4: Fold in half bringing the top down to the bottom and crease.


Step 5: Lift right side up to the existing vertical center crease - open the edges on the right side and squash fold it (push the top fold down towards you where my right index finger is)


so it makes a triangle.

Crease the edges.


Step 6: Flip it over - front to back


It will now look like this.

Step 7: Lift up the right side to the center and squash fold this side - pushing the top down to form a triangle.

and crease it.


Step 8: Rotate it so the triangle is at the bottom.


Step 9: Fold down the top inner corners


and crease.


Step 10: Now unfold those creases you just made - open the layers at the top and push the edge inside on the same creases (push where my right index finger is) - this is called a reverse fold. Do this on both sides.


It will now look like this. We're almost done!


Step 11: Fold down the front wings from the top on each side.


Done! Phew! Good Job!

And here is a 5 x 5 card I made to show you a large and 2 small butterflies. I used this designer paper as background as I thought it looked sort of like the bark of a tree where butterflies might be hanging out!

This Origami Butterfly design was created by Ralph Matthews from England. It is just one of the many Origami projects in the book called "Minigami" by Gay Merrill Gross published by Firefly books. I highly recommend this book. It has patterns for dresses, hats, purses, ducks, flowers and pots, fish, stars, penguins, santa and many others! I purchased mine at Borders Books and you can also find it on Amazon.com

Please let me know what you think of my tutorial and if you make some butterflies please link back here so I can see what you created!

Thought for the day from Poor Richard's Almanac: "The good or ill hap of a good or ill life, is the good or ill choice of a good or ill wife".

Thanks for stopping by today!

Stamps: Paptertrey Ink

Ink: Pitch Black Adirondack

Paper: Very Vanilla, Always Artichoke, Basic Black, DP: K& Co., Origami papers

Supplies: oval punches, Dimensionals

Monday, April 21, 2008

Graduate in My Pocket and Poor Richard

I was straightening up a book shelf today and came upon a copy of Poor Richard's Almanac - the famous Morsels of Wisdom book written by Ben Franklin. I bought it on a trip to Williamsburg, VA several years ago at the printing press there. So I thought I would share some of his wit and wisdom with you! You'll find todays thought at the end of my post.

Today's challenge on Splitcoast was to make a Gift Card Holder. This one is a little different design in that there is a front and back cover to the card and then there is the piece in the middle where you slip the gift card in.
I made mine thinking it's a graduation card but it actually could be given to someone for any achievement. I used my new Papertrey Summer Sunrise Card Stock and twill that just came today. All the stamps are PTI also. The stars were cut with Nestability dies. I stamped 'a gift for you' on the placebo gift card that would be replaced with the actual card you were giving the person!

You can see several tutorials for this type of card in the challenge forum but basically the card is 11 x 4 1/4 and you score 3 inches in from each end and at 5 1/2 inches then fold so the 2 center pieces come together. You seal 3 edges of the center piece (the back where the card folds and the top and bottom edges) using red super tacky tape to be sure the card won't slip out. You want to use thin tape or the seal will be too wide and the card won't slip into the slot.

The opening for the gift card is punched with the word punch (keep moving the punch over to make it wide enough - measure an actual card you would put in it) and the small oval punch in the center.
Here is a closer view of the inside
I'm also submitting this card to this months Caardvarks challenge - Black/White + one Where the challenge is to make a card using black, white and one other color. They have a great prize for the winner - so be sure to check it out!

So here's todays thought from Ben Franklin: "Quarrels never could last long, if on one side only lay the wrong."

Thanks so much for hopping over here today! I'm going to be posting a tutorial for the origami butterfly so be sure to check back!

Stamps: Paper Trey Ink Mixed Messages, It's a Celebration, Simple Little Things
Paper: basic black, Paper Trey Ink : white & Summer Sunrise
Ink: Pitch Black Adirondack, Color Box Gold
Accessories: Star nestabilities, dimensionals, ribbon: Summer Sunrise Twill PTI, star brads
Techniques: dry embossing

Sunday, April 20, 2008

Misting the Flowers for Mother

Hope you are all having a wonderful Sunday! It is just beautiful here today - sunny and 60 degrees but it feels warmer. Yesterday was supposed to be 70 but it never got there and it felt chilly out even in the 60's.

Every Sunday at Split Coast Stampers the challenge is a Featured Stamper - where someone is chosen and we look at their gallery and make a card like it but changing a couple of things.


Today's featured stamper is Sparklegirl. You must check out her gallery! She also has a wonderful blog. Both are just super! I found at least 10 cards that I want to copy but for today I chose this card .

I liked this card for several reasons - first, I just love this stamp set, Essence of Love from Stampin Up - and I recently bought this beautiful Stampin Up ribbon (actually bought it in 4 different colors!) and haven't used it yet - and I also love the Marker Water Misting technique used on this where you color the stamp with your markers, mist the stamp with a water bottle and then stamp it on your card stock. It creates an image that looks sort of like a watercolored painting.

My changes are: I used different colors and a different sentiment (by Darcie) and I didn't add brads beneath the sentiment.

This is a fairly simple card to put together but I think it is just stunning don't you?

So - I also want to let you know about the play I told you we were going to see yesterday. It was called "The Cry of the Reed" . It was quite interesting about a young journalist from the US who goes to Iraq to do some reporting but gets taken hostage and it involves getting in touch with her mother who lives in Turkey and is a devout Muslim (they haven't spoken for 10 years). It showed some interesting viewpoints and was very well acted. We are subscribers to the Huntington Theater - so we see 6 plays a year. It's our 'date night' and we see plays we might not think of going to see otherwise!


Have a great rest of the day - and thanks so much for stopping by!

Stamps: Essence of Love: SU, Sentiment: Darcie's
Paper: PTI White, Pumpkin Pie
Ink: Pumpkin
Accessories: water mister, SU markers Old Olive & Pumpkin Pie, dimensionals, Ribbon: SU,
Techniques: marker water misting

Saturday, April 19, 2008

Fresh Cut Dress for Mother

Happy Saturday everyone! Here in MA it is bright and sunny and supposed to be in the 70's - yahoo!! Kent and I are going into Boston this afternoon to a see a play called "The Cry of the Reed" I'll let you know how it was tomorrow!

So Saturday's on Split Coast is always the Inspiration Challenge hosted by Stef. Today she inspired us with fabrics. Heather Bailey is the designer of these fabrics called Fresh Cut Fabrics. I chose this one here:

And I made this card. As promised yesterday - here is the cute little origami dress that is another pattern in the wonderful book I just got (see yesterday's posting for the butterfly and information on the book).
I had some origami paper that was close in color to the inspiration piece and it had flowers on it so I used that for the dress. I used my cuttlebug to dry emboss the purple panel. I added primas and a flower brad to the corner. The ovals are cut with nestabilities. The oval and sentiment are attached with dimensionals.

Thanks so much for coming by today - I'm off to the play - see you tomorrow with my featured stamper card!

Stamps: PapertreyInk: Women of Life
Paper: PTI White, certainly celery, unknown purple, origami paper
Ink: Pitch Black Adirondack
Accessories: cuttlebug folder, nestability ovals, dimensionals, primas, flower brad
Techniques: origami, dry embossing

Friday, April 18, 2008

Spring has Sprung and a Mistake was Made!

Thought I'd share with you some of the lovely plants that are finally blossoming in my gardens. These are several hyacinths that I planted a couple of years ago after receiving them as gifts at Easter time. Don't you just love their wonderful fragrance?


And here is a cluster of Daffodils that are just starting to open. Daffodils really are the harbinger of spring for me - when I see them being sold at the fruit stands on the streets of Boston on my way into work - I know spring isn't far away!
So onto my card for today - the Limited Supplies Challenge at Splitcoast today was to make a long or tall card - at least 4" x 8" which will still fit in a business size envelope for mailing so it's the standard postage rate (a big consideration these days when thinking about the size of your card!)
Butterflies are another sign of warm weather so I put them on my Mother's Day Card today. I just got a wonderful mini origami book at Borders Books and one of the patterns is this gorgeous butterfly! You can make any size - it's just determined by the size paper you start with.

The book is called Minigami, and it's by Gay Merrill Gross - published by Firefly Books 2005. You can see it here at Amazon.com but I'm sure you can find it lots of other places.

The instructions for the challenge today were to limit layers and embellishments and so - since these Butterflies are pretty dramatic (I think!) - I didn't add anything else accept the origami paper panels and the sentiment. The sentiment is from the Women of Life set by PapertreyInk.


Here is a close up of one of the butterflies.


I'll have some cards with a beautiful origami dress on it sometime this weekend so be sure to drop by and check it out! Happy Friday everyone!

Stamps: Women of Life: Papertrey Ink
Paper: Papertrey White, Pumpkin Pie: SU, DP: Origami Papers
Ink: Pitch Black Adirondack
Accessories: dimensionals, MiniGami by Gay Merrill Gross 2005 a Firefly Book
Techniques: origami

So now for the Mistake was Made part - I completely ignored (forgot) one of the rules of today's challenge and that was not to use DP (designer paper) and my origami paper is certainly DP!!! so I rushed back to my stamping room and made this card:

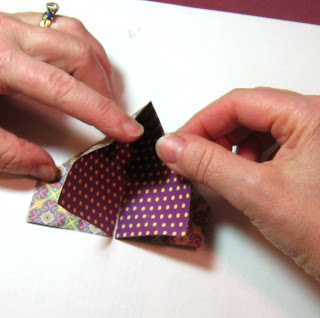
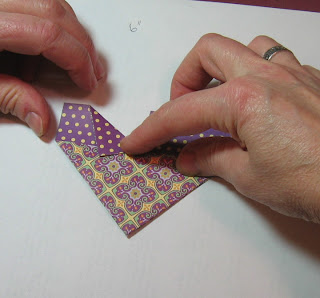
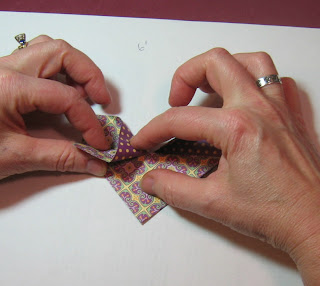
So - this time I stamped the butterflies - actually I colored the stamp with Stampin Up markers - Perfect Plum and Almost Amethyst - spritzed the stamp with water and then stamped them on white card stock. It's called misting with markers and you can see a tutorial on SCS here. I used my sponge dauber with Groovy Guava on the wings.

I cut wire antanae, attached them to the back, scored down the middle of each butterfly and curved the wings around my finger. I attached them to the purple bazzill card stock with zots to hold them on well. This card also qualifies for Sharon's (NoTimeToStamp) Friday challenge to use Black as an accent on a card. You can see her challenge here. Sharon's trademark is to keep it simple and her cards are wonderful - so check them out when you go there!

So - I feel better after confessing my mistake and submitting a new 'following the rules' card LOL - now I can sleep tonight!!

Stamps: Butterfly: Oxford Impressions - Field Notes, Sentiment: All Year Cheer: SU
Paper: PTI White, Bazzill Purple, basic Black
Ink: Pitch Black Adirondack , Groovy Guava: SU
Accessories: wire, zots, nestability square
Techniques: misting with markers, dry embossing

Wednesday, April 16, 2008

Blog Candy Winner & A Cup of Tea and a Prayer

The Winner of my Blog Candy posted on 4/11 below was #19 picked by Random Number Generator - and comment #19 was bunny b who said:

Wow! What a sweet and awesome engagement proposal that was! Congrats to Katie & Greg! And congrats to you as well on your 5000 plus hits! Cute stamp! Reminds me of my dad - he loves to golf!
April 13, 2008 12:32 PM

I'll be e-mailing you for your mail address so I can get the golfafella out to you right away! Congratulations on winning and thanks to everyone who left a comment.
Now onto my card for the day which I made to cover 3 challenges over on Split Coast.


First, it was for today's sketch challenge and for two Fan Club/Dirty Dozen Challenges.
1) to use buttons on a card and 2) make a card based on the inspiration piece seen here:


The inspiration I took from the picture was the colors and the tea theme. The pretty rose button was from my MIL's button box that I inherited when she moved into assisted living and the green ones looked like leaves to me with the slot shapes in their centers. I'm not going to think about how I will ever get this into an envelope if I mail it to someone! Maybe it will be a card I hand to someone - LOL!! I used the script cuttlebug folder to represent the words on the boxes (not sure you can see that on the inspiration picture) and my corner rounder punch for the scalloped edges on the box covers. I used my nestabilities to cut the squares for the teapot image.

All the papers and the ribbon are from PapertreyInk

Congrats again to Bunny b and thank you so much for dropping by today -Hope you have a wonderful evening and see you tomorrow!

Stamps: Teapot: Rubber Stampede, teacup: unknown
Paper: PapertreyInk: White, blush blossom, spring moss, aqua mist
Ink: blush blossom, pitch black adirondack
Accessories: ribbon: Aqua mist swiss dots PapertreyInk, cuttlebug folders, dimensionals, nestability squares, corner rounder, buttons
Techniques: dry embossing