Showing posts with label Creative Artiste Mixed Media. Show all posts

Tuesday, March 17, 2020

Ballerina Bunny on Stage

Today I'm sharing a cute little Easter decoration (or very fancy 3D card!)  using Eileen Hull's new Display Stand Die.  This month many of her Inspiration Team are creating Spring things using either her Display Stand or her Gift Box dies
(see my Bunny Box here if you missed it last week?!)

So I've been in the Easter mode lately making cards and decorations for a sale at my church 
(which may now not happen with churches not holding services due to the Coronavirus - but that's another story!)

I just love the Display Stand Die and I had the Tim Holtz new Bunny Hop bunny dies on my work table, and I suddenly thought the stand could become a 'stage' for one of the bunnies -
and so THIS happened.
You can see the 3 layers of foam dots adhering the bunny to the back of the stand.
And the two layers of foam dots adhering the egg and sentiment.
A view from the back - which I left as plain matboard.
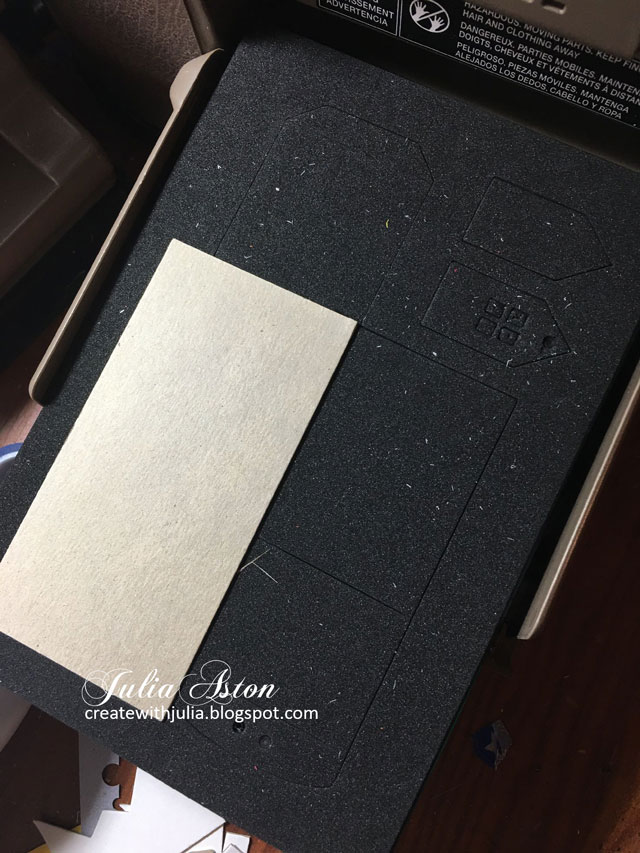
Here are a few photos showing how I put this together.
I die cut the Display Stand out of Little Sizzles White Matboard.  Then I die cut the two end sections out of polka dot DP and glued the pieces onto the die cut.
To make the tutu for the bunny, I cut two pieces of white netting from my stash.  Each piece measured 5 1/2" x 1 1/2".  I colored the white netting by spraying it with Seedless Preserves Distress Spray Stain.
I layered the two pieces together and hand sewed a running stitch along the top edge and pulled it in to gather it.
I wrapped the tutu around the bunny and tied the threads in a knot on the back.  I trimmed off a bit of the netting along the bottom to the length I wanted.
I stamped and die cut the large Nestability egg using a Nested Egg stamp from Waltzingmouse (retired).  I colored the ears and nose of the bunny with Copics and made her eyes with a 01 Micron black pen.  I sponged the edges of both pieces with Ranger Distress Antique Linen ink.
I die cut the net die from Impression Obsession and layered it to the Display Stand to give the suggestion of a basket.  I layered the egg and bunny onto the upright piece with thick foam dots.  I layered two of the foam dots for the egg and three for the bunny.
I added the pom pom ribbon along the top to look like the curtain on the stage and along the bottom to look like the footlights!  I stamped the sentiment on a die cut label and adhered it to the egg with two thick foam dots. I added enamel dots to the egg and an enamel heart to the sentiment.
Please check out Eileen's Blog every Wednesday where all of the weekly projects by various members of her Inspiration Team will be posted.  You'll find a lot of creative inspiration for using Eileen's Sizzix Dies!

I'm linking my project to:
Anything Goes

Anything Goes

Anything Goes


Stamps:  Nestie Eggs - Waltzingmouse (retired), Happy - Penny Black
Paper:  White Little Sizzles Matboard - Sizzix, White Card, Bitty Big Pale Peony DP - PTI, Tan Kraft Core - Core-dinations.
Ink:  Baby Pink, Hydrangea, Ocean Waves, Obsidian - Altenew, Ranger Distress Antique Linen.
Accessories:  Display Stand Die - Eileen Hull/Sizzix, Nested Egg Dies - Nestabilities, Bunny Hop dies - Tim Holtz/Sizzix, Fish Net Die - Impression Obsession, Jar Labels - PTI,  white netting from stash, Seedless Preserves Distress Spray Stain - Ranger, purple embroidery thread, embroidery needle, pom pom ribbon - American Crafts, enamel dots - Altenew, thick foam dots, 01 Micron Black pen, Copics R20, W2 Tombow Glue

Tuesday, December 10, 2019

Welcome to a Magical Winter Village!

Today I'm sharing my December Christmas Project made for Eileen Hull's blog.  All month her Inspiration Team will be sharing projects on Wednesdays using many of Eileen's wonderful Sizzix dies!
I made a Winter Village Holiday Decoration using her House Ornament Die.
I used a string of battery operated Starry Lights to illuminate both inside and outside of the houses.

I was inspired by a page in a catalogue that I recently received in the mail.
 Viva Terra.
Ceramic Holiday Village Tea lights
Here's how my little village looks in daylight where you can see more detail on the houses.  
I loved how the white looks like snow on the windows on the white house so I didn't scrape it out too much!


Here's how I made the houses.  
I just wanted the window wall part of the house on the die
so I cut 4 pieces of matboard 2 1/2" x 4" to fit just that area.
I cut off all the tabs on the pieces. (I did cut 4 but only showing 3 here!) 
My first thought was to just have the four sides of the house attached to each other with an open top, but then decided I wanted roofs on them, so after I embossed them I cut off the peaks on two of the sides.
I embossed them using a pancake griddle (purchased specifically for this purpose! - about $20 on Amazon or you can use one you have that you no longer use for food).  I heated the grill to 300 degrees, laid a craft mat on the griddle, then the mat board pieces.  I first melted some Glittering glass on the pieces (you could also use UTEE).  When that was all melted, I added Molten Dimensions Golden Rod.  
When it was all melted, I just slipped the craft mat off the griddle and I could touch the pieces after just a couple of minutes cooling.  
(I made a couple of extra gold sides for this first go at the embossing, in case I messed it up somehow!)
 The window areas filled with the melted EP and I just poked most of it out using a pick.  I didn't try to get them totally cleaned out, I liked the look of slight raggedness -  especially on the white house where it looked like snow on the windows!
I repeated the same process using Molten Polished Silver and Molten White Wonder to create the silver and white houses.
For the roofs, I cut 2 pieces of matboard 2 1/2" x 1 3/4" and embossed them in the same manner as the houses.
I trimmed off any run-offs of the melted EP on the pieces with scissors, it cuts like butter!
For the first house I used Tombow Glue on the edges to glue the houses together.  
Here you can also see how I cut off the peeks on two of the sides of the house so I could add a roof.  The two rectangles are the roof pieces.
Then I found that hot gluing them was faster and had a stronger hold. (DUH!) I also ran some hot glue on the inside edges as far as my glue gun would reach from both the tops and bottoms of the houses (before adding the roofs) for added strength.  
Then I hot glued the roofs on by running the glue along the edges at the top of the house and pressing the roof onto the glue, one side at a time.
 I wove some of the Starry lights inside the houses as well as between and around them.  I sprayed some white bottle brush trees with Ranger Distress Iced Spruce Stain Spray and placed them around the houses.  I decided to leave the Salvaged Snowman and Decorative Deer in their natural state (rather than coloring them up) to keep the winter scene soft and serene!
I am so happy with how my little winter village came out and I love walking into the room where I have it set up and seeing it's golden glow at night! And it's a decoration I can leave up all winter!

The Creative Inspiration Team hopes you will stop by Eileen's Blog every Wednesday in December for more holiday inspiration!

I'm linking my village to:
Creative Artiste Mixed Media Challenge
Anything Goes

The Funkie Junkie Boutique Blog Challenge
It's the Holidays


Accessories:
House Ornament Die - Eileen Hull/Sizzix, matboard, Molten Dimensions Embossing Powders Golden Rod, Glistening Glass, Polished Silver, White Wonder - Eileen Hull/Emerald Creek, Bottle Brush Trees - Joann, Iced Spruce Ranger Distress Spray Stain, hot glue gun, Salvaged Snowmen ad Decorative Deer - Idea-ology, electric pancake griddle, craft mat, battery operated  Starry Lights string - Christmas Tree Shop

Tuesday, November 12, 2019

Setting the Thanksgiving Table

Today I have 2 projects to share using some of  Eileen Hull's Sizzix Dies that will help you set a festive table for Thanksgiving!  These will also be posted over on Eileen's blog on Wed 11/13/19.

I've created a pocket to place the napkin and silverware in at each place setting using Eileen's Gift Card Folder Die and a little house treat box using her House Ornament Die, decorating it with leaves from her Journaling Cards Flowers and Leaves Die.
I folded a Thanksgiving paper napkin and slipped it inside the folder and then placed the utensils on top.
I stamped some Thanksgiving sentiments on the top of the folders.
Here are a couple of process photos. 
I die cut just the folder piece on the die out of water color paper.  I colored the inside top half by pressing it into Distress inks rubbed on my craft mat and spritzed with water, first with Fossilized Amber and then with Frayed Burlap, drying with my heat tool after each color.
I die cut the folder piece again out of a piece of DP from Abandoned Paper Stash and adhered it to the front of the die cut.  
Then I folded it on all the score lines and adhered the flaps where they overlapped.  Here's the front of one and the back of the other.
I stamped some Thanksgiving sentiments at the top and adhered die cut skeleton leaves on the bottom fronts.
 I made the treat boxes using Eileen's House Ornament Die.  Here are the four sides of the finished house.  I have a few process photos below as well.
I stamped 'for you' on the little house tag that is on the House Ornament die.
I put Hershey Kisses inside my treat box.
Because this is made from patterned paper, I cut a second piece just of the bottom flap and adhered it to the connected flap to give it a little more sturdiness.  I also adhered the bottom of the flap to a die cut coaster.  It made it a little easier to open the box - you put your finger on the coaster piece and lift the top of the house and the candies fall out!
I die cut the house piece twice - once without the bottom flap since you only need one flap.  (although in retrospect, if I had cut both with the flap, I could have used that second flap to reinforce the other one!) 
The thankful die was wider than one piece, so I connected the two pieces at the tab (see the ScorTape?) and then die cut the word.
Here it is laid out on my cutting pad.  Be sure the die is not laying over the tab on the left.
I adhered a piece of vellum on the inside - covering the windows and the cut out word.
There were a couple of little pieces from the die cut word I had to adhere to the vellum so you could see what the letter was.
A piece between the t and h, two pieces on the a, and a piece between the k and f.  Luckily I didn't lose any of those little bits!
  (If I had lost them I would have cut the word again from the same paper)
Then I die cut leaves using the Journaling Cards die out of the same patterned paper.  I adhered them to the sides of the house with foam dots after curving their edges a bit for more dimension.
I also colored the corners of the windows and some edges of the letters with a yellow Copic.
Some creative and festive additions to each guests place at the Thanksgiving table!

I hope you will visit Eileen's blog every Wednesday when members of her Creative Team will be posting inspiring projects using many of her fabulous Sizzix dies!

I'm linking my projects to:
Just Us Girls

Creative Artiste Mixed Media
Anything Goes

Die Cut Divas
Thanksgiving


Place Setting Pocket
Stamps:  First Fruits - PTI, Thanksgiving Wishes - Lil Inker Designs
Paper:  Water color paper - Canson, DP Abandoned Paper Stash - Tim Holtz/Idea-ology.
Ink:  Ranger Distress Fossilized Amber, Frayerd Burlap, Cocoa Bean - PTI.
Accessories:  Gift Card Folder Die - Eileen Hull/Sizzix, Skeleton Leaves - Sizzix, ScorTape, Tombow Glue.

House Ornament Treat Box
Stamps:  Happy Scripts - Penny Black
Paper:  Abandoned Paper Stash - Tim Holtz/Idea-ology, Vellum - PTI
Ink:  Hero Arts Black
Accessories:  House Ornament Die, Journaling Cards Flowers and Leaves - Eileen Hull/Sizzix, Cozy Cup Coaster Die - The Greetery, Thankful Die - Counting My Blessings set - PTI, ScorTape, Foam dots, twine, Yellow Copic.