This month, the Group of Seven Cardmakers are playing with the technique - Floating Frames.
There are several tutorials for this on YouTube - two of them are linked to over at GO7. I looked at both of them and because I just happened to have Press N Seal Glad Wrap in my cabinet - I went with this tutorial. Floating Die Cut Frame by Jennifer McQuire.
Side view to see the depth of the 'floating' frame.
I used Antique Roses stamps and dies from Altenew. I chose 3 shades of green ink for the leaves and 3 shades of blue and black for the two blooms. I used my Misti and stamped all the layers of leaves and blooms on a white panel - four times so I had 4 panels of each bloom and leaves to use on my card.
I die cut all the pieces and laid them over a 4 1/4" x 5 1/2" white panel.
I laid a piece of Press'n Seal over the panel and pressed over all the pieces with my fingers - it is slightly tacky on one side (be sure to have the tacky side down!) so holds all the pieces in their places on the white panel.
I cut around the edges of the white panel so nothing went over the edge..
I removed the white panel and the pieces remain stuck to the Pres'n Seal
Then I die cut a rectangle out of the center of the panel - So I had two pieces to work with - still stuck to the Press'n Seal.
I added pieces of thick foam tape all over the back of the pieces. Thick foam makes the frame 'float' higher off the card base.
I removed the backs of the foam tape, flipped over the panel and carefully pressed it onto the white panel, removed the Press'n Seal and there's my floating frame! I adhered the inside of the frame cut- out onto a white card front for my 2nd card and removed the Press'n Seal! I added 3 clear Fairy Drops to each card.
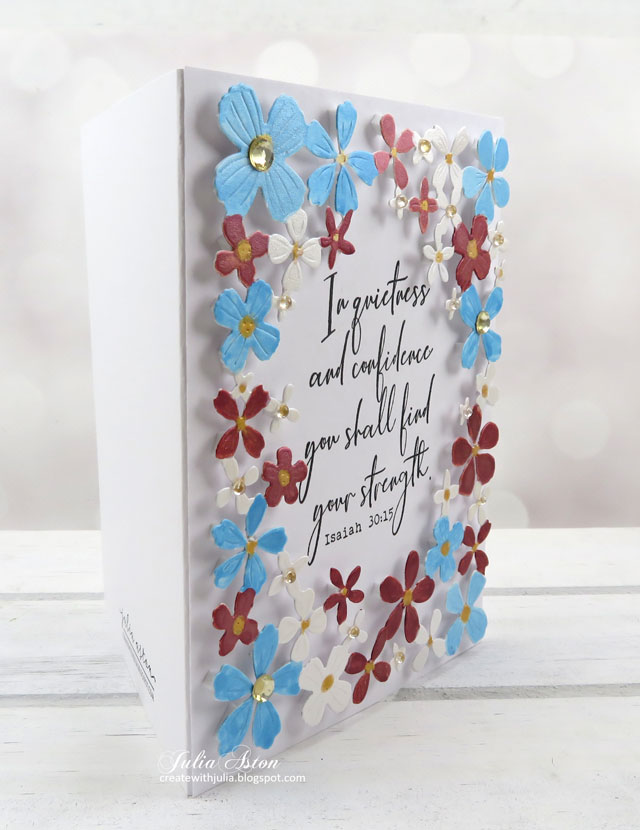
A couple of days after I made the above cards - I was looking through my box of cover dies and came upon this Flower Field Frame die from Poppy Stamps - I've had this for at least a year and it's the first time I've used it!
A faux floating frame so to speak! It's all one piece - just has to be colored and adhered to a card base with lots of little bits of foam strips! I used Metallic Water Color Paints to color the blooms and added gems to the center of some of the flowers.
Notes:
1. Depending on what stamps you choose (my first card blooms had 4 stamps for each bloom to create the 3D look) it can take a couple of hours just to stamp everything and then die cut the pieces for these two cards. But it does create a beautiful look for a special card for someone. I would suggest you do all the stamping one day - die cutting the next day and placement the third day and to stamp/cut enough for several cards!
2. You could hand color your stampings or stencil the colors over your stampings depending on what kind of sets you have in your craft room. That would save a lot of time.
3. Maybe you'll find a cover die similar to the one I used for my last card that works as well! Check out all the corners of your craft room!
We'd love to see what you do with this technique and to let us know what was easy/difficult for you. You'll find some beautiful inspiration from the rest of the Group of Seven as well as Mr. Linky to show us what you do over at
Group of Seven Blog!
I'm sending my one piece floating frame card to:
first time using the Flower Field Frame die
something tiny/small My flowers are small on this floating frame.
ends 3/4
Sending my You're Amazing card to:
clear Fairy drops ends 3/4
Antique Roses CardStamps: Antique Roses - Altenew, Isaiah 30:15 - Impression Obsession
Paper: White, True Black - Papertrey Ink.
Ink: Light Spruce, Medium Spruce, Dark Spruce - Gina K Designs, Persian Blue, UIltramarine, Sapphire - Altenew, Nocturne - Versafine Clair.
Other Supplies: Antique Roses Dies - Altenew, Rectangle Die - Nestabilities, Press'n Seal - supermarket, foam tape, Fairy Drops - Memory Box.
Flower Field Card
Stamps: Antique Roses - Altenew, Isaiah 30:15 - Impression Obsession
Paper: White - Papertrey Ink
Ink: Nocturne - Versafine Clair
Other Supplies: Flower Field Frame Die - Poppy Stamps, Metallic Water Colors Paints - Yasutamo, paint brush, water, foam strips, gems - Park Lane, Clear Fairy Drops - Open Studio


.png)




.png)